|
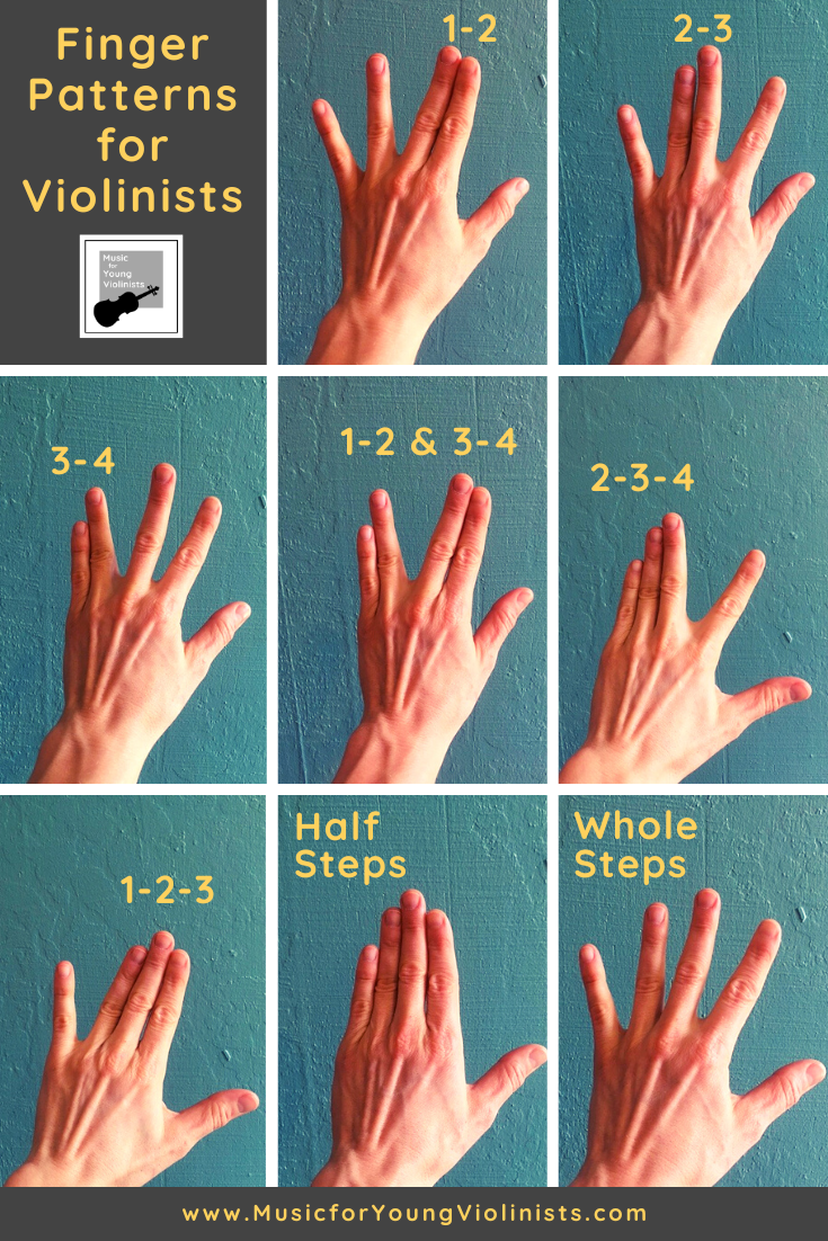
Playing music is one of the ultimate experiences because we merge all 3 parts of our being. We use our mind to control our body to express our soul. What is a technical? A "technical" is termed as such because it works on technique, extracting just the mind-body connection involved in playing music. They are fun to do in themselves, and anyone serious about pedagogy knows how important it is to break things down into their smallest component, using technicals for step-by-step mastery. I like to use the metaphor that technicals give us more colors in our palette to paint with, leading to more personalized expressions when we then apply them to our music-making. #1- FINGER PATTERNS: 1 & 2 2 & 3 3 & 4 1 & 2 + 3 & 4 1-2-3 2-3-4 How to teach?
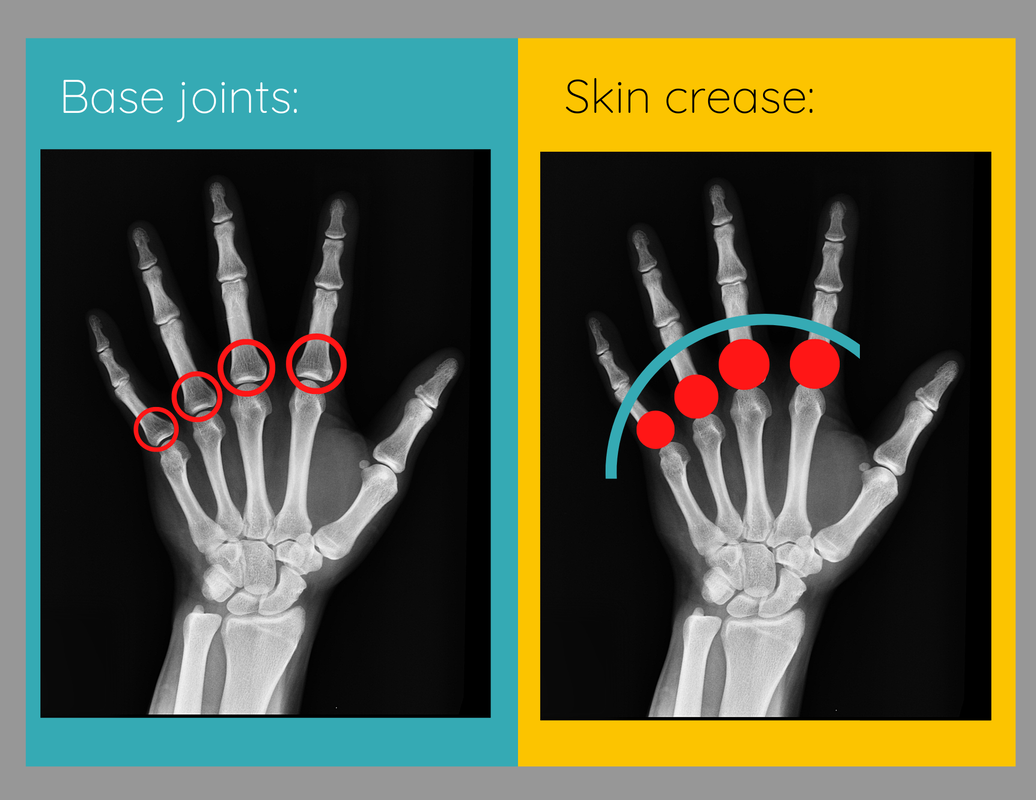
Why teach? Finger patterns help make music theory applicable to violin playing and aid in learning repertoire faster. #2- BASE JOINTS: The anatomical term for these finger bones is proximal phalanges, but we will refrain from Latin terms and call them the base joints. The base word is familiar in the word "basement," and etymologically, this refers to the foundation, which is appropriate since utilizing this portion of our body provides a solid foundation for playing the violin and, when mastered, creates highly articulate playing and fingers capable of fast playing. We will use this concept in the next technical presented here in this series, and it can also be taught independently. How to teach?
Why teach? The eye sees the hand covered in skin, does not identify the proximal phalanges bones, and then tends only to use what it sees, not taking advantage of the power the base joints offer. Using base joints to deliver the fingers on the instrument leads to clean, articulate playing. #3- HOOK BACK FINGER: How often does a violinist contort the entire hand to get the 1st finger into what we often refer to as a "low" position? (or flat), because we have not isolated the finger from procuring this motion How to teach?
Why teach? Students will be able to find notes requiring this, but in my decades of teaching experience, I find that they are not likely to use a hook back and will contort their hands. While improper hand shape is usable with beginning-intermediate level repertoire, ultimately, it will prevent from playing more advanced and fast-paced repertoire. #4- VIBRATO: Two key concepts can be implemented to start learning vibrato ergonomically and easily. By removing the asymmetry and gravity-defying elements of violin playing and replacing these with "cello position." Once we take out these 2 elements, vibrato is clear to understand and easy to learn. How to teach?
Why teach? Not only will this approach streamline learning vibrato, but it helps both the player and teacher hone in on the elements of violin playing (asymmetry and going against gravity) that tend to make learning many new techniques difficult, providing a learning template for moving forward. #5- SHIFTING: Shifting is simple: the arm abducts and adducts. This is all that shifting is: Moving the arm up closer to the body by adducting it and moving the arm farther from the body by abducting it. How to teach?
Why teach? Anyone who has ever worked on an advanced repertoire may feel this because shifting can feel difficult, but it is a very simple motion. Identifying this, feeling the arm (so the hand shape does not overcompensate). Correlating Downloads for 5 Technicals for Left Hand:
2 Comments
Jenna
10/2/2022 04:57:49 am
I love your clear explanations. Thanks!
Reply
Heather
10/2/2022 07:08:37 am
Thanks Jenna for the feedback. Best wishes, HF
Reply
Leave a Reply. |
Categories
All
Archives
February 2024
AuthorHi! It's me, Heather. I absolutely love working on the Music for Young Violinists project and all the many facets: blogging, website, music, teaching materials, freebies, videos, newsletter and giveaway contests. The best part is connecting with you so feel free to drop me a line. You can learn more about me on the "ABOUT" page. Thanks! |
||||||||||||


 RSS Feed
