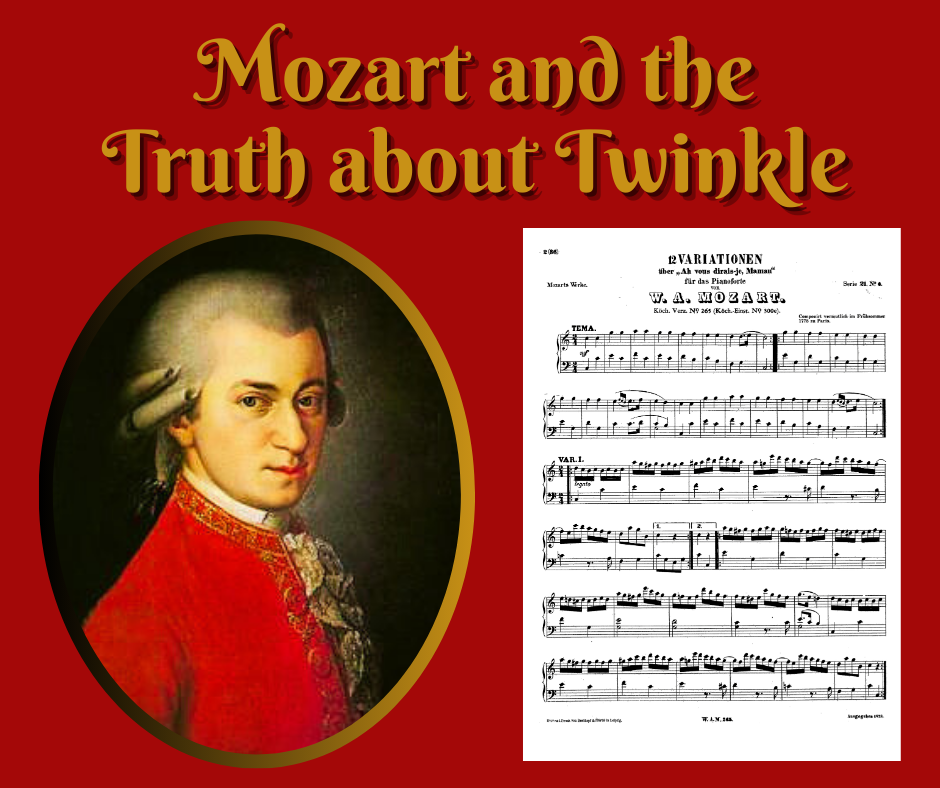
Who wrote Twinkle?For decades, I thought this clever tune was composed by W. A. Mozart until a colleague enlightened me. Enjoy this delightful re-post by guest author Murray Charters from 2015. By Murray Charters (B. Mus., M.A.) Cellist and Teacher, Kitchener, Ontario Wolfgang Amadeus Mozart (1756-91) holds great appeal to teachers and students of the Suzuki method. There are pictures of the young boy playing the harpsichord with his older sister, Nannerl, and we know much about the strong guiding hand of his father, Leopold, in his music education. They were already a Suzuki family! Wouldn’t it be nice to connect clever young Mozart with the most famous tune in Suzuki literature? Wolfgang Amadeus Mozart (1756-91) holds great appeal to teachers and students of the Suzuki method. There are pictures of the young boy playing the harpsichord with his older sister, Nannerl, and we know much about the strong guiding hand of his father, Leopold, in his music education. They were already a Suzuki family! Wouldn’t it be nice to connect clever young Mozart with the most famous tune in Suzuki literature? Nannerl recorded that her brother started composing simple keyboard pieces around age 5, and his first symphony at age 8. By that time he had already travelled to many of the important cities of Europe and actually wrote that first symphony to pass the time while his father recovered from a cold when they were in England. On the way to England they had stopped in Paris where a collection of folk songs had been published just a few years earlier, in 1761. That collection included a very attractive little song, without lyrics, said to have been created in the then popular pastoral style some 20 years earlier by author or authors unknown. This tune proved so appealing that it was published again in Paris in 1774, this time with lyrics of a rather sophisticated nature added. "Ah! vous dirai-je, Maman" is the first line of an anonymous love poem of the time. Of course it’s about love; it’s French isn’t it? “Oh! Shall I tell you, Mother / What is tormenting me?” the poem begins, and goes on to exclaim: “Can anyone live without love?” These lyrics speak of teenage angst rather than nursery rhyme cuteness, but that was soon to change. In 1806 a young English poet, Jane Taylor, published a six-stanza poem called The Star in a book of Rhymes for the Nursery. Whether intended or not, Taylor’s poem fit very nicely onto this French folk song. In fact, others must have thought so too and her words were eventually printed together with that music in an 1838 song book. And thus it was that what we now know as “Twinkle, twinkle, little star” finally made its first appearance on the world’s stage in that form in the second year of the reign of Queen Victoria. So how did we come to associate this well-known English nursery rhyme and French folk song with Mozart, especially in Suzuki circles? Because both he and Dr. Suzuki knew a good melody when they heard it. Mozart wrote a splendid set of keyboard variations on this tune around 1781 or 82. But he called it “Ah! Vous dirai-je, maman” which shows he knew the melody only after its French publication of 1774. He certainly wasn’t the only composer attracted to all the possibilities for variation offered by this simple but elegant tune. Johann Christoph Friedrich Bach, 9th son of J.S., did the same thing around the same time, and there have been other sets written since, but none by composers with names of the musical appeal of Mozart. (I particularly recommend the Variations on a Nursery Tune for piano and orchestra by Ernst von Dohnanyi, perhaps because of its subtitle: For the enjoyment of humorous people and for the annoyance of others.) I’m sure these musicians saw the same things in this melody that we all point out to our eager music students. Its immediately innocent nature using just six notes of the scale, a very simple rhythm pattern, and much repetition belies a more sophisticated emotional tone set by the refusal of the middle section to return to the tonic. Of course this charming melody is also absolutely ideal for creating good posture for little left hands on bowed stringed instruments, and we should all praise Dr. Suzuki for using it so cleverly at the beginning of his method. Just don’t say it was written by Mozart. A very special thanks to Murray's Music for contributing this article to the Music for Young Violinists Project!
3 Comments
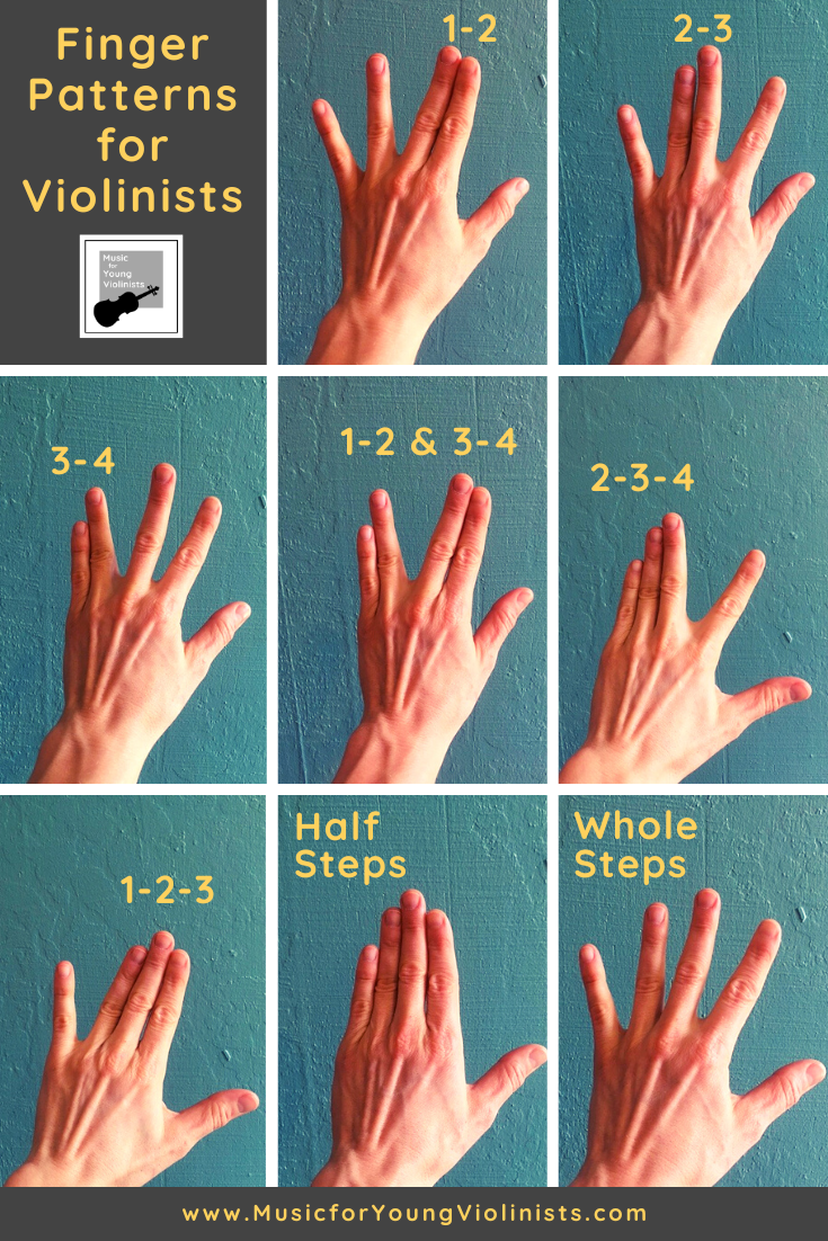
Playing music is one of the ultimate experiences because we merge all 3 parts of our being. We use our mind to control our body to express our soul. What is a technical? A "technical" is termed as such because it works on technique, extracting just the mind-body connection involved in playing music. They are fun to do in themselves, and anyone serious about pedagogy knows how important it is to break things down into their smallest component, using technicals for step-by-step mastery. I like to use the metaphor that technicals give us more colors in our palette to paint with, leading to more personalized expressions when we then apply them to our music-making. #1- FINGER PATTERNS: 1 & 2 2 & 3 3 & 4 1 & 2 + 3 & 4 1-2-3 2-3-4 How to teach?
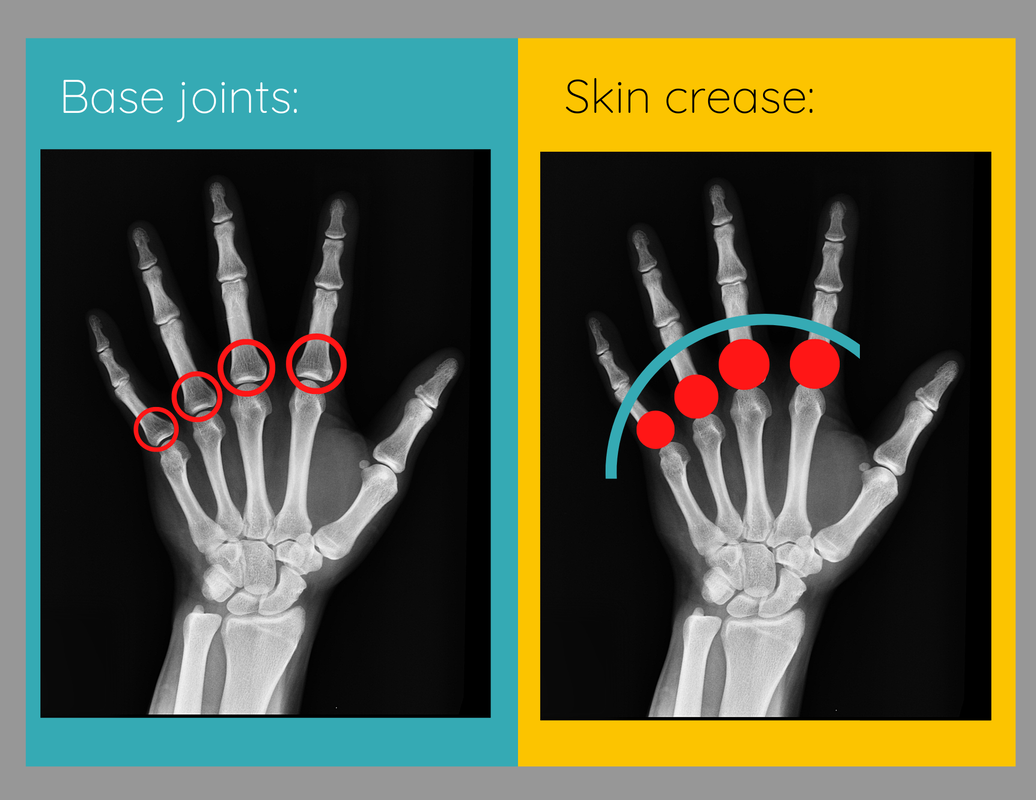
Why teach? Finger patterns help make music theory applicable to violin playing and aid in learning repertoire faster. #2- BASE JOINTS: The anatomical term for these finger bones is proximal phalanges, but we will refrain from Latin terms and call them the base joints. The base word is familiar in the word "basement," and etymologically, this refers to the foundation, which is appropriate since utilizing this portion of our body provides a solid foundation for playing the violin and, when mastered, creates highly articulate playing and fingers capable of fast playing. We will use this concept in the next technical presented here in this series, and it can also be taught independently. How to teach?
Why teach? The eye sees the hand covered in skin, does not identify the proximal phalanges bones, and then tends only to use what it sees, not taking advantage of the power the base joints offer. Using base joints to deliver the fingers on the instrument leads to clean, articulate playing. #3- HOOK BACK FINGER: How often does a violinist contort the entire hand to get the 1st finger into what we often refer to as a "low" position? (or flat), because we have not isolated the finger from procuring this motion How to teach?
Why teach? Students will be able to find notes requiring this, but in my decades of teaching experience, I find that they are not likely to use a hook back and will contort their hands. While improper hand shape is usable with beginning-intermediate level repertoire, ultimately, it will prevent from playing more advanced and fast-paced repertoire. #4- VIBRATO: Two key concepts can be implemented to start learning vibrato ergonomically and easily. By removing the asymmetry and gravity-defying elements of violin playing and replacing these with "cello position." Once we take out these 2 elements, vibrato is clear to understand and easy to learn. How to teach?
Why teach? Not only will this approach streamline learning vibrato, but it helps both the player and teacher hone in on the elements of violin playing (asymmetry and going against gravity) that tend to make learning many new techniques difficult, providing a learning template for moving forward. #5- SHIFTING: Shifting is simple: the arm abducts and adducts. This is all that shifting is: Moving the arm up closer to the body by adducting it and moving the arm farther from the body by abducting it. How to teach?
Why teach? Anyone who has ever worked on an advanced repertoire may feel this because shifting can feel difficult, but it is a very simple motion. Identifying this, feeling the arm (so the hand shape does not overcompensate). Correlating Downloads for 5 Technicals for Left Hand:
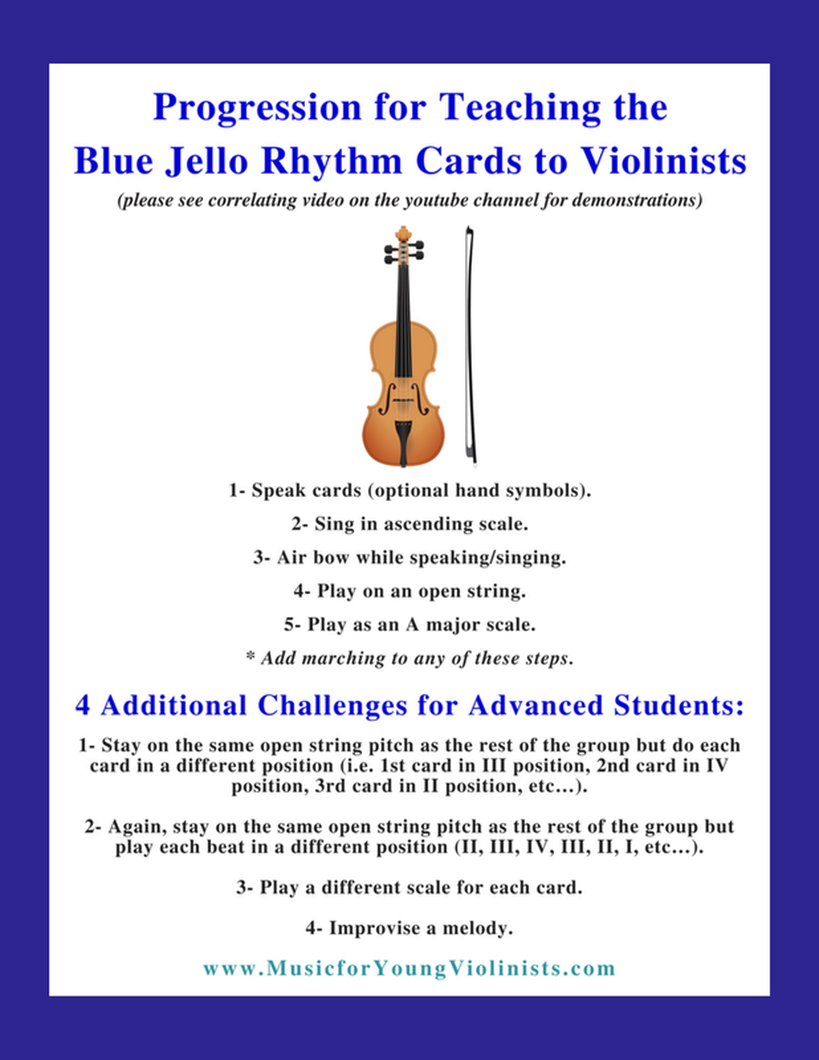
Learn a 5 part progression for teaching rhythms to violin students using the Blue Jello Cards from the Music Mind Games materials + 4 additional ways to integrate advanced students in multi-level classes.  Music Mind Games is a music theory curriculum created by Suzuki Piano teacher Michiko Yurko, and it involves a series of colorful materials and progressive games for teaching music theory to children. The entire curriculum is one of the best I have ever seen for effectively teaching complex concepts in natural, developmentally appropriate ways for children. As I progressed in my violin teaching career, the reality of limited time pushed me to narrow my music theory offerings, and the one thing I kept teaching consistently from the extensive Music Mind Games curriculum was the Blue Jello Cards used for teaching rhythm note reading. I developed a 5 part approach for using these for violinists and four challenges to engage and integrate my more advanced students in multi-level teaching situations. On a fun, personal note, I credit the effectiveness of the Music Mind Games curriculum for spawning my career as a composer. After many years of teaching the basics using the Blue Jello Cards, my rhythmic dictation got so strong that I would transcribe different languages into rhythms in my head when I traveled to different countries and use these to compose music. In this video, learn a progression using the Blue Jello Cards from the Music Mind Games curriculum specific for benefitting violinists. The progression shared in the video is: 1- Speak cards (optional hand symbols). 2- Sing in ascending scale. 3- Air bow while speaking/singing. 4- Play on an open string. 5- Play as an A major scale. * Add marching to any of these steps. Have multi-level classes? Learn four additional ways to integrate advanced level students in a challenging and engaging way: 1- Stay on the same open string pitch as the rest of the group but do each card in a different position (i.e., 1st card in III positions, 2nd card in IV position, 3rd card in II position, etc.…) 2- Again, stay on the same open string pitch as the rest of the group but play each beat in a different position (II, III, IV, III, II, I, etc.…) 3- Play a different scale for each card. 4- Improvise a melody. Learn more at www.MusicMindGames.com. More Ideas from M4YV for Teaching Music Theory: Pipe Cleaners & Music Theory/ Blue Jello Cards - Learn a cheap, hands-on, colorful, and easy clean-up activity to support teaching music theory and the Blue Jello Cards to young musicians. The Magic Bag - a Metaphor for the Learning Process - Learn a "magical" way to create a learner's identity in young students using the Blue Jello Cards. How do you teach rhythm and/or music theory in your studio? Let us know in the comments below.
Through Limitation Comes Innovation At the end of February 2020, I hired someone to help me with my website and they suggested using Zoom as a way to discuss plans. I had never even heard of this thing called Zoom. Fast-forward to June 2020 and I now use Zoom 7x a week to take classes, teach violin and capoeira, and attend meetings. Scroll down to learn the top 5 benefits & 3 downsides of Zoom violin lessons. Like all of you, I have experienced many changes in the trajectory of my teaching due to the COVID-19 pandemic. I always prefer meeting face-to-face with my students, but, acknowledge that there have been many benefits that have come from this period and using Zoom (or other online video communications) to keep music lessons active. 1- Gaining fluency and skills with new options for teaching and learning. My first Zoom violin lesson was a bit of a disaster. I was late for my student due to not understanding how to properly share and access the link, I did not know how to use the features so there was no audio for the first 5 minutes and the camera angles and lighting were, well... let us just say that this too had room for improvement. It was distracting and clunky for both me and my student. I know now how to set-up a recurring session, place the camera, adjust the lights, and easily adjust the audio and camera in a matter of seconds. I learned a new skill and this will open future options for connecting and has expanded my concept for how I can teach. The options are endless and I now know that if a student or myself ever has a situation where we can not meet in person we can continue our work and fulfill our vision. 2- Insight into a student's environment. Does your student hold their violin too far down? Did you see on the Zoom lesson that their music stand is not properly elevated to facilitate proper posture? Does your student suffer from distractions? Can you recommend a more ideal place in their home for learning based on what you observe in their environment? Did you discover that they have a piano you never knew about and now you can integrate this into their curriculum? The piano keyboard is the best way to solidify music theory concepts, how exciting! We must remember that we only see our students for 30-60 minutes every week and the rest of their learning takes place in their home. Gaining insight into the student's home learning environment can solve mysteries (such as the posture circumstance listed above) and help you make suggestions to better a student's core learning environment. 3- Creativity: Through limitation comes innovation. I work with an older brother and younger sister. The older brother was starting to refine his vibrato and the younger sister was just beginning to learn vibrato. To be honest, this has been very difficult for me to concentrate on through a screen and make any real progress in a positive direction. However, what the screen is fantastic for are all of the visual components of violin playing:
I have always said that the reason it is so easy for me to teach the violin is that I get to see everything so clearly. Video lessons helped to spotlight this factor and I made use of this in my curriculum. This also correlates with the 4th benefit of Zoom lessons listed next. 4- Instant Videos: Zoom has built-in video features. My students video record their Zoom lessons and then review the video to understand their assignments and in the process, observe their performance. Viewing oneself play the violin is one of the best ways to improve. Students should be doing this regularly but as teachers, we get busy and do not always uphold this expectation. Also, this convenience relieves the student (or parent of the student) from taking notes during the lesson. 5- Prioritizing health in our modern society. Foremost, the use of Zoom lessons helps us prevent spreading the COVID-19 virus. There remains much to learn about this virus and it appears one can transmit without having symptoms. If this is accurate, then we have a responsibility as instructors to continue being prudent in our actions so we do not pass this along to our students, many of whom are children and may not have developed a robust immune system yet. Secondly, without spending so much time driving and in activities, most of us (teachers and students) are receiving a well-needed rest. Our bodies need this extra time to repair and stay healthy. I hope that we are all cognizant that health is one of our highest values and this experience will forge in us a commitment to take better care of ourselves in the years to come. Connecting with this value is a blessing that will serve us thruout the rest of our lives and something to be grateful for. While it can be healthy to seek the positive in any situation, the 5 benefits of Zoom violin listed above do not paint the full picture of Zoom lessons. Below are listed some of the downsides of using this way of teaching. 1- Compromised Tone - Shinichi Suzuki said, "tone is the living soul." The limitations of the microphones and speakers in the computers we use to do Zoom lessons remove this life-infused quality of beautiful violin tone and frankly put, it's painful to listen to at times. On a basic computer, everything above a certain range or volume entirely cuts out and all violin sounds are compressed. Having a microphone or specialized headphones can help but nothing will ever compare to the beauty of live violin tone. 2- Environmental Diversions - It's distracting being in my dining room teaching because our homes have so many triggers, the learning environment does not lend itself to dedicated focus like a teaching studio does. 3- Increased Screen Time - We already are on our screens too much and now Zoom lessons add to this burden. According to the Mayo Clinic, the average time we spend on screens is 7-10 hours a day. This is in sharp contrast to the recommendations of acceptable screen time:
We love the violin because it's slow and it connects us to a time period where things were slow. The instant gratification offered by my screens dulls our dopamine receptors and may affect the way mitochondria operate within cells. Educate yourself further about the negative impacts of too much screen time here. What have you learned from using video communications for the violin?
Please share in the comments below. Thank you! Over the recent Winter Break, I spent 2 weeks traveling to spend time with loved ones and it was glorious. The highlight of these special moments was meeting and holding my 3-month-old nephew, baby Liam. I do not officially resume school until Monday but have already started waking up early and working 12 + hour days getting ready for the intensity of nursing school and working ahead on all things Music for Young Violinists so I can devote myself to my studies. I was initially going to send some neat FREEBIES out this season but my own current experience of feeling how limited time is caused a change of course in sharing. When I am studying new content for my nursing program I find the most challenging part is discerning how to best use my time - Should I:
The list above is abbreviated and illustrates the challenge of starting at the beginning of acquiring a new skill and knowledge base. In contrast, however, having spent decades in the world of teaching and learning the violin I had a very clear idea of how to make the most use of my time and was able to concisely pass this along to my students. This information is what I will be sharing in the 6 part practicing series. I have mused that perhaps the only thing that is fair in this world is that we all get 24 hours a day. Learn how to make the most of your precious time with the Music for Young Violinists 6 part practice series. 15 Ways to Optimize Violin Practice (video and free chart) The Practice Experiment (More Coming Soon) Remember, practice does not make perfect. Practice makes permanent. Your time is precious, let me show you how to make the best use of it with this series on practicing.
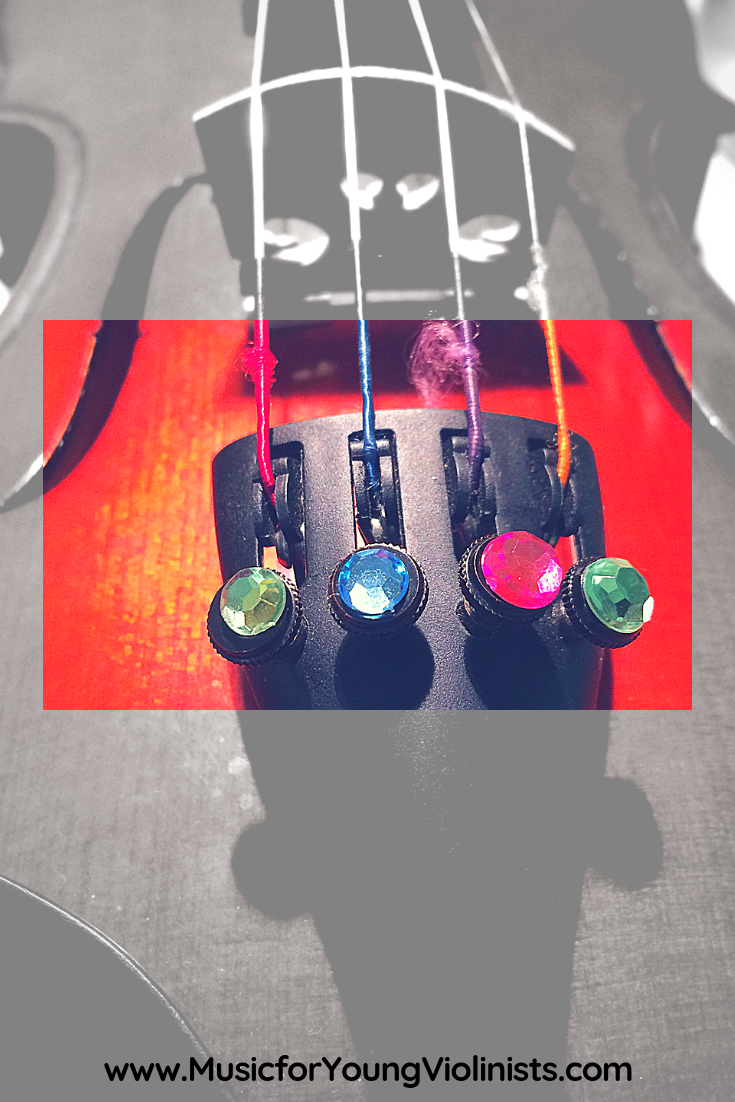
Use stick-on jewels on the fine tuners to help make violin playing fun and personalized for young students. This idea for making violin fun comes from one of my 5-year-old students who brought in some stick-on jewels one lesson. While I have a strict rule for no stickers on the face of the violin, I thought to add these to the fine tuners would not damage the instrument and they helped a young musician make her music-making a little more personalized and festive. You can purchase these on Amazon by searching for stick-on jewels and also at many stores in the scrapbooking and craft sections. For more ideas on how to make violin fun for young musicians, please visit the Violin Hacks & Bow Hold Helpers page and download some free PDF's on the FREEBIES page.
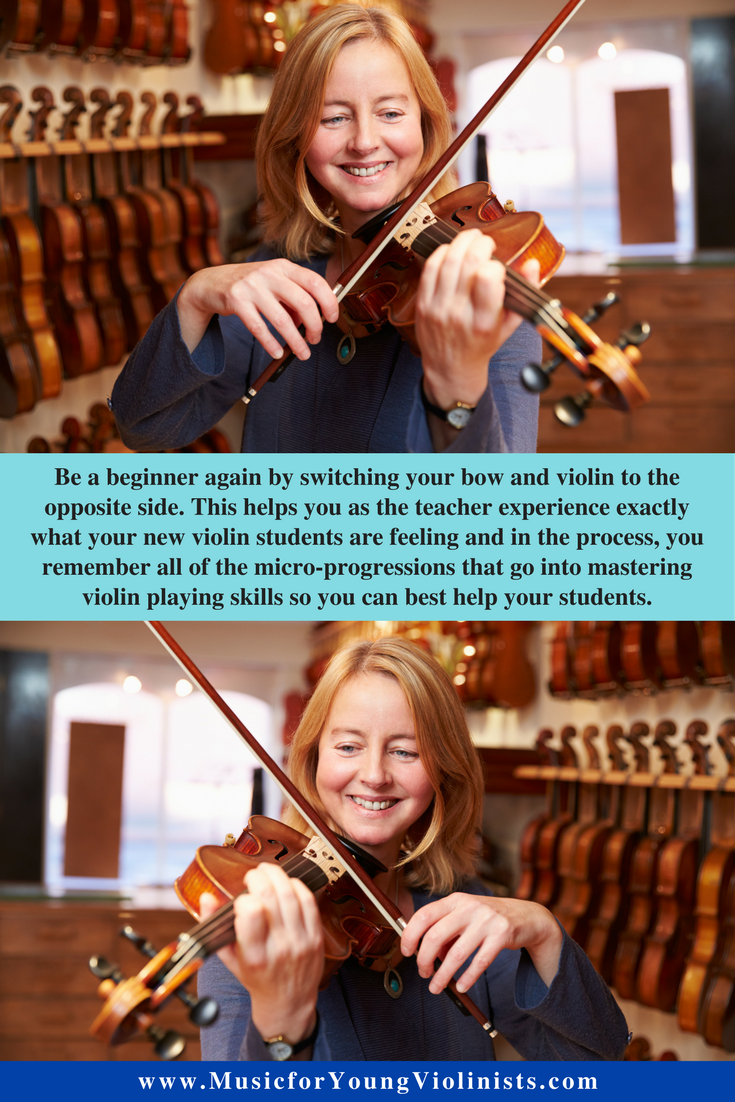
Flip your instrument to the other side (violin on the right and bow on the left) to be a beginner again and truly understand what your students are experiencing. This is the best way I know of to assist in breaking skills down into micro progressions so that you can fully convey a concept to a student. This simple act of changing sides was a revolution to helping me improve how I taught vibrato to young children.
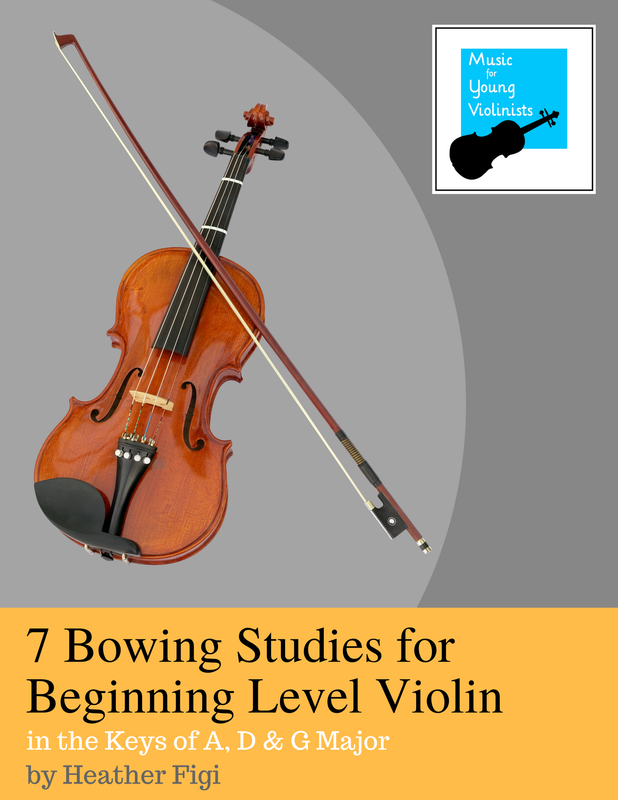
(in the Keys of A, D & G Major)
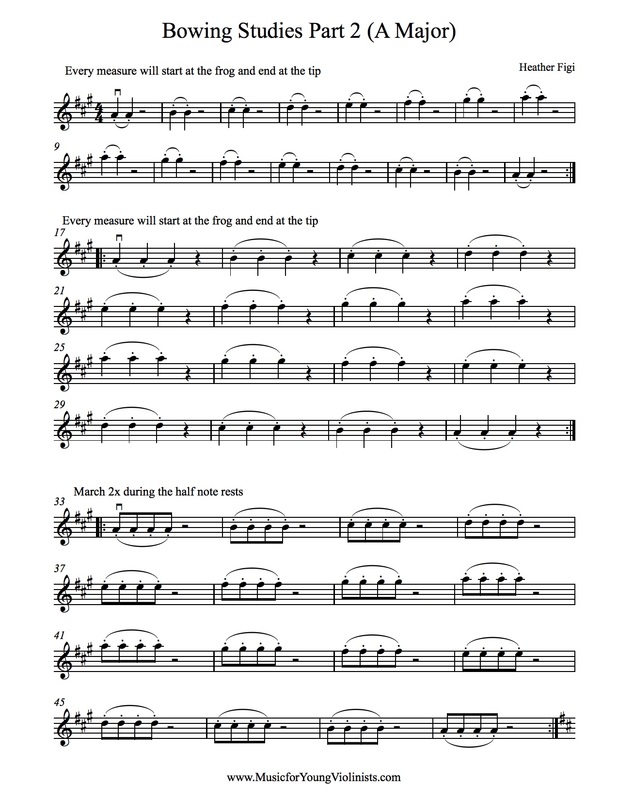
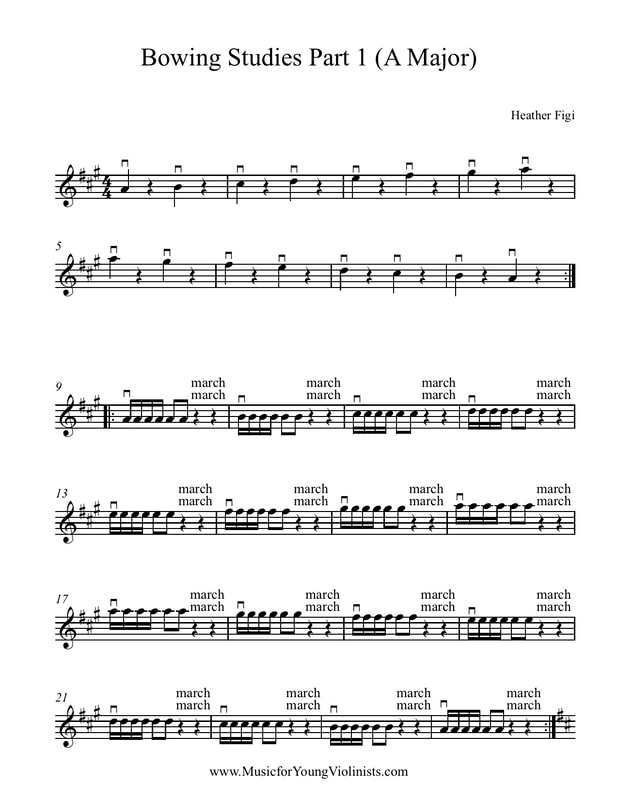
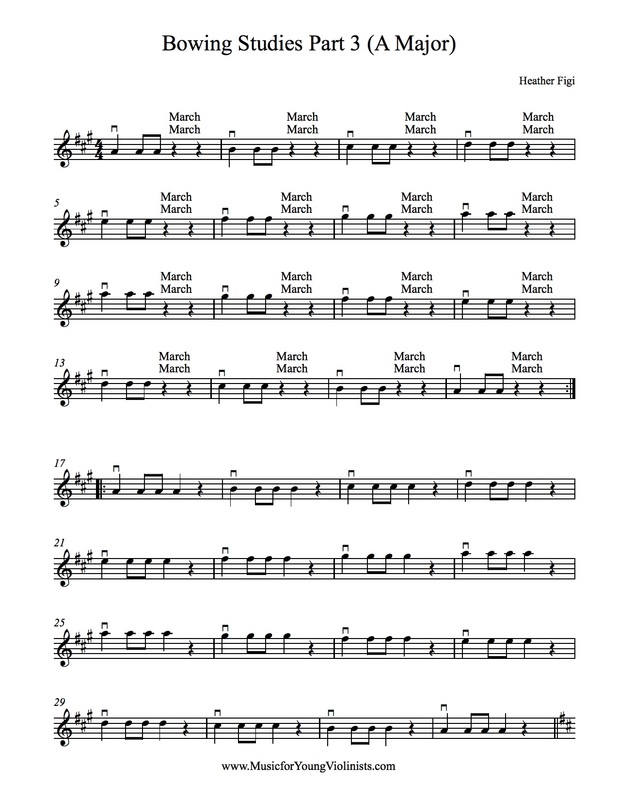
I have a young student who plays with a passionate and focused tone and is very devoted in her practicing. She is progressing beautifully but after many years of lessons she still struggles to execute down and up bows correctly. Doing review pieces to fix this issue is counter-productive since she has ingrained incorrect bowing patterns into her old repertoire. Doing the same scale 20x/day would help but does not create a compelling assignment and she would likely zone out and resume playing incorrect bowings.
In an attempt to help her master down and up bows, I created the 7 Bowing Studies for Beginning Level Violin in the Keys of A,D & G Major. Since the focus of these studies is bowing they are kept to one octave and done 3 times in keys with parallel finger patterns (A, D & G Major) for ample repetition of the bow strokes and to keep the left hand as simple as possible. These exercises can be used in two ways: 1- Individually to help with a specific technique needed in repertoire. 2- As a series for students who need more support organizing their down and up bows. Features of this resource include:
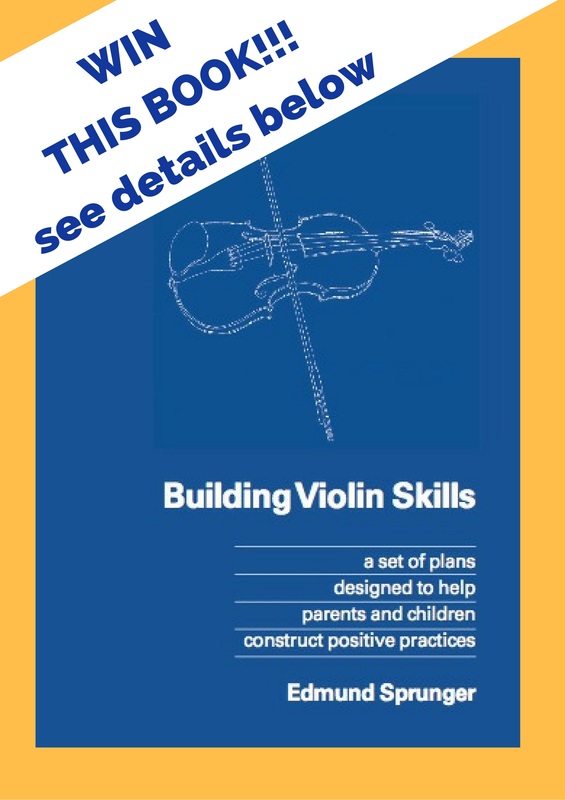
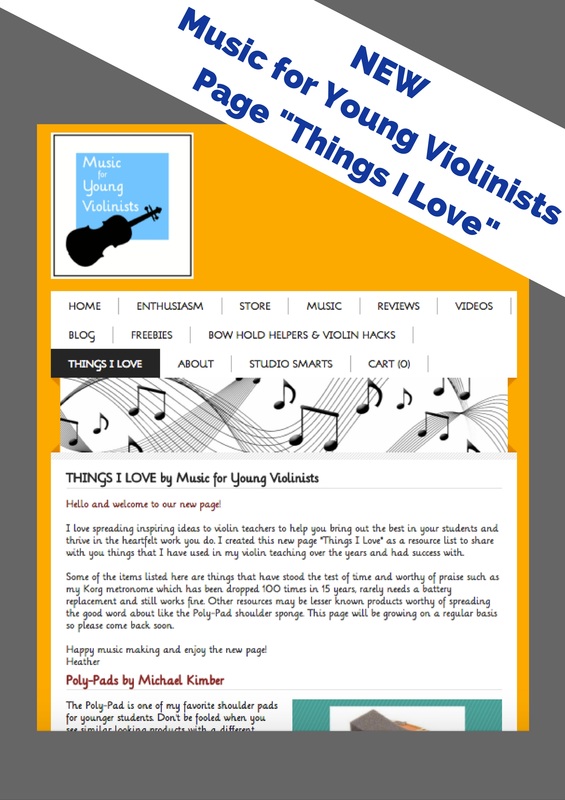
I love spreading inspiring ideas to violin teachers that help you bring out the best in your students and thrive in the heartfelt work you do. I created a new page here on the Music for Young Violinists project called "Things I Love" as a resource list to share with you things that I have used in my violin teaching over the years and had success with. Some of the items listed here are things that have stood the test of time and worthy of praise such as my Korg metronome which has been dropped 100 times in 15 years, rarely needs a battery replacement and still works fine. Other resources may be lesser known products worthy of spreading the good word about like the Poly-Pad shoulder sponge. This page will be growing on a regular basis so please check back soon. Featured on “Things I Love” is Helping Parents Practice (Ideas for Making it Easier) Volume 1 by Edmund Sprunger. This is HANDS DOWN my favorite resource to use in supporting parents practicing with their children. I appreciate this book so much that I have practically underlined every sentence in my copy because it is so clarifying and poignant. Sprunger combines decades of experience teaching Suzuki violin with his formal training in psychology to offer wise and compassionate perspectives that will elevate a parents understanding of why their child is responding or behaving in a certain way. He also offers solutions that are effective and healthy for addressing these specific situations. The book is divided into sections by practice topic and then further broken down into 2-5 page solutions for specific scenarios that a parent would encounter while helping their child practice. This concise organization was done with the busy teacher/parent in mind and makes it an especially convenient tool because you can look up your immediate situation without having to read an entire book. Thank you Ed and please let us know when Volume 2 is available. Learn more about Ed Sprunger and his resources HERE. To celebrate this new page we are giving away Ed Sprunger’s new book: Building Violin Skills: A Set of Plans Designed to Help Parents and Children Construct Positive Practices. To enter, just list one “Thing You Love” for your teaching and music making in the comments below. Winner will be chosen at random at the end of the month.
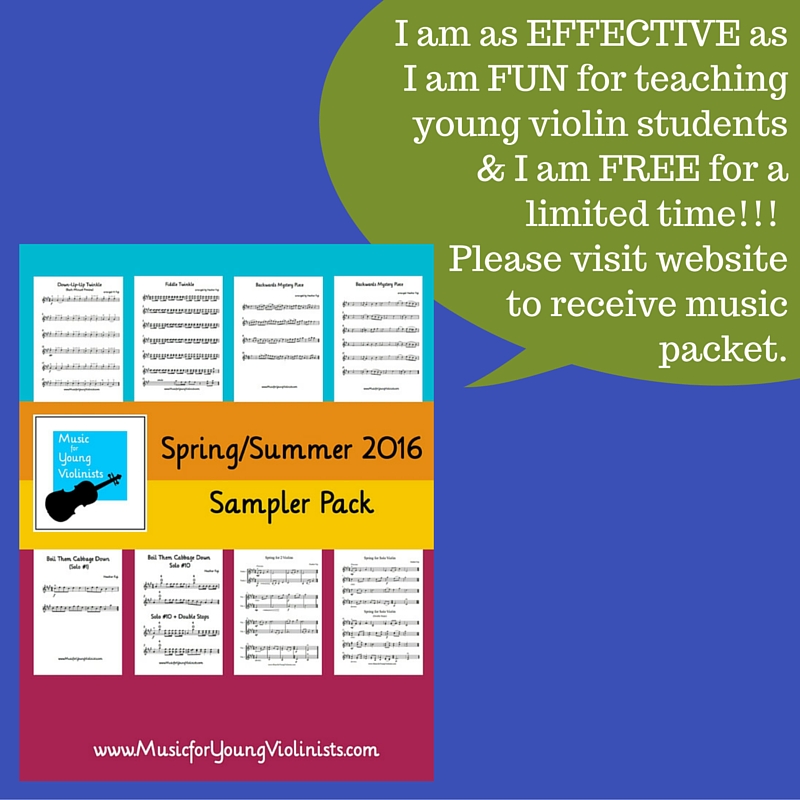
Tell a friend, email the studio, post to Facebook/Pinterest or if you are like me, send a good old fashioned letter in the mail: the Spring/Summer 2016 Music for Young Violinists music packet is still available for FREE. Just fill out a contact form either on the HOME PAGE or on the FREEBIES page and bam - you will receive a link that allows you to download this packet of music teaching awesomeness.
Wow - that's pretty awesome right! I will only offer these music packets as free seasonal downloads for 3 more seasons so don't delay in spreading the good news. All good things in life must come to an end and when I begin nursing school I will have to end this neat global music sharing project. Thanks! Heather  Scott Lake, Oregon Scott Lake, Oregon The school year year flew by. One week my students were walking in my studio door recharged from summer break and creating goals for the new school year and the next week we had our end of year awards ceremony and party. One reason that I look forward to a lighter summer teaching schedule is that I am able to have the space to reflect on everything from the previous year. I try to evaluate what was successful and what I would have done different. I also think about the needs for my studio for the upcoming year and how I can create a program and curriculum structure to best support my students. In reflecting, I also like to make a list of what made my year distinct. The time goes by so quickly that this helps me organize my memory and feel proud of my teaching. This also literally makes me slow down to create structure for the reflection process. Below is a list of events related to my music teaching that shaped my past school year.
I recommend every teacher create an annual list like this to reflect and feel proud of your work. What are some of the highlights from your school year? Please share in the comments below.Thank you!
What marks the end of the school year for you and even more fun - how do you celebrate? Please share in the comments below.
Thank you to TakeLessons.com for including me in this neat infographic.
(7%-38%-55% Rule)From the 1-Minute Pedagogy Series1 - Minute Pedagogy is a series of 6 short videos that share my favorite "pearls of wisdom" I have received for violin teaching from colleagues and teacher trainers over the past 2 decades. Think of these little videos as us having a cup of coffee together and sharing advice and perspectives to support the work we do as teachers. Please feel invited to continue the dialogue with your own ideas in the comments on the blog or youtube channel below. I apologize for the silly grin in some of these videos. I could not help but have a gigantic smile on my face when I filmed these because I was remembering so many special people that deeply you touched my life. To view all 6 videos in this series click HERE. If teaching were just a matter of downloading information we could send our students an email and concepts would be understood. However, teaching is the art of communication and words are not our first language. In research studies the communication that happens between the words is referred to as meta-communication, nonverbal communication or paralanguage.
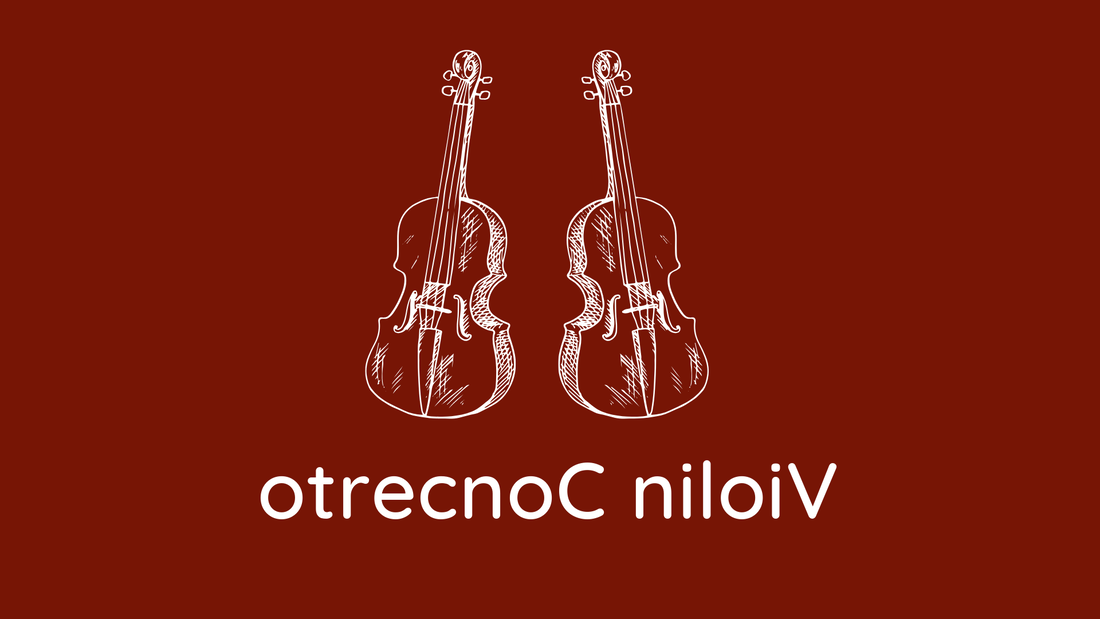
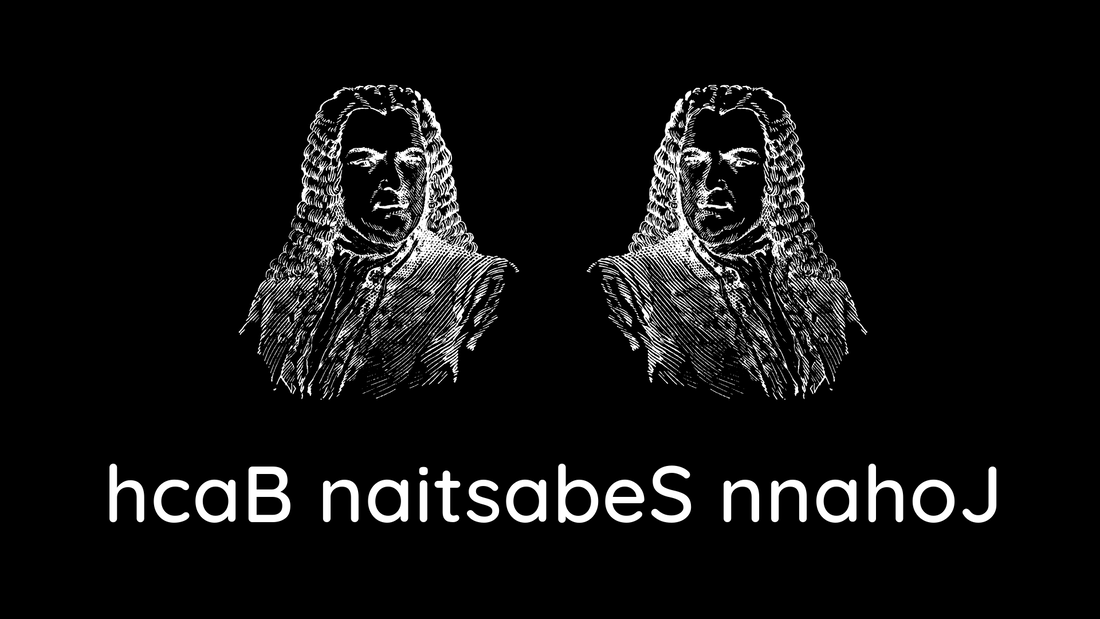
One of the preeminent researchers and authors of nonverbal communication, Albert Mehrabian, asserts that in some cases only 7% of communication is contained in the vocabulary words, 38% in the body language and the remaining 55% expressed in the "liking" or attitude of the sender. The 7%-38%-55% Rule is contextual and DOES NOT apply to every communication scenario but is useful to bring up because it helps us think about communication as being a composite of vocabulary, body/facial motions and our inner attitudes and beliefs imprinted on the message. In the video above I share some of the ways that I communicate non-verbally with my students. I would love to hear about what special non-verbal ways you have developed to communicate and connect with your students. Please share in the comments below. Butterflies in your stomach? Try this little trick of saying the alphabet backward in your head to re-route your mental circuits and steer away from the uncomfortable experience of performance anxiety. One of the ways this works is because a backward alphabet is an unknown pattern to the mind. This also means it will become ineffective if used too frequently. If that is the case, then start spelling other words in your mind backward like: Violin Concerto and Johann Sebastian Bach: 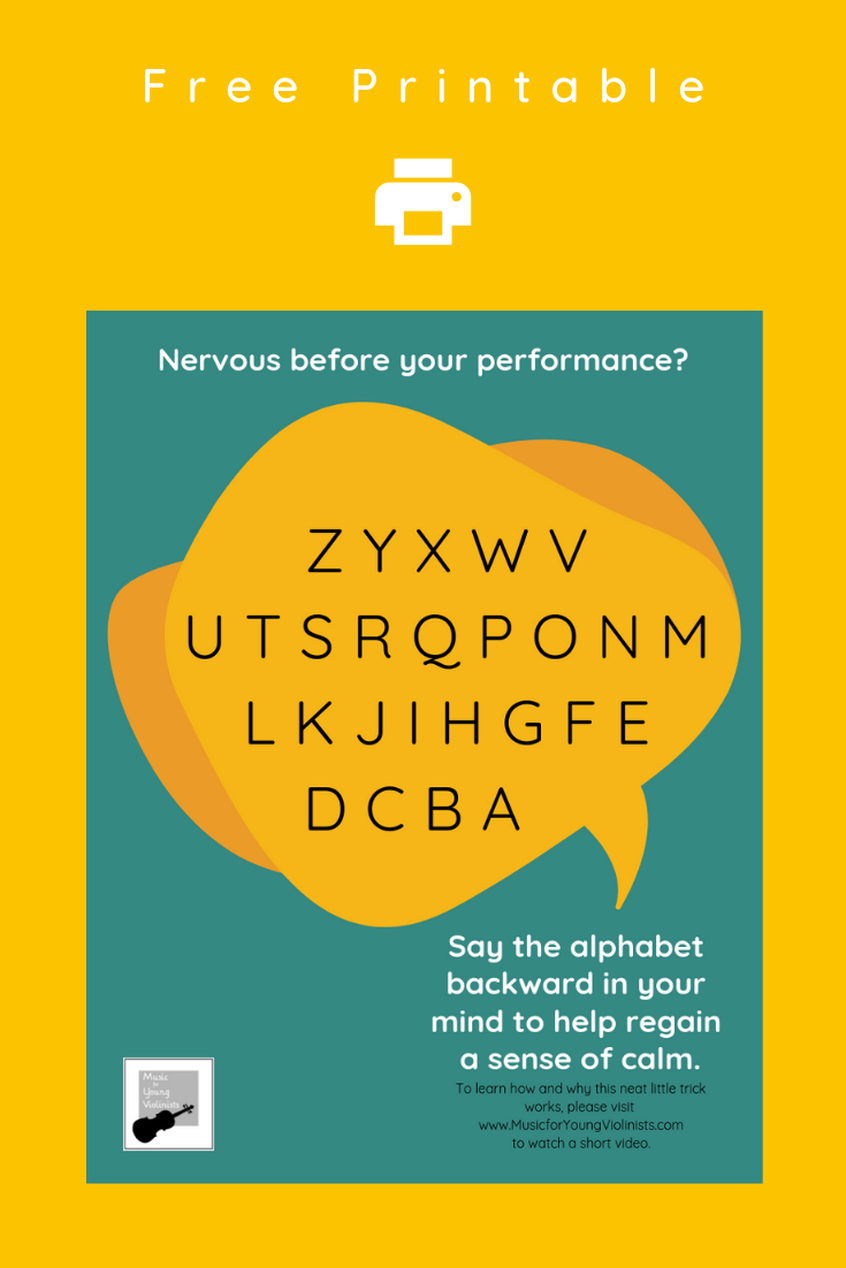 Try this trick before your next performance to help alleviate performance anxiety. Try this trick before your next performance to help alleviate performance anxiety. How do you help your students alleviate the stress of performance anxiety? Please share in the comments below.
From the 1-Minute Pedagogy Series1 - Minute Pedagogy is a series of 6 short videos that share my favorite "pearls of wisdom" that I have received for violin teaching from colleagues and teacher trainers over the past 2 decades. Think of these little videos as us having a cup of coffee together and sharing advice and perspectives to support the work we do as teachers. Please feel invited to continue the dialogue with your own ideas in the comments on the blog or youtube channel below. I apologize for the silly grin in some of these videos. I could not help but have a gigantic smile on my face when I filmed these because I was remembering so many special people that deeply you touched my life. To view all 6 videos in this series click HERE. Do we talk too much when we teach? I once had a colleague tell me that teachers here in America tend to talk too much when we teach and for the most part, I agree. Words are not our first language and the unique nature of our work as violin teachers invites us to integrate physical sequences with cognitive patterns. We then wrap this all up in the magical expression that is music itself. Such a unique combination is difficult to contain in verbal instructions which is why I suggest we do an inventory of how much talking we do when we teach and assess if this amount of language is as necessary as we may be in the habit of doing and also consider what options we have instead of words to communicate our teaching point.
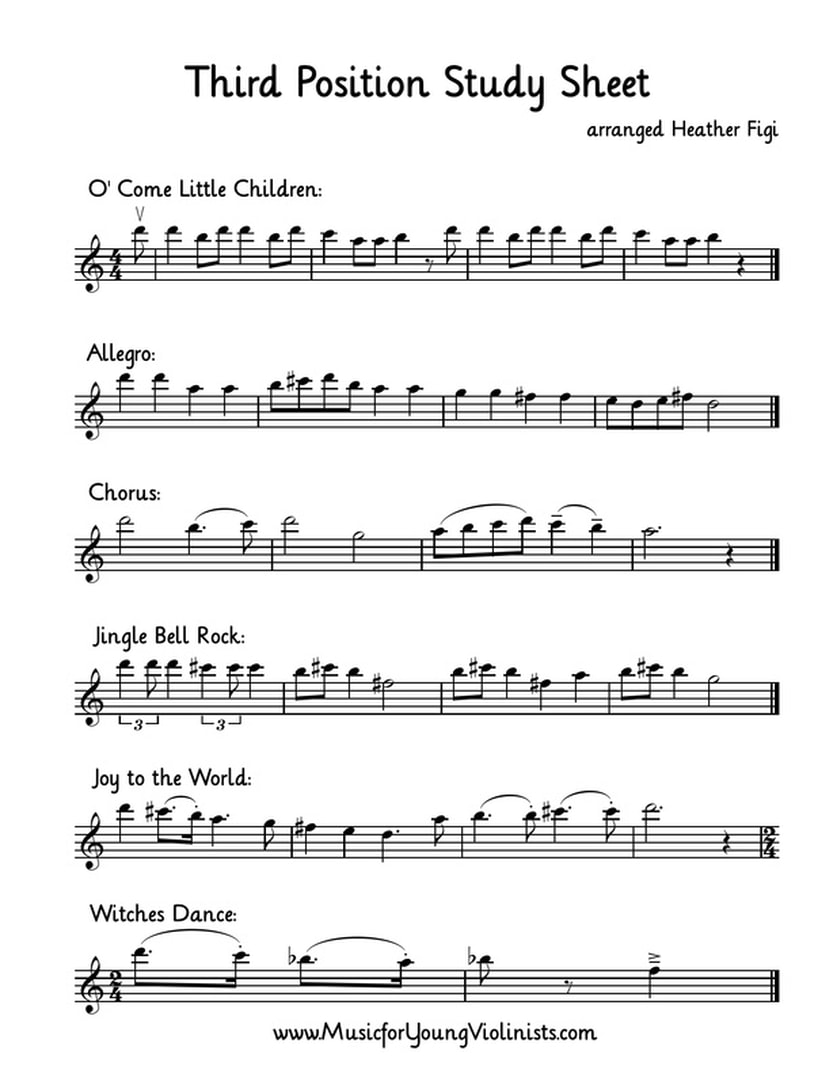
Words go through our ears and into our brain where they can be interpreted in a multitude of ways which may not even match the intent of the instructor. Touching a body part relevant to the technique being studied, modeling with our own playing and reserving enough space in the lesson time to accomplish enough repetitions so the student can synthesize the information and correctly repeat in their home practice are integral to a successful learning experience. Certainly language is helpful in the process but if we talk too much we are not as effective as if we balance our teaching with training the muscle memory and inflecting meaning into the music. Additionally, we can use the tone of our voice, the spacing between words and facial gestures to communicate a sense of awe and wonder for this incredible process of learning music and stress the priorities of our teaching points. SILENT TEACHING CHALLENGE: If you really want to have some fun with this, take out a timer and have a playful challenge with your student or class to see how long you can go without speaking. You will be amazed at how this captivates your students while preserving your energy and best of all this is very effective for getting focused work accomplished. How do you communicate with your students in your teaching? What are some ideas you have for non-verbal teaching techniques? Please share in the comments below. The THIRD POSITION STUDY SHEET is part of the free Winter 2016 music packet available only from Music for Young Violinists. This worksheet has been such an empowering resource for my students who are just beginning third position and they often progress thru these short studies much faster than we expect. Although I could assign each of these passages by ear, I find that it creates more clarity and organization to have the expected assignment clearly notated on a piece of paper. I designed this worksheet to combine multiple learning channels into one experience: EARS - Using review pieces to learn third position serves as guard rails to keep a student on track. They already know what the tune should sound like so there is clarity from the start. EYES - I remember when I first started reading on the G string and high on the E string how difficult it was to discern with all the additional staff lines. If a student and teacher prefer, this worksheet allows for writing in fingerings and half/whole step markings. Eventually the consistency of playing in the same range will help your young musician develop fluency for playing in this new higher range. HANDS - I kept all of the studies in the same range on the E string to give students enough repetition of the new skill set to truly grow confident in this new skill. If a student only practices third position in a single piece they will likely struggle for a while due to not receiving enough support to master this new and fun skill. How do you help your students with third position? Please share in the comments below.
This packet is not longer available but the worksheets from this can all be found in the Teacher's Toolkit available here at the Music for Young Violinists store. 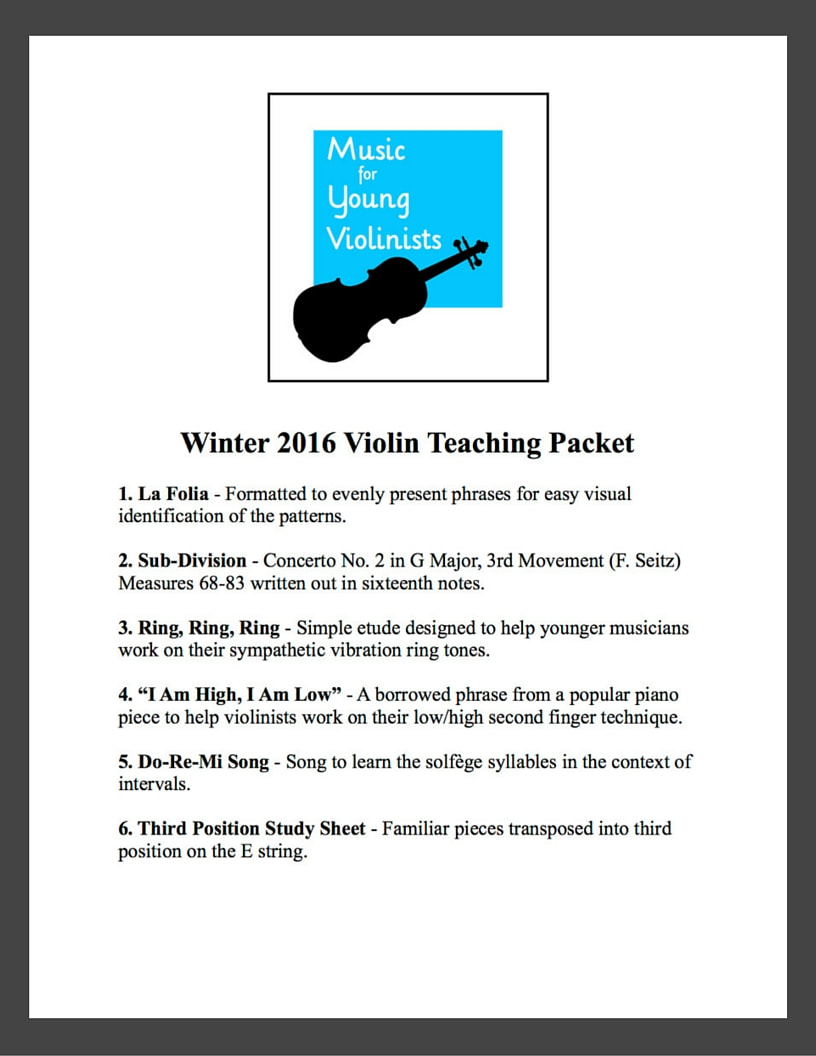 La Folia - I noticed my students struggling to memorize the straightforward opening of this piece and could not figure out why until I looked at the score they were using (Suzuki Violin Book 6.) This version has the 4 bar phrases broken up unevenly on the lines, and my students were unable to identify how simple the pattern is. After my students used this re-formatted version, the phrases became visually apparent, and memory was much easier.
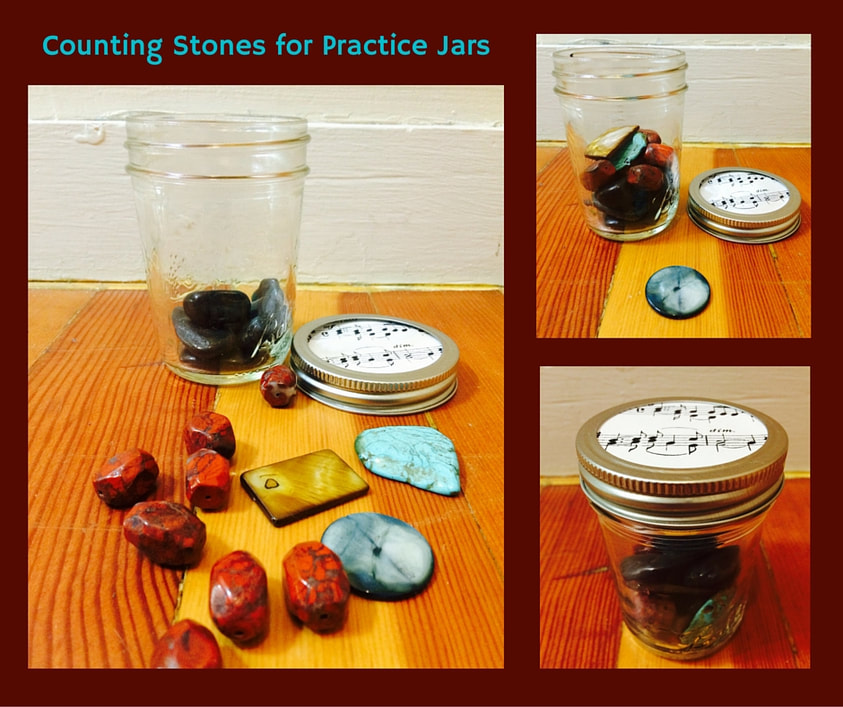
Sub-Division - Concerto No. 2 in G Major, 3rd Movement (F. Seitz) m. 68-83 By the time a musician is at this level sub-division should already be an acquired skill and having it printed out for explanation is not necessary. However, I find that having an assignment blocked out on a separate worksheet creates clarity of goals between teacher and student as well as preventing a student from plunging into the score without having the proper foundation to interpret the music accurately. Ring, Ring, Ring - This is a simple etude that is easy to learn and designed to help younger musicians work on their sympathetic vibration ring tones. It can also be done starting on the D string. “I Am High, I Am Low” - When a young musician begins differentiating between what we refer to as low and high 2nd fingers, they need a great deal of support. I borrow this musical phrase from a favorite piano piece and have students learn it in the five-part sequence listed on the worksheet. They enjoy it and have fun getting some speed in it. Do-Re-Mi Song - Solfège is not something that most American musicians learn when they are young, but I would like to see this change. This simple and fun piece focuses on the intervals of the scale while teaching the seven syllables of solfège used in English. I first introduce this by singing and using hand symbols and fun body movements to match the lyrics. After it is learned vocally, a violin student can easily transfer this onto the violin. Third Position Study Sheet - I love teaching the III position by ear but found that some students need a correlating visual to help it make more sense and not get discouraged in their home practice. This worksheet takes several familiar pieces and transposes them to be played in the III position on the E string to help concentrate on a specific range. It is a fun assignment and students enjoy experiencing their growth by mastering these phrases in the III position. Did you know that my book Twinkle: Duets, Trios & Quartets was written to help students gain fluency and confidence with their III position? I created this collection of chamber music pieces before the Suzuki books were revised to fill the gap that used to exist with the use of the III position. You can view samples from this collection on the website and download a free Twinkle Duet when you sign-up for the newsletter. Counting stones for practice jars are an easy, quick and economical gift to make for your students and will help a musician of any level stay organized and goal oriented in their home practice. Above is a picture of a counting stone practice jar from a batch that I recently made and shared with the teenagers in my studio as a Christmas gift. I purchased the stones and beads from my local Michaels Craft store. To use the counting stones for practice jar the student removes the stones from the jar and places one back in the jar for every repetition they complete to satisfaction. Since I believe it is important to use both singing and visualization when doing repetitions I used a variety of stones to emphasize my teaching values. The special stones (or beads) that are different looking can be used to keep track of these non-violin repetitions and create a sequence. For example, a student could place the stones on their music stand in a specific order that represents 2 violin play thrus and 1 sing thru, 2 violin play thrus and 1 sing thru, etc… Practice counting devices like this help musicians keep track of their repetitions without having to log the numbers in their head. This frees up mental space so they can more fully concentrate on their musical goals. Also of benefit is using the left hand to put the repetition stone back in the jar which will give a much needed muscle release to the body so that tension does not accumulate. Watch a video using counting stones: How do you help your students accomplish repetitions in their home practice? Please share in the comments below.
The "chinrest" is really a "jawrest."
This terminology can confuse young violinists and their parents in the beginning. It is useful to point out this discrepancy so that the violin posture is not inadvertently misinterpreted during home practice. Let’s face it, getting kids to stay engaged during violin practice can be tough. Whether they’re tired after a long day at school or they’re frustrated with a particular skill, kids can get easily distracted. To help keep your student or child motivated, try implementing a few violin games into their practice session. Not only will games keep them engaged, but they will also help reinforce important skills and techniques. At TakeLessons, we’ve compiled a comprehensive list of over 20+ violin games. Each game works on a particular skill, such as reading music, ear training, and violin posture. What’s more, these games can be applied to almost any instrument. Below is a sample of a few games both parents and teachers can play with their budding musicians. Simon Says: To help with ear training, play this new rendition of the old-school game “Simon Says.” Taking on the role of “Simon,” start by issuing instructions to the student(s). For example, when you play A on the violin, the kids have to stand up. Or when you play E, the kids have to sit down. Spot the Mistake: Start by showing students the proper bow hold, then ask them to close their eyes while you set up your bow hold with one obvious mistake; for example, a straight thumb. Once you’re ready, ask students to open their eyes and spot the mistake. They get three chances to guess the mistake before moving on. Tree Trunk: To practice the proper violin posture, have the child pretend he or she is a tree in the middle of a tornado. If the student’s feet are placed too narrow, then the wind will be able to push him or her over sideways. If his or her feet are placed too wide apart, then the wind can pull him or her forward or backwards. Children can get easily burnt out when trying to master a complex instrument such as the violin. To help keep them motivated, mix up their practice routine with these fun, educational games. To view all 20+ violin games, click here. This article originally appeared on TakeLessons.com. Brooke Neuman is a violin and piano editor at TakeLessons, an online marketplace that connects thousands of teachers and students for local and live online music lessons.
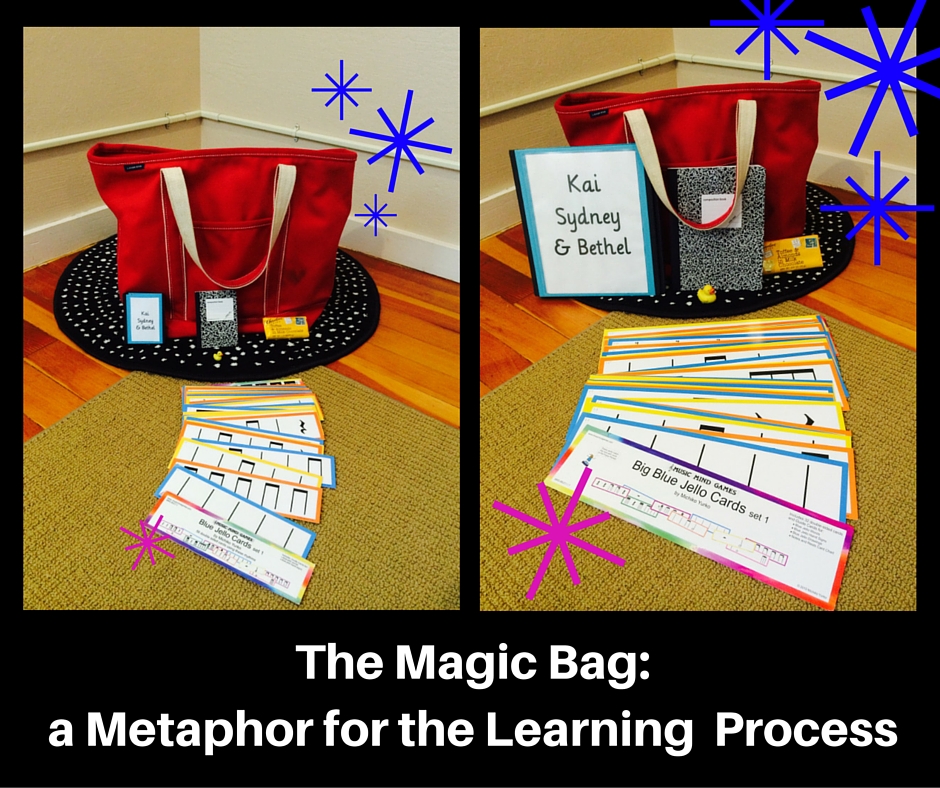
I have a magic bag. When I put something in this “magical” bag it makes the object grow into a larger version of itself. For example, if I put a miniature notebook into the magic bag, I get back a large notebook. I started this trick in my teaching to help with review of the *Blue Jello (set 1) rhythm cards. I wanted to fortify this foundation of fundamental rhythms before we learned the second set of this rhythm card series. The Blue Jello (set 1) cards happen to come in both a small and large size which naturally led to this playful idea. This simple trick for reviewing first year material turned into a very captivating way to begin a class and my students never even realized we were doing review.
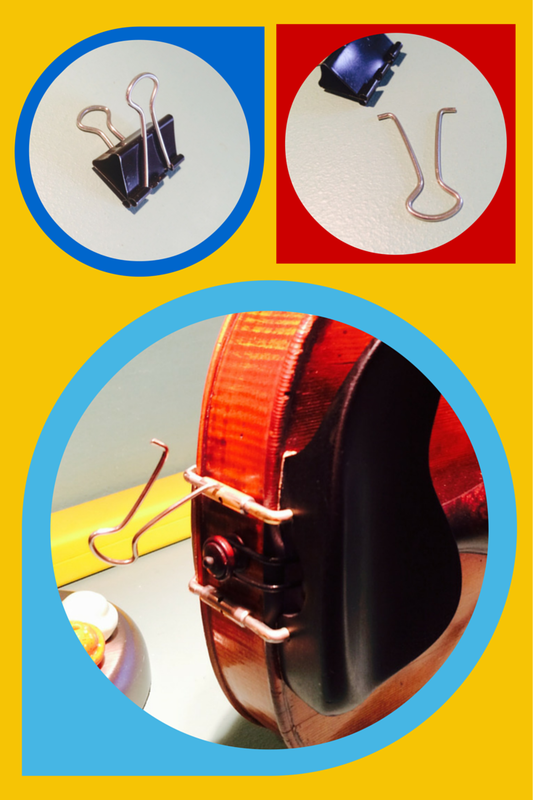
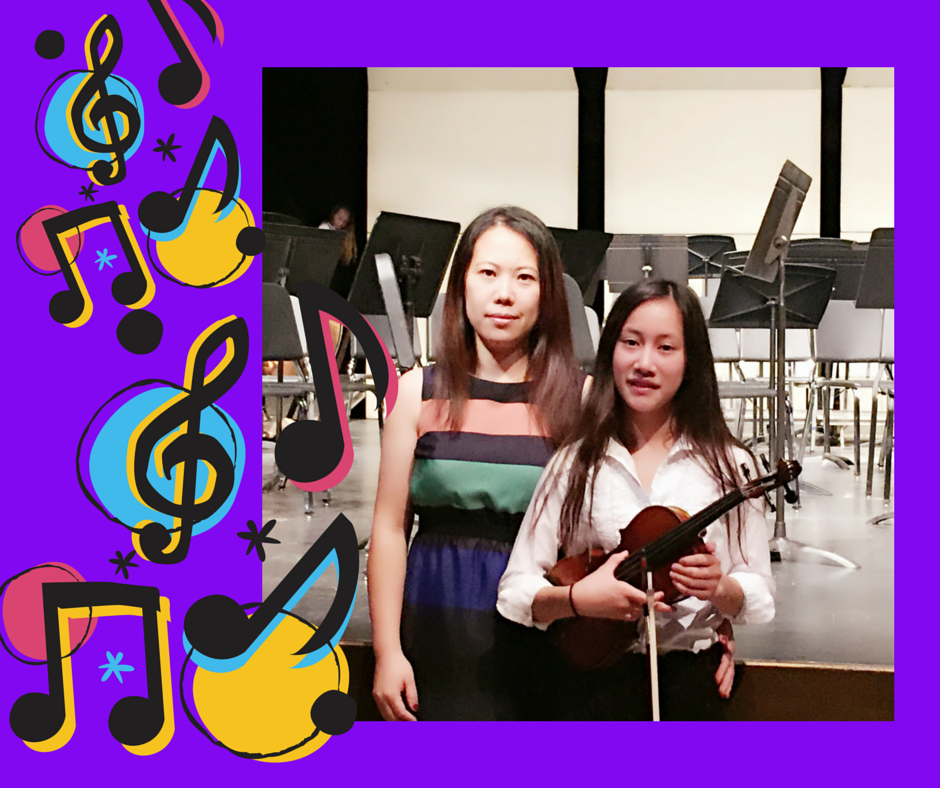
As the school year went on I realized that the magic bag was more than a way to enchant my students into doing review and actually a metaphor for the learning process. When we come to class our knowledge is small and when we leave class it is bigger - this is the wonder of the learning process. As I realized this parallel I began to state it to my young students so they could be aware that they were growing and be able to feel empowered by this incredible process. I believe that learning and the growth that occurs along the way is one of the most satisfying experiences we can possibly have in this world. The magic bag helps us conceptualize the true magic of the learning process while having fun along the way. I also did this intentionally to plant in my young students an identity of being a learner and a student. If you have not already read the book The Talent Code by D. Coyle, I highly recommend it for several reasons. One of the reasons I recommend this book for educators and parents is to learn about the incredible studies that have been done correlating identity to success. In the video below I first share a brief view of how the magic bag works, the concepts and reasons behind it and then a clip of me using my magic bag in the classroom. In this video I reference the importance of mindsets - for more information on this I recommend Sal Khan's article The Learning Myth: Why I'll Never Tell My Son He's Smart. I also reference the power of identity - for more information about this and to learn of some compelling studies involving learning and identity I recommend reading D. Coyle's book The Talent Code. * To learn more about Blue Jello Cards rhythm cards and the Music Mind Games music theory curriculum click HERE. A "hack" is defined in the urban dictionary as: A clever solution to a tricky problem. As violin teachers (or parents of young violinists) our technique development can all be categorized as tricky problems so here are a few photos of "hacks" I have used in my studio to offer solutions for my students. For more, please visit the Violin Hacks & Bow Hold Helpers page. Summer music programs were a highlight of my childhood and now that I am a violin teacher I see first hand how they powerfully impact the students in my studio. Concentrated environments like a summer music institute (or camp) provide a synergistic effect with multiple influences coming together in a special location, intense schedule and within a community of like minded individuals. It is no wonder why a student is able to so easily achieve breakthroughs with this type of support. I asked a mother-daughter duo from my studio to write about their experience doing a summer institute last year. Reflections from Joanne (Violinist) Age 13: Northwest Suzuki Institute was a wonderful experience for me! I learned so much not only about just Suzuki music but much more! This year NSI was for one week and every day I had seven classes to attend. My first class was Instrument Care in which I learned a lot about how to take care of my instrument and make it last longer! In this class there were a lot of "hands-on" activities a like changing your own string on your instrument! The class was taught by Rafael Videira. I liked him a lot and thought that he had a great sense of humor which makes everything a lot more interesting! My next class was my Group Class which was taught by Shelley Rich. She is very energetic and makes the music we play together very fun! At NSI there are various group classes depending on your level. My next class was Fiddle Class. Fiddle Class was taught by Gail Acosta, and I loved the way she made the music work for everyone of different ages! After Fiddle Class I had my Masterclass. Everyone at the camp is required to take a Masterclass everyday. In my Masterclass my teacher was Lillie Manis. Masterclass was nice because It was only with a couple of kids (in my Masterclass there were three kids including me) so we each get one-on-one time to work on our most polished piece and the technical things within it! It's like a mini lesson! My last class of the day is the Rhapsody Orchestra. There were two orchestras this year and I was placed in the Rhapsody Orchestra. The instructor was Dr. Dijana Ihas. She was amazing and before I went to NSI, Ms. Heather told me that she was very talented, nice, but strict. At the camp I found out that all those were true. I very much recommend Dr. Ihas because she was very professional and took every minute of out time very seriously! We got a lot done in four days and were able to preform our piece, the Hungarian Dance No. 5, like professionals! Overall I feel that NSI was the best thing that I have done this whole summer! To be honest I was a little nervous before the camp, but when I went, I quickly adjusted because everyone there is very nice and creates an environment for you so you feel like everyone cares. The only thing that can create a little inconvenience for the parents that work in the summer is that parents have to stay with their child the whole day or ask another parent to be responsible for the child. Northwest Suzuki Institute is just really worth it and I recommend it to all and I am very positive that I will go back again next year! Reflections from Hong (Mother of Joanne)
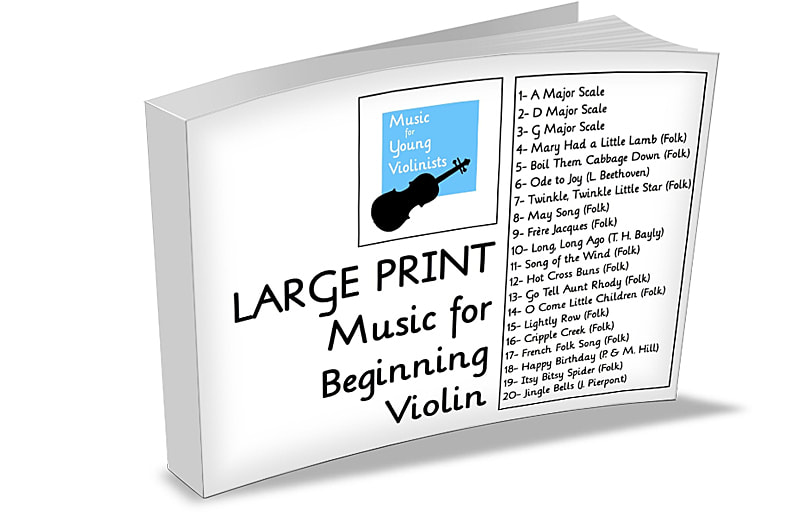
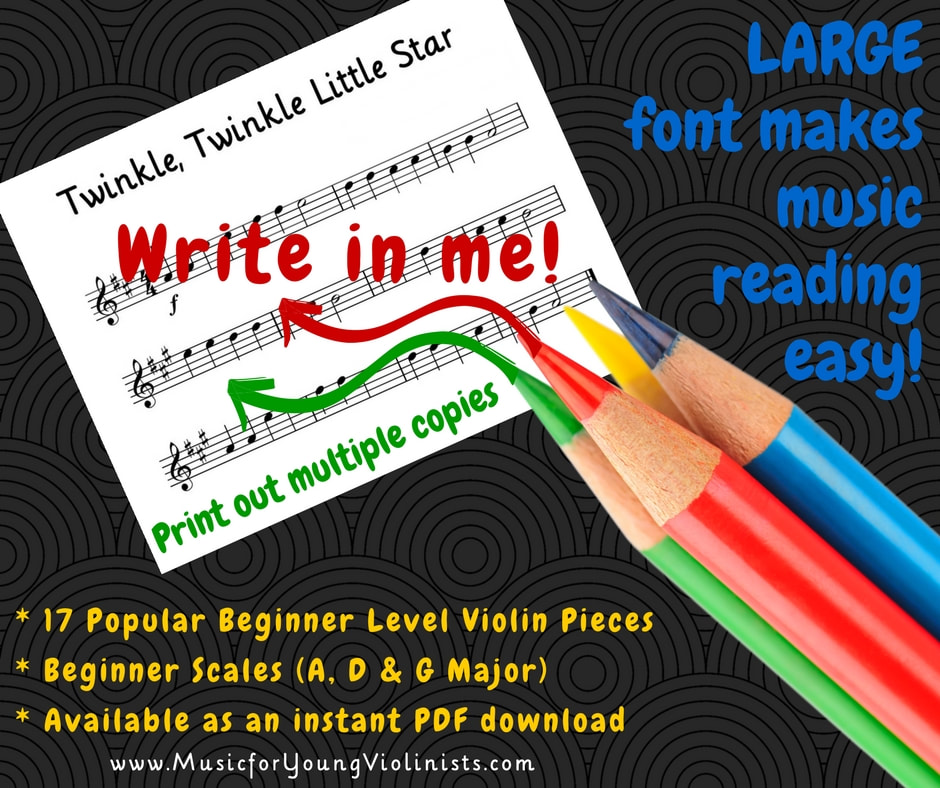
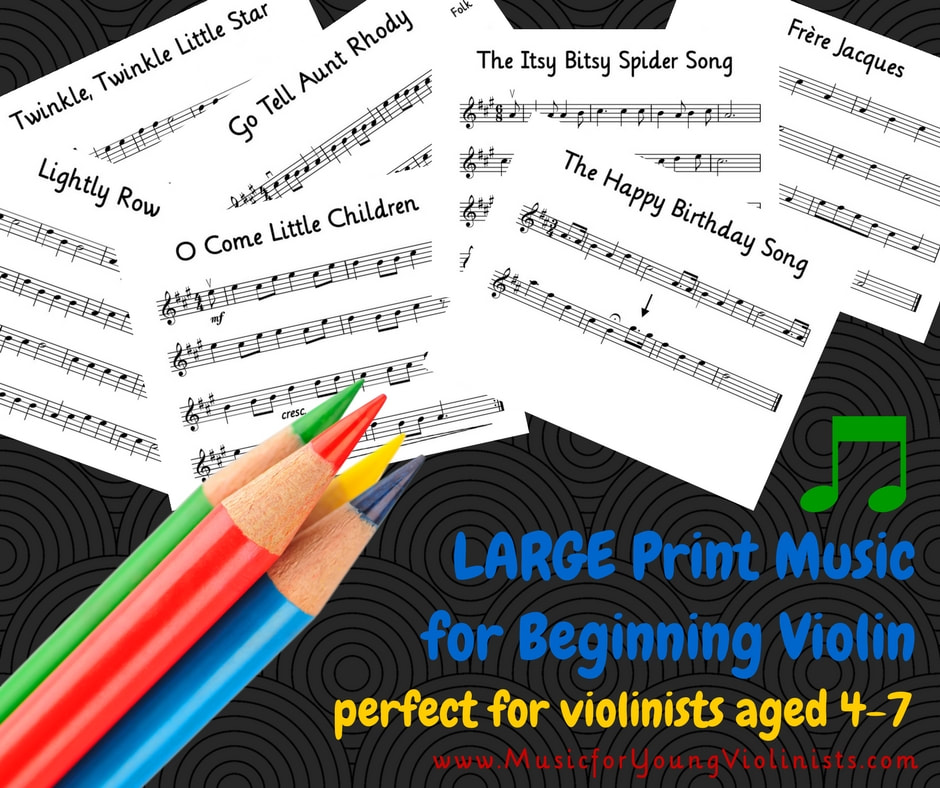
I am writing to express my high level of satisfaction and enthusiastic support for the NSI string camp my daughter Joanne attended this summer. The camp was well organized and had an exceptional professional music staff, and was executed in a friendly, competent manner. Joanne thoroughly enjoyed the experience and benefited from it immeasurably. Everyday, Joanne participated in a group lesson, a master class, orchestra practice and other music enrichment classes where she learned how to care for her instrument and fiddle music. The classes are split into different levels for violinists so that the kids can get the most out of the experiences. Our favorite part of the camp is the master class where Joanne and two other kids work with one teacher on violin techniques. Although she had been playing violin for almost five hours during the day, she was still very excited to practice the assignment she got from the master class. The teacher uses simple pieces from earlier books to help Joanne improve her violin position, bow holding, and arm movements. It's surprising for me to see how much she grew within a couple of days. She left the camp charged to continue improving her technique throughout the year. She has also made a lot of friends. Some of them live in Eugene (Oregon). Others came from California and even Canada. I myself have learned so much from the parent class, interacting with other parents who are equally crazy about music, and from getting to know my daughter and her music. It is truly a very unique family experience that we have already made the decision to come back to explore further next year. LARGE PRINT Music for Beginning Violin is a 21 page digital download that includes 17 popular folk tunes and 3 beginner level scales.
This is the perfect collection for the young violinist (aged 4-7) who is just beginning to learn how to read music. The large music font makes it easy to see notes and was formatted for plenty of room to write in. Once purchased, teachers and parents can print out as many copies as they like for multiple educational uses. As a teacher myself I know that I sometimes want to revisit pieces and write in pitches or fingerings. I also love using color with my students and having multiple use copies with this digital download format gives me versatility and creativity in my teaching. The scales and beginner level pieces included in this collection were chosen because they complement the foundational skill set established for a student who is at the Suzuki Violin Book 1 level but are also appropriate for any young beginner. I owe a special thanks to my precious young violinists over the years who have taught me what pieces light them up and keep them invested and working hard. Popular tunes like Jingle Bells, Happy Birthday and the Itsy Bitsy Spider Song are pure violin teaching gold for teachers working with young students. Happy Music Making! |
Categories
All
Archives
February 2024
AuthorHi! It's me, Heather. I absolutely love working on the Music for Young Violinists project and all the many facets: blogging, website, music, teaching materials, freebies, videos, newsletter and giveaway contests. The best part is connecting with you so feel free to drop me a line. You can learn more about me on the "ABOUT" page. Thanks! |
||||||||||||||||||||||


 RSS Feed
