
|
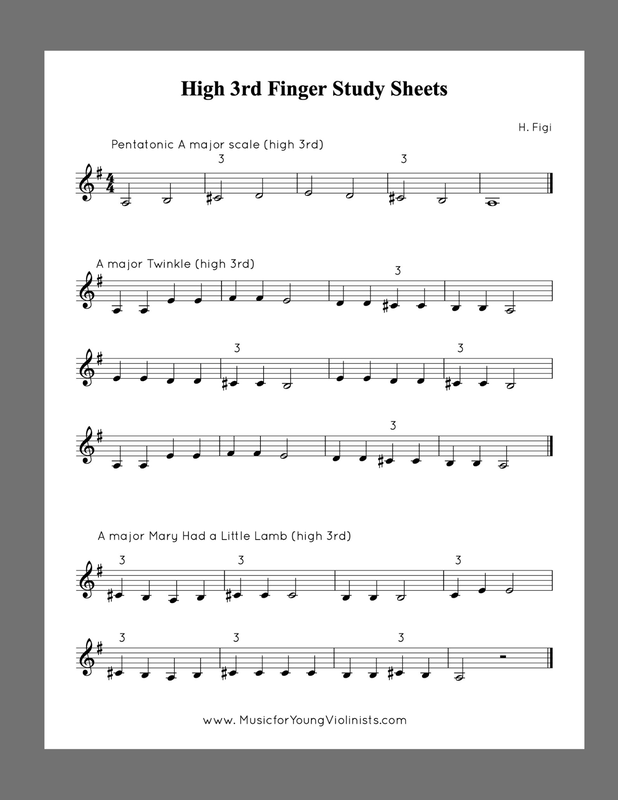
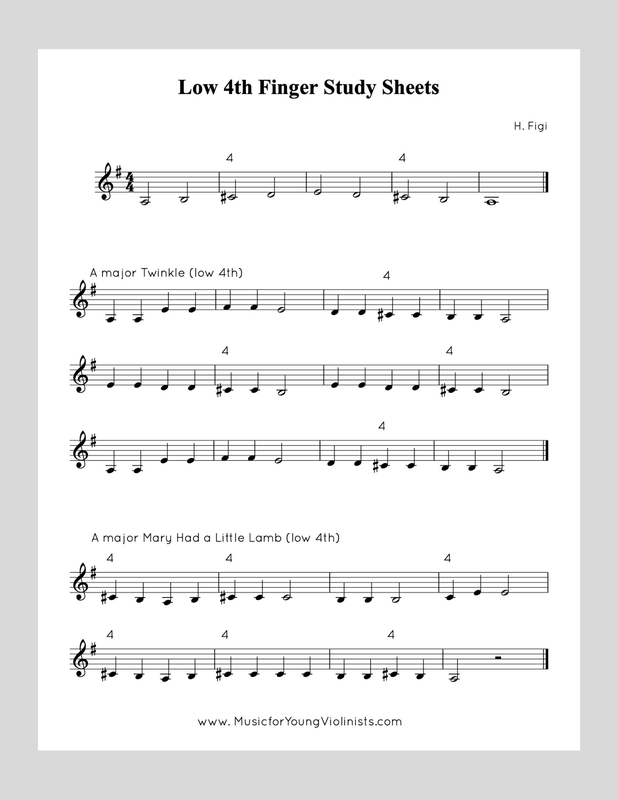
Eeek! High 3rd Fingers (or Low 4th Fingers) - New FREEBIEs The time has come, and a beginning violinist has just encountered a piece with a new geographical location for the 3rd finger - what do we do? First of all, congratulations! This is so exciting and takes a little support, but soon you will feel comfortable with this new technique and thrilled to play this new tune that has enticed you. Next, we want to take the old and add the new. What does this mean? Keep scrolling to learn.
Whether you are a student or a teacher, it is really important to implement this concept of using an existing aural template (or physical technique) and augmenting it with the new technique to make learning natural. While it will still be challenging, we can avoid defeat by working like this. My student recently shared a super neat piece she wants to learn - it's in the key of G Major (1 sharp, a very standard key for us violinists), with G#s and D#s (requiring either high 3rds or low 4ths) all over the place - WOW, this is taking it to a new level! The free PDF downloads above will help you tackle a situation like this. We will use your existing knowledge and aural template of major keys, beginning scales and easy tunes. It seems like a lot with 6 pages in total, but simplicity will emerge after you peek at it. It should all sound familiar - these are simplified 5-note major scales and easy pieces Twinkle & Mary Had a Little Lamb, but with new, fancy, sophisticated high 3rds (and then the same music but with using low 4ths). "Hey, wait a second. I need some clarification. Why is this all in the key signature of G major?" Great question; these study sheets are all with only one sharp because this is often what we encounter with our actual sheet music when we get new repertoire with accidentals. "What's an accidental? Sounds like the word accident, which is not what I am going for in my music." Accidental is a term for a note (aka pitch) that is outside the key signature. For example, if we have a piece in the key of C major (which has no inherent sharps or flats), a G# would be an accidental for this key. The world of music making, especially violin playing, is full of misnomers, and I have written about 3 common ones here (and the comments share more food for thought). How to use these study guides? Some students must use the "guitar position" (sitting with the violin on the lap) and pluck the exercises before doing as written with the bow. This is especially important for violinists like me and prone to excess tension in the left hand or violinists who struggle with proper left-hand technique due to recently sizing up to a new instrument or where they are in their development. There is inherent repetition within these sheets; some students will need to do all the exercises daily for a month, and some will be able to grasp the concept by just utilizing one portion. We are all unique, and these guides can be tailored to where a violinist is at in their development. Catch a mistake? To error is human; I always double-check my work, sleep on it and then check it again, but from time to time, I make a mistake. Gold stars to anyone who catches a mistake and sends me a friendly email to fix it. This project is a labor of love, and your help is appreciated! Also, please reach out in the comments below to share your innovative ideas for approaching this issue with your teaching and practicing.
0 Comments
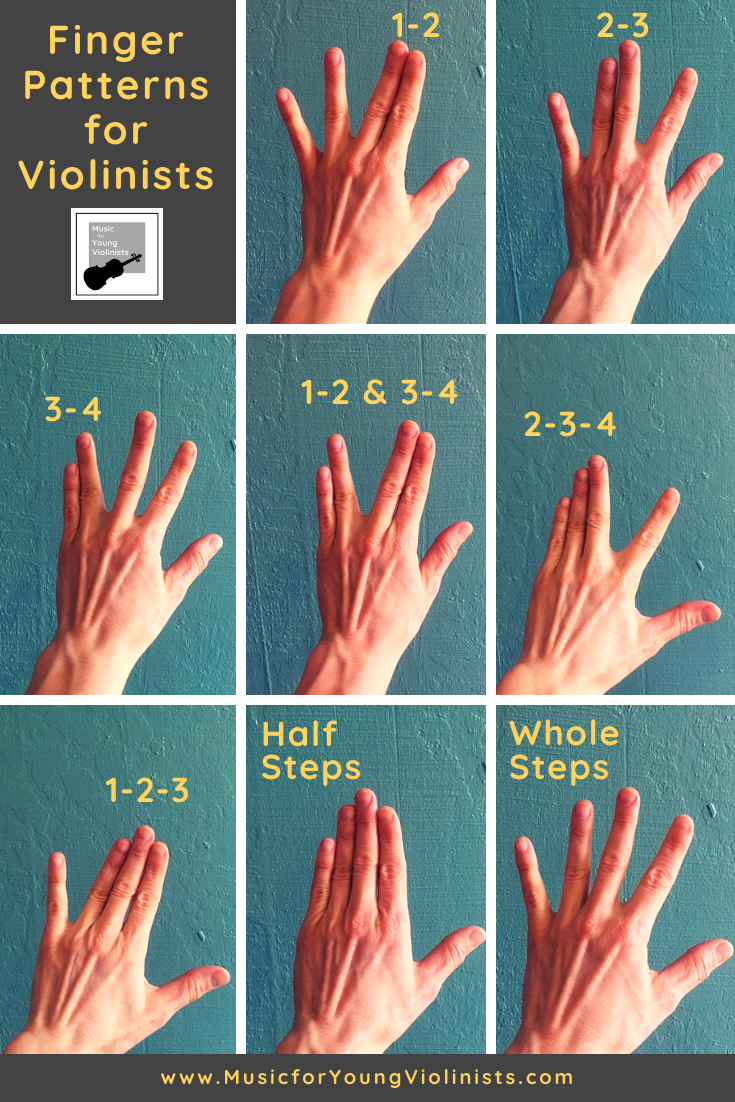
Playing music is one of the ultimate experiences because we merge all 3 parts of our being. We use our mind to control our body to express our soul. What is a technical? A "technical" is termed as such because it works on technique, extracting just the mind-body connection involved in playing music. They are fun to do in themselves, and anyone serious about pedagogy knows how important it is to break things down into their smallest component, using technicals for step-by-step mastery. I like to use the metaphor that technicals give us more colors in our palette to paint with, leading to more personalized expressions when we then apply them to our music-making. #1- FINGER PATTERNS: 1 & 2 2 & 3 3 & 4 1 & 2 + 3 & 4 1-2-3 2-3-4 How to teach?
Why teach? Finger patterns help make music theory applicable to violin playing and aid in learning repertoire faster. #2- BASE JOINTS: The anatomical term for these finger bones is proximal phalanges, but we will refrain from Latin terms and call them the base joints. The base word is familiar in the word "basement," and etymologically, this refers to the foundation, which is appropriate since utilizing this portion of our body provides a solid foundation for playing the violin and, when mastered, creates highly articulate playing and fingers capable of fast playing. We will use this concept in the next technical presented here in this series, and it can also be taught independently. How to teach?
Why teach? The eye sees the hand covered in skin, does not identify the proximal phalanges bones, and then tends only to use what it sees, not taking advantage of the power the base joints offer. Using base joints to deliver the fingers on the instrument leads to clean, articulate playing. #3- HOOK BACK FINGER: How often does a violinist contort the entire hand to get the 1st finger into what we often refer to as a "low" position? (or flat), because we have not isolated the finger from procuring this motion How to teach?
Why teach? Students will be able to find notes requiring this, but in my decades of teaching experience, I find that they are not likely to use a hook back and will contort their hands. While improper hand shape is usable with beginning-intermediate level repertoire, ultimately, it will prevent from playing more advanced and fast-paced repertoire. #4- VIBRATO: Two key concepts can be implemented to start learning vibrato ergonomically and easily. By removing the asymmetry and gravity-defying elements of violin playing and replacing these with "cello position." Once we take out these 2 elements, vibrato is clear to understand and easy to learn. How to teach?
Why teach? Not only will this approach streamline learning vibrato, but it helps both the player and teacher hone in on the elements of violin playing (asymmetry and going against gravity) that tend to make learning many new techniques difficult, providing a learning template for moving forward. #5- SHIFTING: Shifting is simple: the arm abducts and adducts. This is all that shifting is: Moving the arm up closer to the body by adducting it and moving the arm farther from the body by abducting it. How to teach?
Why teach? Anyone who has ever worked on an advanced repertoire may feel this because shifting can feel difficult, but it is a very simple motion. Identifying this, feeling the arm (so the hand shape does not overcompensate). Correlating Downloads for 5 Technicals for Left Hand: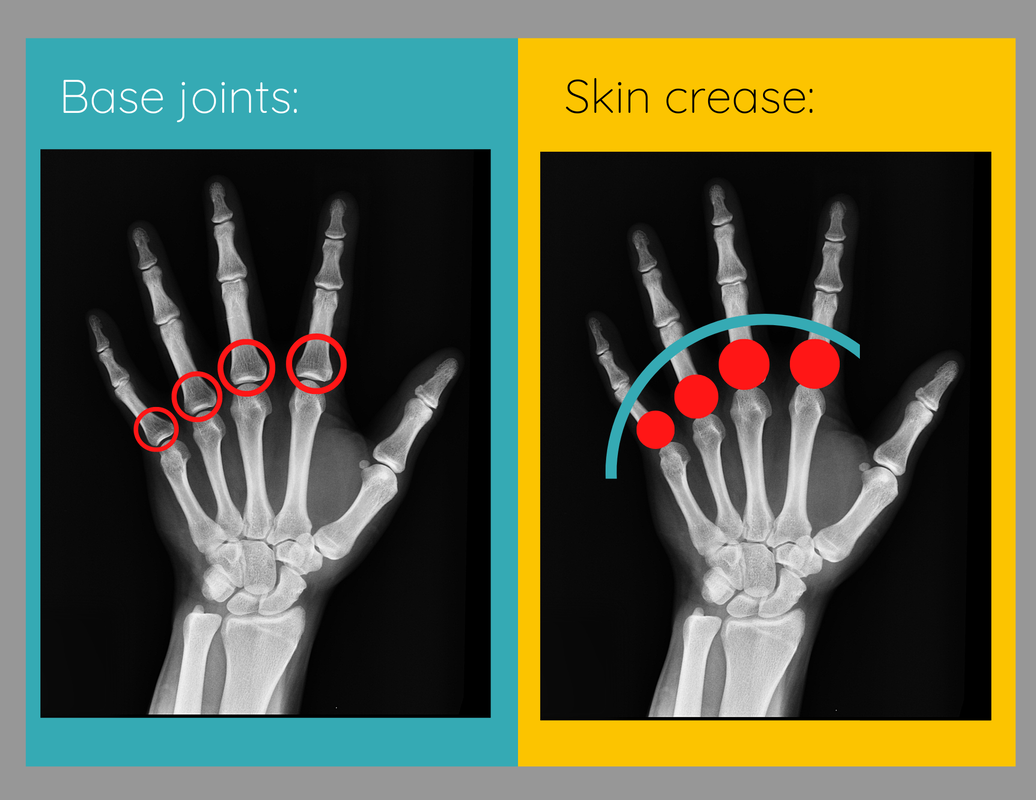

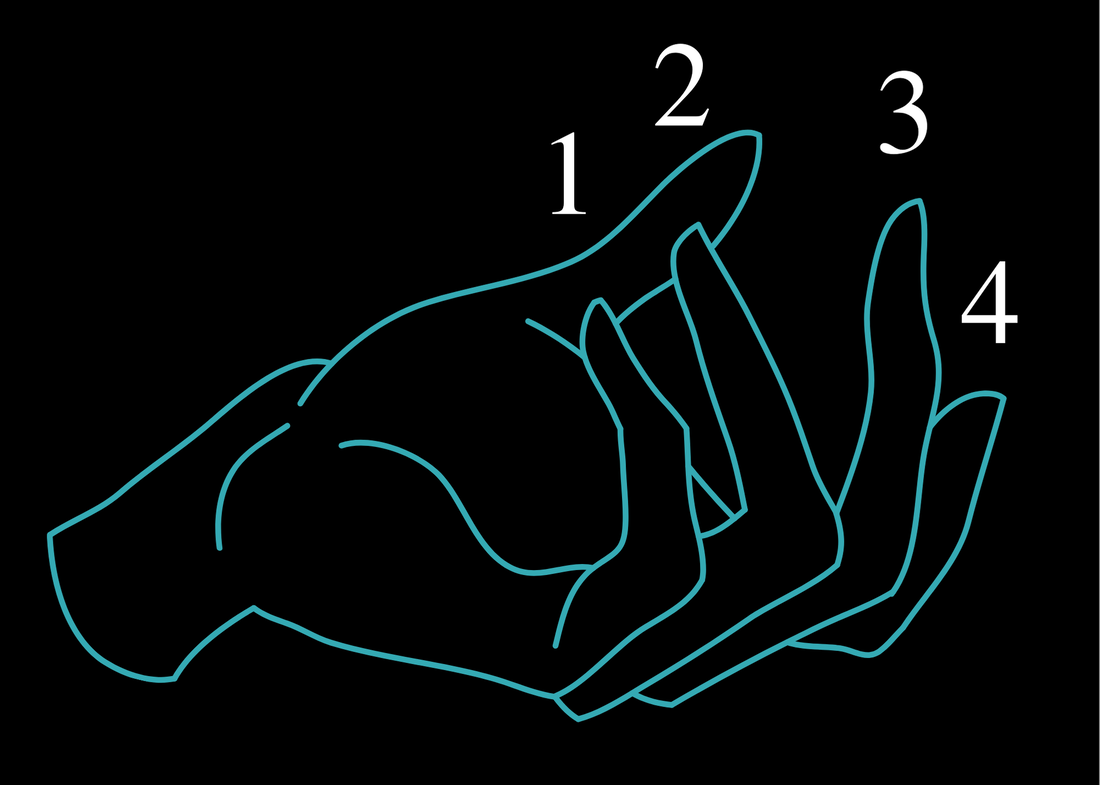
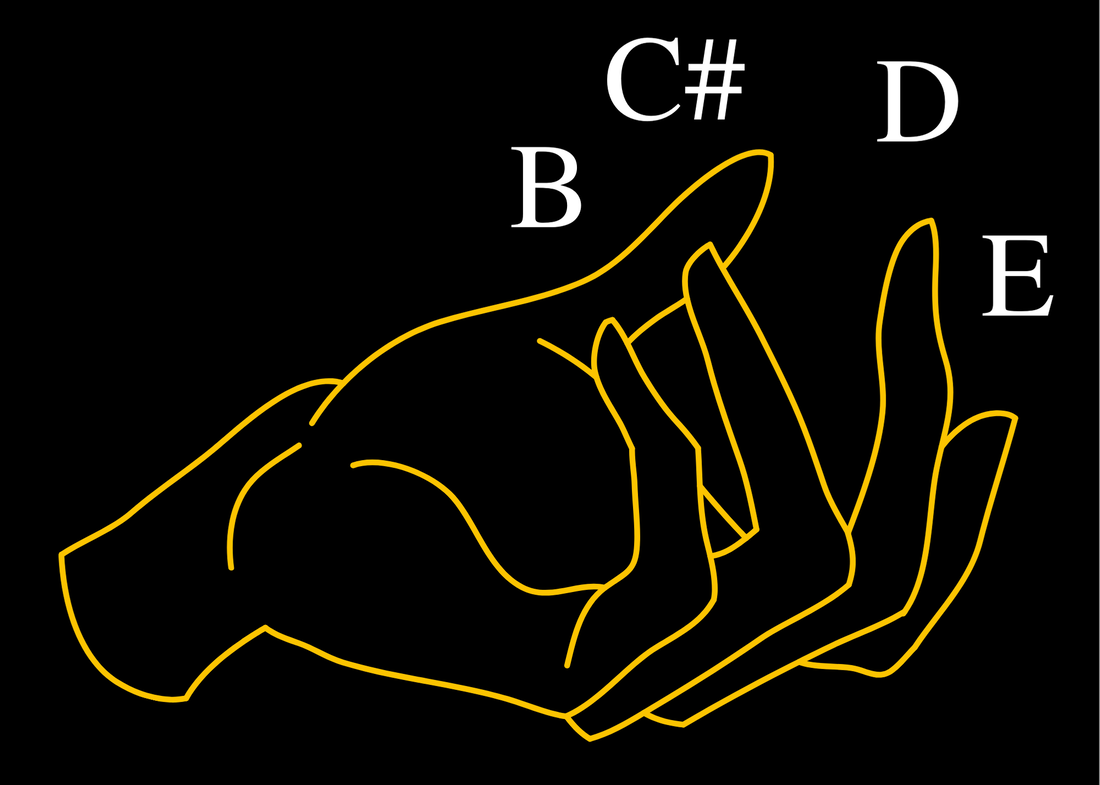
In the arena of heated conversations among string teachers, the subject of finger #s (i.e., 1, 2, 3) versus pitches (B, C#, D) is a hot topic. I was surprised to read the comments on the blog post Best Way to Learn Violin Notes? and did not expect the consistency of responses. My favorite part was learning how the different countries approach this. Click HERE to read what others are saying about finger #'s vs. pitches. 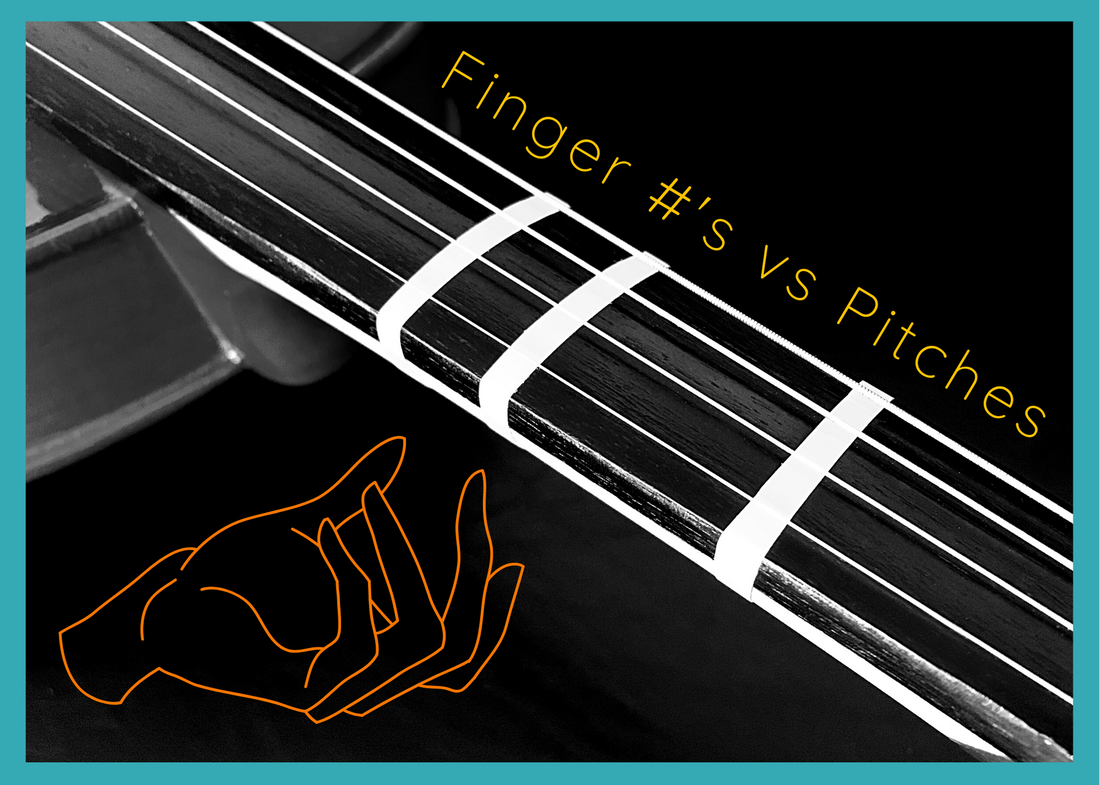 The pros of using finger numbers are that they are simple and clear. They also can segue nicely into using finger patterns. I am a proponent of teaching finger patterns even if using pitches over finger #s is the preference since they help train the whole and half steps while strengthening the mind-body circuitry. Since the finger patterns correlate nicely with the tapes on the violin fingerboard, it is easy to integrate them into the curriculum, especially at a beginning level. Another pro of using #'s is to benefit students with special learning needs. These students (i.e., dyslexic, or right-brain dominant learners), have minds that best connect with a # over a letter.
The pros of using the letter name of the note segue into a broader understanding of key signatures. This leads to understanding music theory, and ultimately teaches the universal language of music. I spent most of my teaching career using finger #s and have to wonder: Was my reluctance to embrace using pitch names a reflection of my struggles with music theory? I digress but bring this up since many of us had either very limited or unsuccessful music theory training. It was not until I was age 25 and did teacher training and teaching using the Music Mind Games music theory curriculum that I began to understand music theory. I recently discovered the Fantastic Finger Guides. I think they are fantastic- they offer a quick and economical solution to accurate finger placement and immediately help to code the language of music theory into the beginning level violinist. In 8 seconds, I applied the Fantastic Finger Guide. It went on smoothly and would be doable for students to apply independently. Now, a clear map of pitches appears on my fingerboard as well as easy to see finger numbers identified on the side of the neck (perfect to see from "rest position"). The product comes on a beginning version (with less information as not to overwhelm the beginning student) and an advanced version that includes more pitches and a quick visual guide for how sharps and flats work. Receive 10% off the Fantastic Finger Guides thru July 31, 2020 with coupon code MFYV2020.
Click HERE to learn more and order the Fantastic Finger Guides. Giveaway Contest - Win the Fantastic Finger Guides!!! Entering is easy, scroll down to learn how. 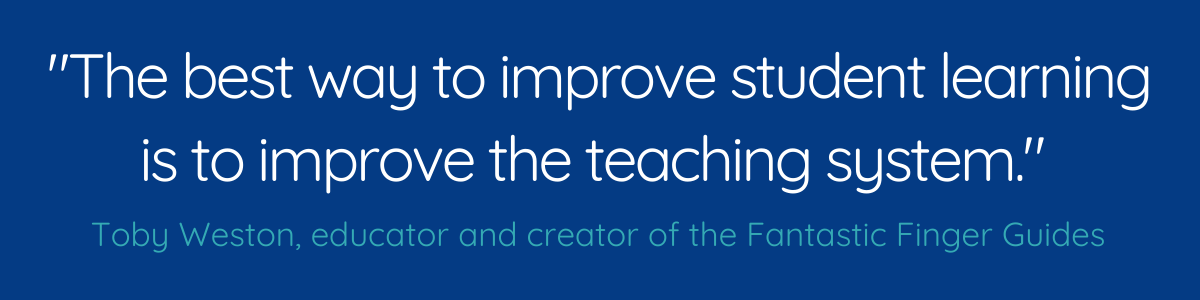 After almost a decade of teaching, Toby Weston, educator & creator of the Fantastic Finger Guides asked himself: Why do we use finger tapes when first learning to play string instruments such as the violin, viola, or cello? Is there a better way than finger tapes to get our beginners playing correctly with musical confidence? Learn more about why using pitches instead of finger numbers is empowering to the learning process below by guest blog post author Toby Weston. 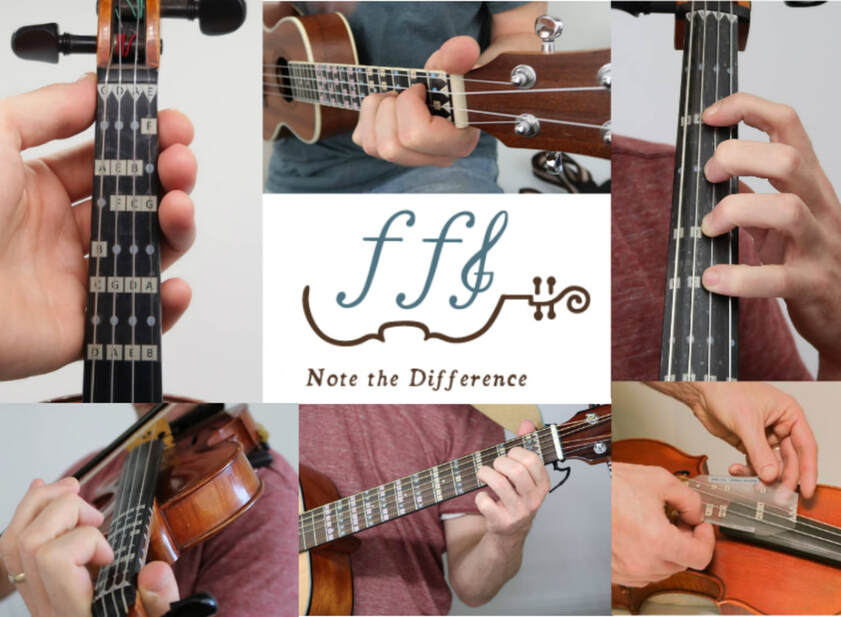 I have learned from teaching middle school music for the past 12 years that the best way to improve student learning is to improve the teaching system. I wondered if there was a better way to teach than with finger tapes because finger tapes don't provide sufficient musical information to help the student grow musically smarter and they are a very abstract teaching tool. I was concerned that by using finger tapes, my students were labeling the sound only by its physical location and not coding the actual musical language. At one point I used different color tapes for different locations: 1st finger was red, 2nd finger was white, and the 3rd finger was blue. After a year of playing, most students using this system will code the location as 1st finger on the red tape on the A string, but not code the letter name nor musical language. By the time these students reached the 7th grade, many had deficiencies in understanding their fingerboard in terms of a musical alphabet. After years of using finger tapes I had a breakthrough in the Fall of 2017: Why don't we just put the letter names on the instrument? 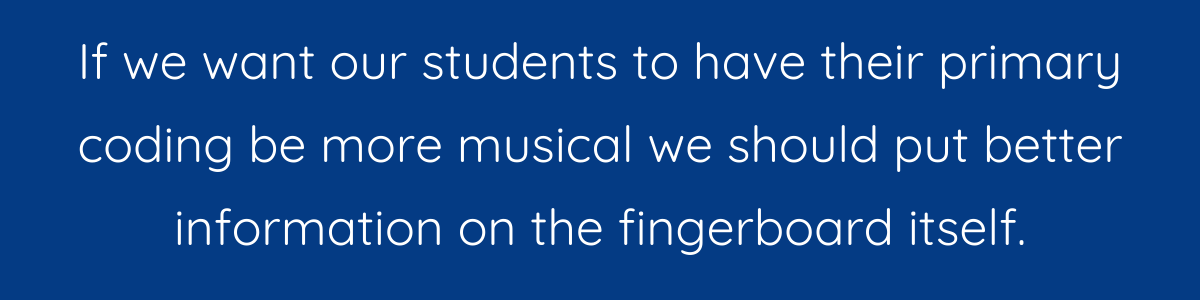 This way the student has the information needed to move forward in the music. When a student practices on their own they build correct muscle memory for spacing and also musical alphabet memory. This leads to gaining confidence in their playing without their teacher present. The student can code the music alphabet as their primary thinking versus finger tapes that are too abstract and don't provide any musical information. I ended up creating the Fantastic Finger Guides to solve this problem for my students. I created the D Major Beginner Guide for my first-year students and the All Notes guide for my second-year students. When students are beginning to learn the violin, less is better thus the rationale for a more simplified finger guide. Receive 10% off the Fantastic Finger Guides thru July 31, 2020 with coupon code MFYV2020. Click HERE to order the Fantastic Finger Guides. 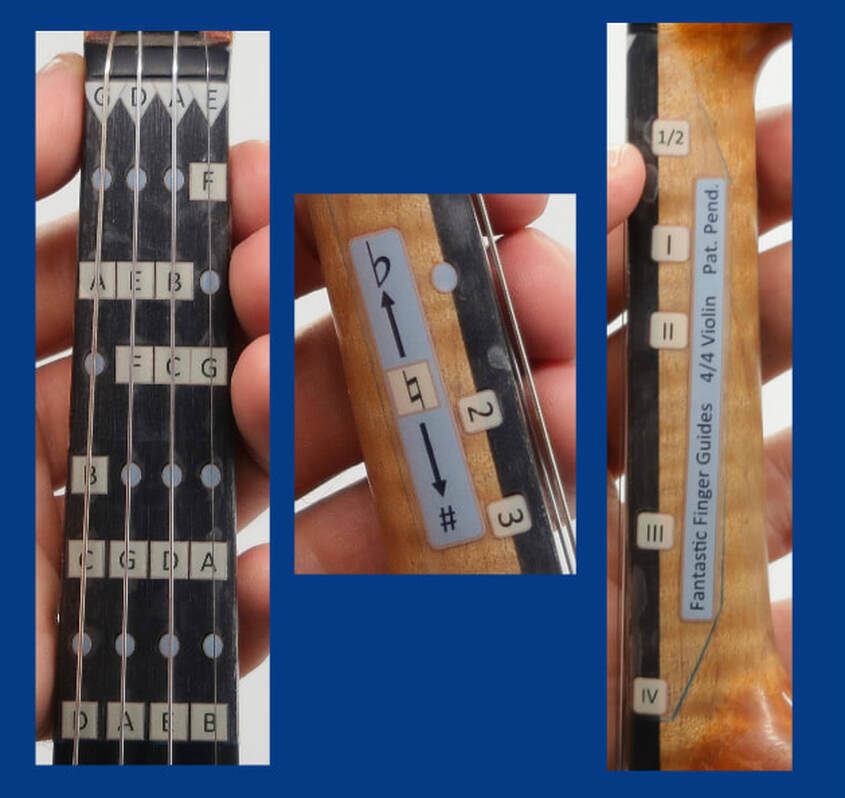  How To Enter the Fantastic Finger Guide Giveaway Contest:
Do you know what finger patterns are? If you have not started finger patterns yet, then today is the day! It will take you about 4 minutes to learn the finger patterns and then 1 minute/day to practice. You will benefit immensely from mastering finger patterns and they will help you build technique, make music theory applicable to violin playing and aid you in learning your repertoire faster. Keep scrolling to learn more. 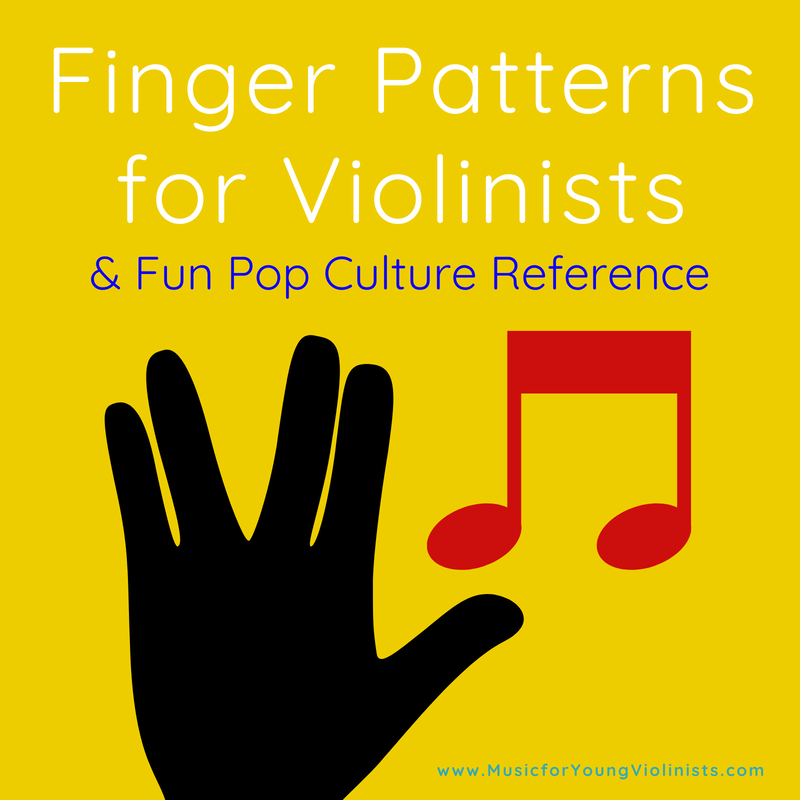 The best way to learn finger patterns without an instructor is thru either a chart or a tutorial video (like the ones below) . I like to teach them in the sequence displayed below and include the less common finger patterns of 1-2-3 and 2-3-4 together as well as all fingers together (half steps) and all fingers apart (whole steps). Once you have these mastered, the next step is to start applying them to your music. Now that you are thinking in terms of half-steps and whole-steps, mark these into your music so the concept starts to click. After a while of using finger patterns, you will notice you learn pieces faster and have improved intonation. Did you catch the fun pop reference? Here are some hints: The sci-fi TV show and movies Star Trek & character Spock
Have a violin finger pattern tip?
Please let us know in the comments below, thanks! |
Categories
All
Archives
February 2024
AuthorHi! It's me, Heather. I absolutely love working on the Music for Young Violinists project and all the many facets: blogging, website, music, teaching materials, freebies, videos, newsletter and giveaway contests. The best part is connecting with you so feel free to drop me a line. You can learn more about me on the "ABOUT" page. Thanks! |
||||||||||||||
 RSS Feed

© COPYRIGHT 2015. ALL RIGHTS RESERVED.