
|
After spending decades teaching and hours every day watching how the body's posture impacts the instrument's sound, I can not stress enough that the body is the first instrument. One of the most common problems is too much activation in the shoulders. Learn 3 innovative ways to train and teach the release of muscles in the shoulders in this blog post below. 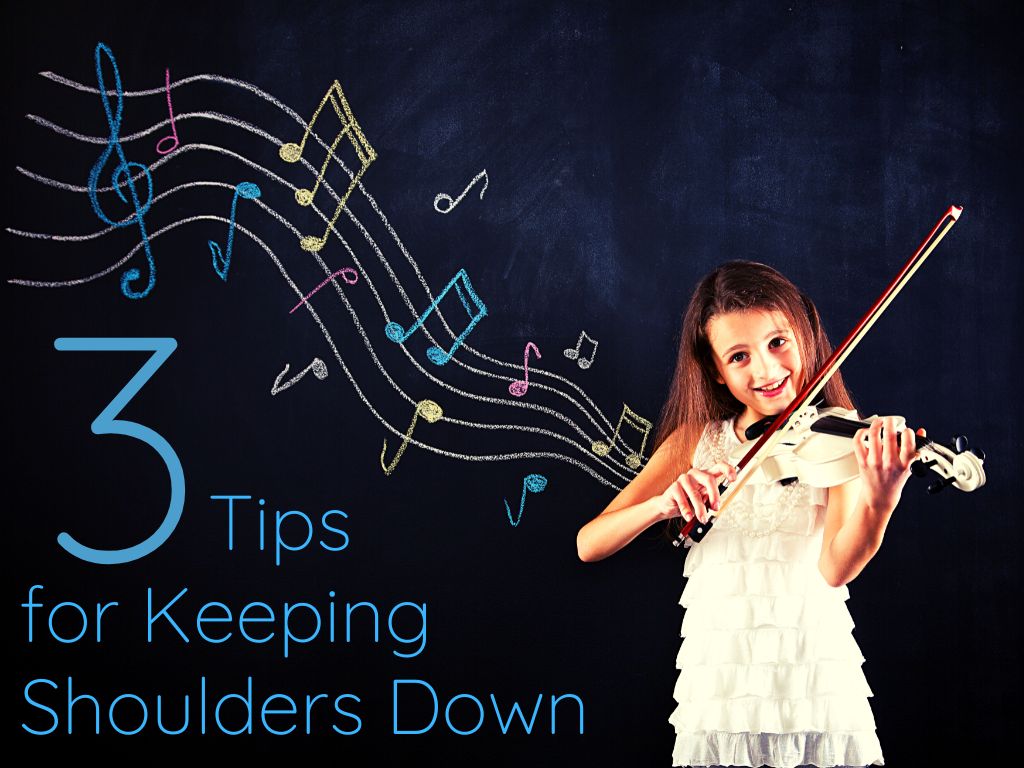 When we play the violin, both shoulders tend to tighten up and cause negative issues in our playing. Here are 3 tips to help violinists gain awareness in their shoulders and keep their violin playing healthy. 1- PRACTICE LAYING DOWN This is silly and awkward BUT highly effective. The laws of gravity will help a violinist feel a naturally aligned state in their body when they play laying down. Laying down while playing the violin is an incredible tool for the following three techniques: 1-Teaching the neck to release tension. 2- Supporting the shoulders in finding the base of their sockets. 3- Getting the knees to soften up. Young children love this because it feels like a novelty, however, this practice technique is appropriate for players of all ages and levels. Laying down while playing the violin will create a very unnatural feeling in the bow arm and compromise the sound, but the long-term results of alignment and awareness are more than worth the short-term compromises. 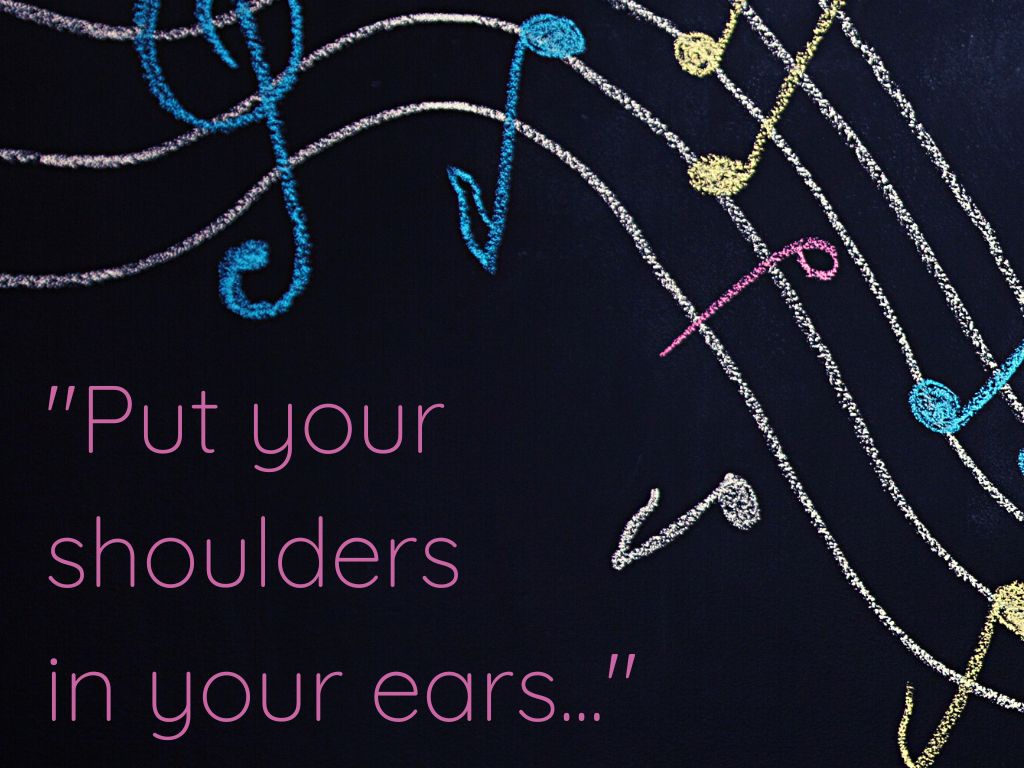 2- TIGHTEN UP: Go to the extreme to build awareness. Tighten up the shoulders as much as possible for 5 seconds and release. I use this verbal cue: "put your shoulders in your ears." After this intense use of muscles, the shoulders will respond with fatigue and rest by staying down in the bottom of their sockets. They may not always stay down for the rest of the lesson or practice session, but this exercise helps develop the necessary awareness to address tight shoulders and fix this problem in violin playing. In addition to creating muscle fatigue and natural inclination to release, this tip will also help a violinist realize the extreme of their range of motion so that they have more control in choosing where their shoulders go when playing. 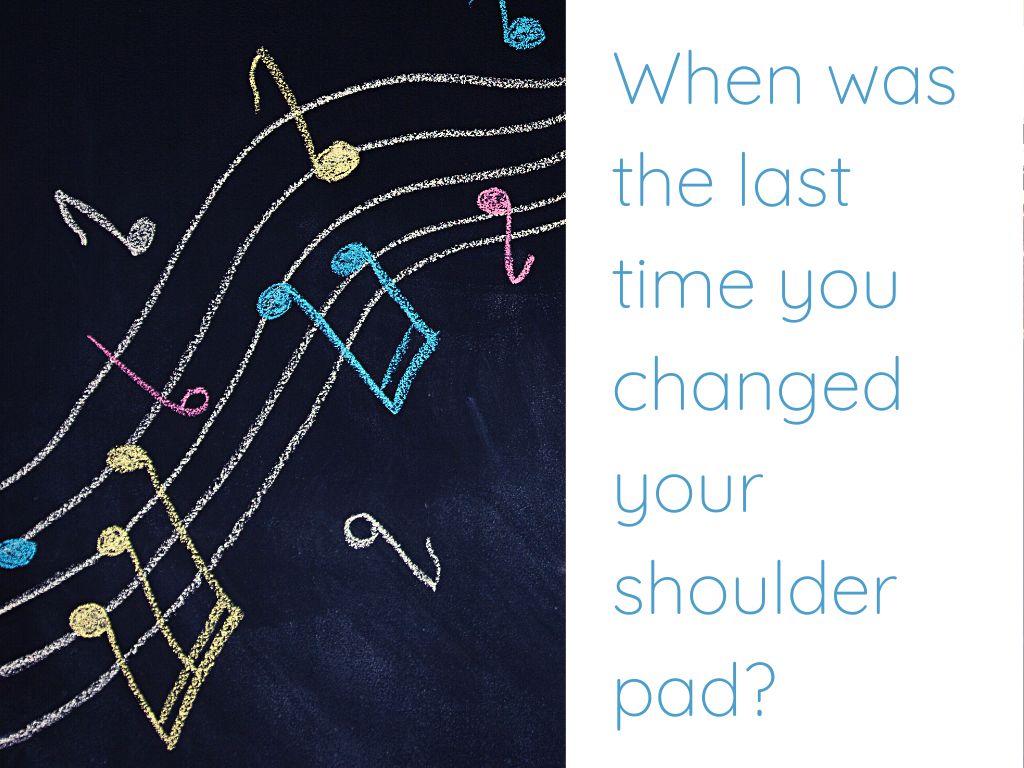 3- EVALUATE THE CHIN REST AND SHOULDER PAD SET-UP: When was the last time you changed your *chin rest or shoulder pad? Young students with growing bodies have different proportions in their neck-shoulder-arms approximately every six months and, their playing needs are also growing. Chin rests and shoulder pads need to be re-evaluated for younger players on a regular basis because of this continual physical and musical growth. Most of us do not live in a major metropolitan area with a large string supply store to experiment with a variety of gear for our violins. Instead of this, stay up to date and informed of the variety of chin rests and shoulder pads by subscribing to string catalogs (links below). Also, consider the Poly-Pad which I have featured on the “Things I Love” page. This economical shoulder sponge has extra curves than competitors pads and is one of my favorites. When I moved to Oregon 15 years ago I purchased a Poly-Pad in each size and it really helped me individually fit all of my students. Interested in more tips for playing the violin? Below are 3 M4YV tutorial videos on vibrato, pizzicato and bow hold "bunny flips" that share ideas to help you bring out the best in your music making!
How do you help your student keep their shoulders relaxed when they play the violin?
0 Comments
In this post you will learn what a double-stop for the violin is, the top 5 benefits of using double-stops and be able to download free double-stop PDF printables for beginner-advanced level violin. Double-stops on the violin are when two notes are played simultaneously and part of what makes the violin repertoire so thrilling, gorgeous, and sublime. See the image below for an example of how this would appear in a score. The term "double-stop" is a bit of a misnomer and can be confusing because nothing is actually stopping in the verb sense of the word stop (i.e., to cease or end). The term double-stop makes more sense when we think of "stop" as a noun referring to a location such as a bus stop. For violinists, the location refers to pitches on the fingerboard. When a request for more double-stop content from the M4YV project came to my inbox, I was an instant YES due to my captivation with this aspect of violin playing. I love double-stops so much that they are one of the reasons I play the violin! Double-stops are not hard, but they are different than playing on a single string. For some of the players here, it will be a new technique, which makes this the perfect time to remind us that new does not equal difficult, but without the proper mindset, new can be interpreted as feeling difficult. Keep reading to learn the 5 benefits of double-stops on the violin. 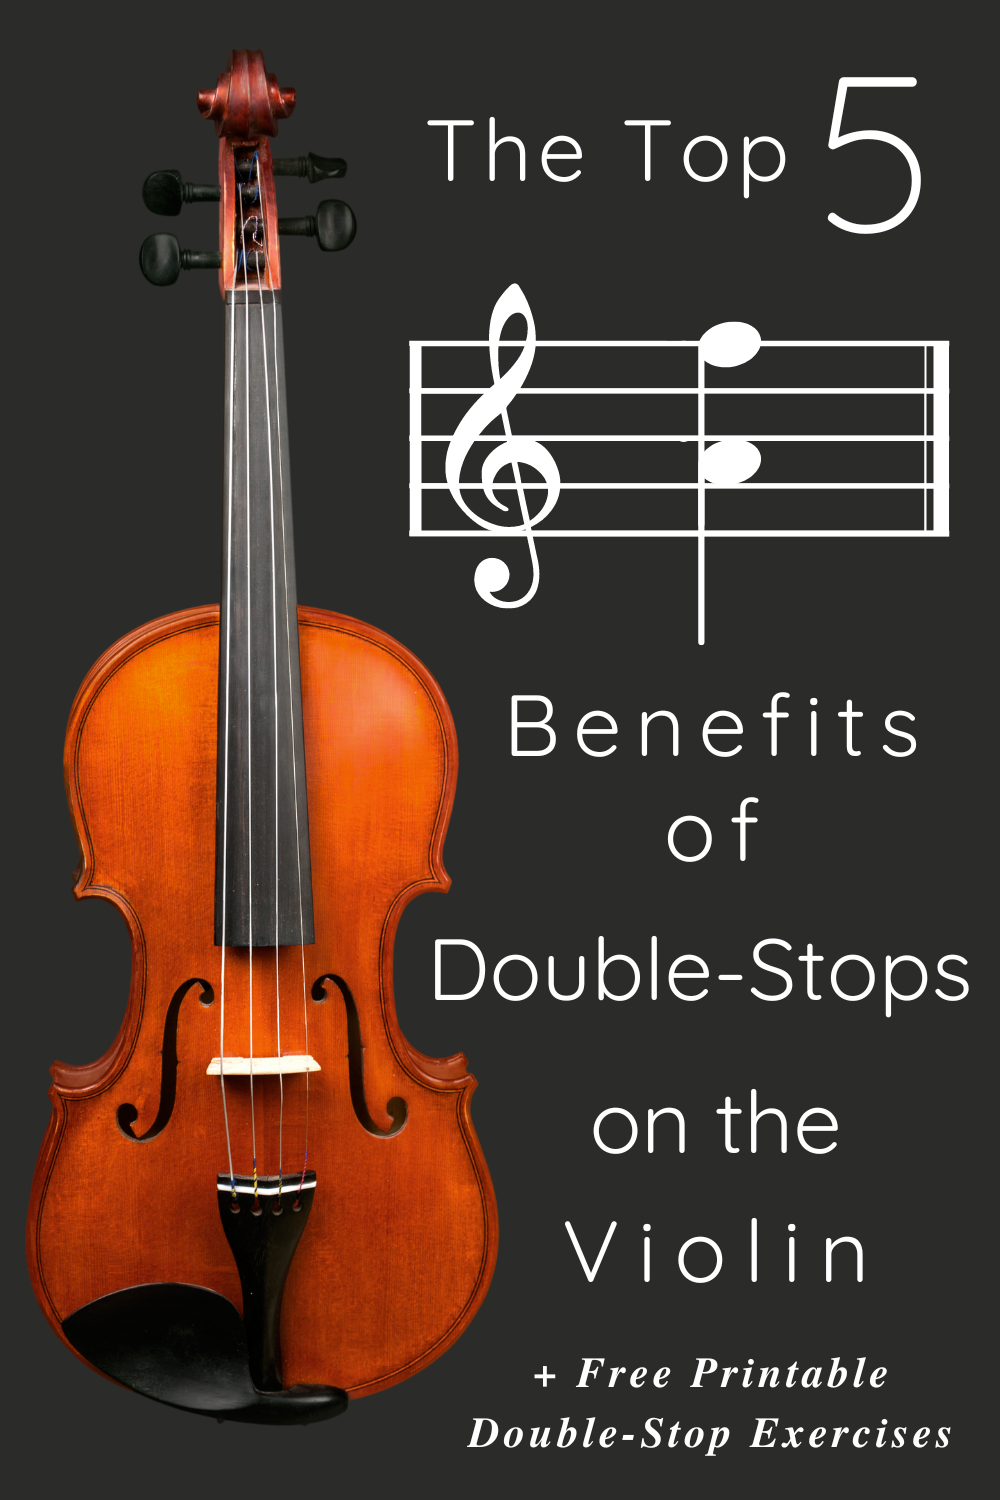 The Top 5 Benefits of Double-Stops on Violin:1- Improved intonation: Double stops help to hear pitches in relationship to each other, and this process leads to better intonation because intervals are more evident in the ear. 2- Learning block fingerings: Double-stops require using "block fingerings," where two fingers are placed on the fingerboard simultaneously. Block fingerings are more sophisticated than using a single finger at a time and help to develop skill. 3- Better understanding of whole & half steps: Double-stops fortify an understanding of whole and half steps because when using block fingerings, the fingers will feel the proportions of a whole and half step in relation to each other. 4- Advanced bow control: In the same way that double-stops require the left hand to use two fingers at a time, the right hand also needs to double it's playing requirements by refining it's control over two strings simultaneously. When we begin playing the violin, we work with focus to play just a single string at a time. When we start learning double stops, we exert focus to play two strings together with control and precision. 5- Advanced repertoire: The most magnificent repertoire composed for the violin uses double-stops, including but not limited to: J.S. Bach's 6 Sonatas & Partitas for Solo Violin, concerto cadenzas, and mesmerizing fiddle playing. Check out the videos below for some amazing examples of double-stops in violin repertoire.
Scroll down a bit on the page to find these FREEBIES to help learn and play double-stops. What are your favorite double-stop compositions?
Please share in the comments below. Violin playing is a dynamic and complex learning process that can be cumbersome when the syntax is not built upon existing concepts. Learn 3 misnomers in violin teaching and how to upgrade your languaging for better results. 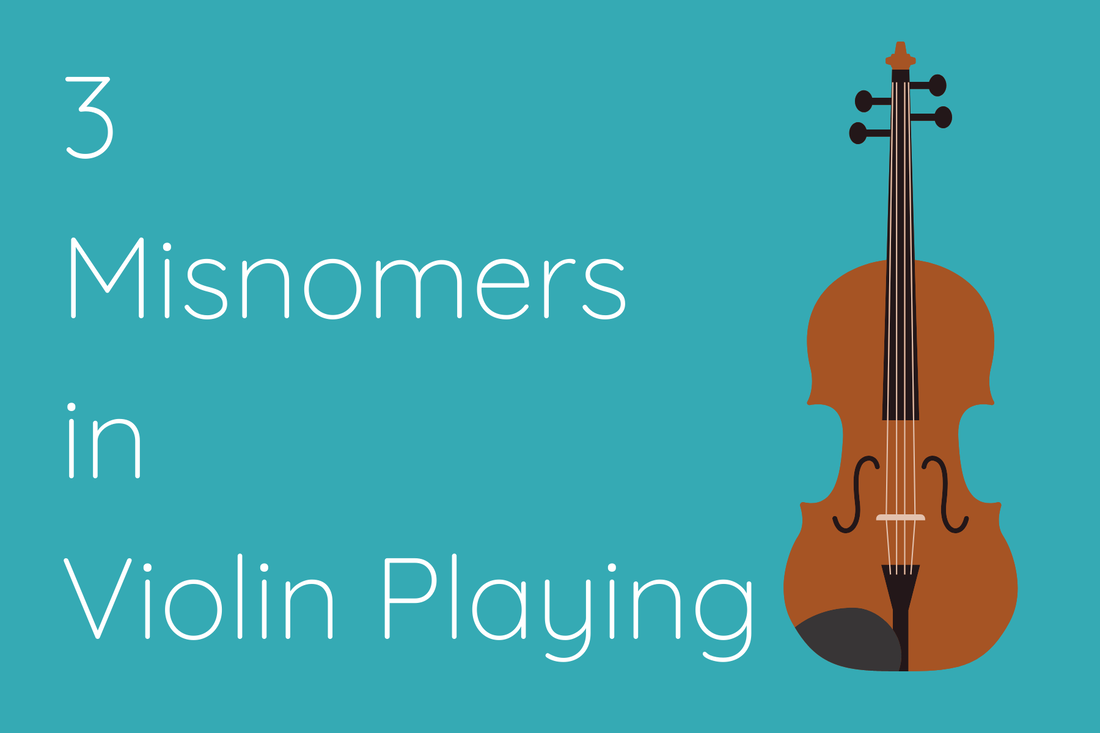 Down Bows & Up Bows: Since the bow moves in lateral directions, left and right, the actual words "up" and "down" do not correlate with the motions and can confuse both young violinists and their parents during home practice. For violin players having difficulty integrating the words "down" and "up" into their playing, consider substituting the words "open" for down bows and "close" for up bows. Open refers to the arm opening up straight for what is termed the down bow, and close refers to abducting the forearm in what is termed an up bow. The Chinrest: I always told my students that if I could go back in time, I would change the term "chinrest" to "jawrest" since it's a misnomer. In reality, the chin is not involved in violin placement, and it is the jaw that contacts the face of the violin. This terminology has befuddled more than one student in my career, and they tried defeatedly to place their chin there. It is useful to point out this discrepancy so that the violin posture is not inadvertently misinterpreted during home practice. Learn about my favorite type of "chinrest" HERE. High and Low Fingers: Words like "high" & "low" are confusing to beginning violin students while still learning how to play the instrument because these words are associated literally and do not yet connect with pitch vibrations. Consider altering your instruction to be a description location like "closer to the bridge (or nose)" and "closer to the scroll" instead for more efficient results in the initial stages of learning these distinctions. Learn a neat trick for teaching "low" 1st fingers HERE. Have a languaging teaching tip?
Please share in the comments below. Did you know there are 4 ways to do the "spider crawls" on the bow? Learn all 4 ways, neat tricks for teaching and learning these and get introduced to the ultimate challenge with a short tutorial video below. 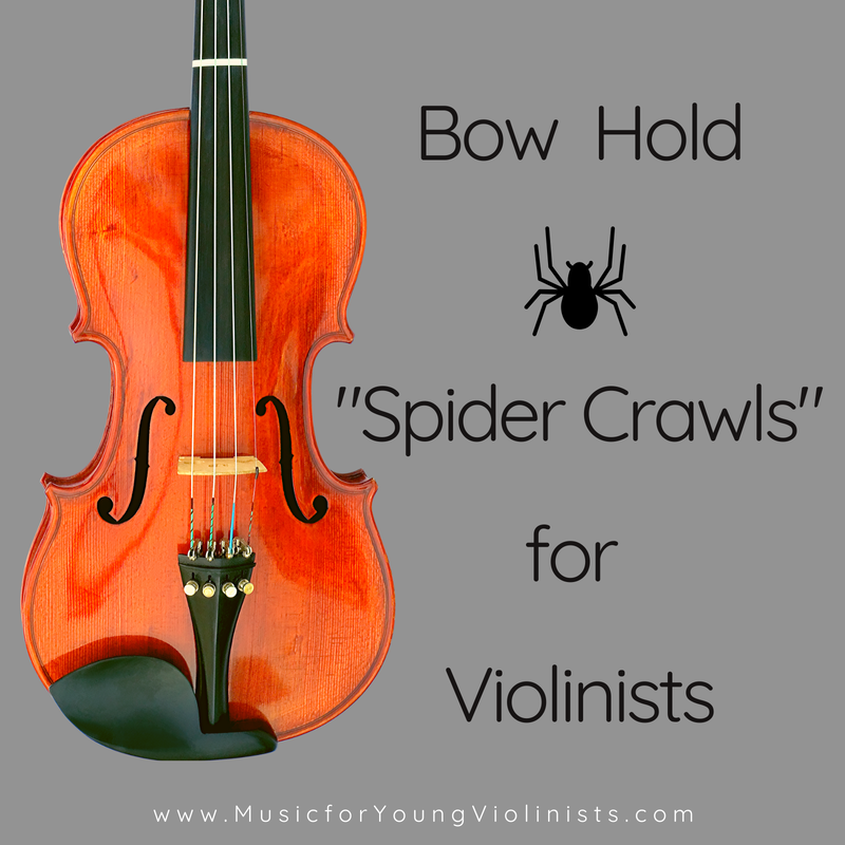 Guest author Adrian Martinez helps tackle one of the most popular questions - how long does it take to learn how to play the violin?  How long does it take to learn the violin? We’re going to start by responding to this question with what is perhaps the most frustrating answer: it depends. First, it depends on what you mean by “learn.” Within a day, you might possibly be able to play a few notes - within a week, you might be able to play those notes in a way that kind-of-sort-of sounds like a song. You might then say you’ve “learned” the violin. On the other hand, if you’re asking how long it takes to master the violin, you might fall back on Malcolm Gladwell’s 10,000 hours, or you might be really impish and say that absolute mastery is impossible. After all, music is ever-growing and changing, and even micro-adjustments to technique can produce totally different sounding songs. We might then look at the extraordinary variety inherent in humankind. There are so many different students, each with different levels of experience. Someone who has played the guitar before might find it easier to develop a left-hand technique than a total novice. On the other hand, another guitarist might find the lack of frets daunting and disorienting, which could curb their progress. 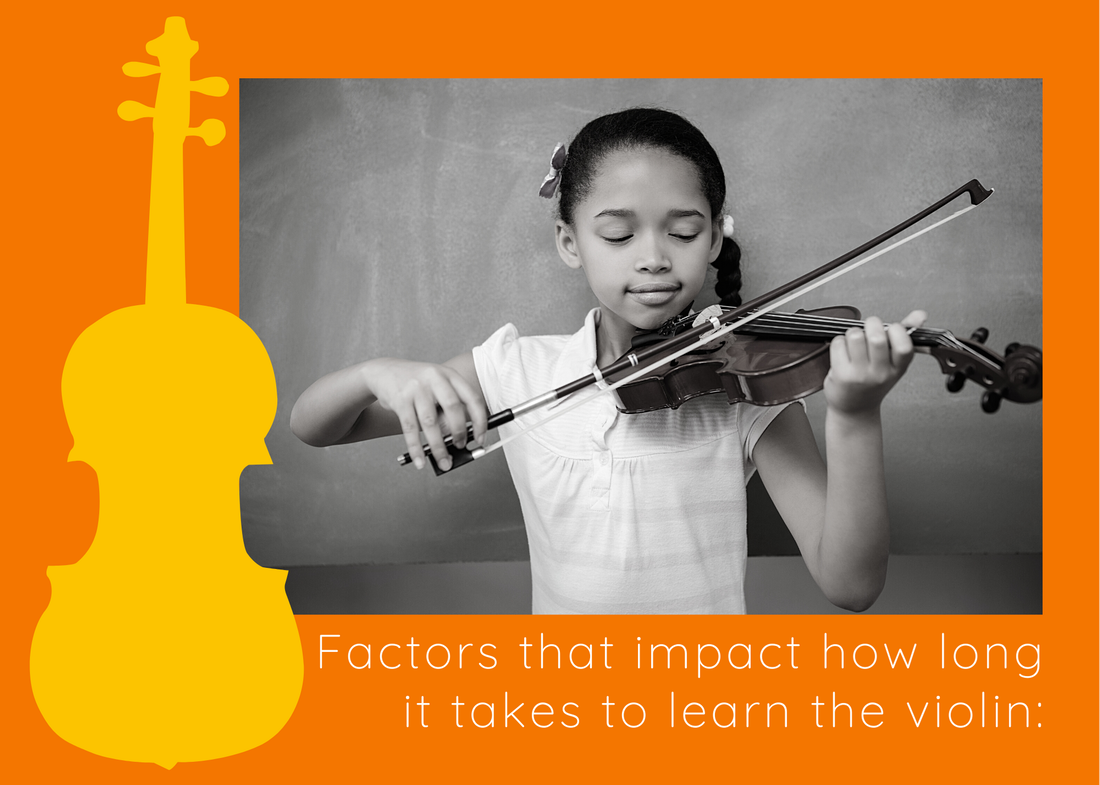 How you’re learning can also be a pretty important factor. Whether or not you’ve got a personal instructor, if you’re taking online music lessons, if you have access to sheet music, or you’re just trying to guess for yourself. Other factors include:
Of course, you’re not here reading this blog post for the answer “it depends” - though elaborating on why it depends can help you narrow down what your goals and potential barriers might be. We’re going to make some assumptions, then. We’re going to assume you’ve never played an instrument before, you don’t know any music theory - that you’re basically a complete beginner. We’re also going to assume you practice for around 5-6 hours a week (an hour a day with a day or two off or 45 minutes every day) and that you have a teacher.  Month 1:The first month is all about the absolute basics. You’ll learn how to hold the violin and the bow (and yourself). You’ll also learn the basic anatomy of a violin. It’s unlikely that you’ll use the fingers on your left hand during the first month; instead, you’ll focus on your bow technique. You will do exercises like this & this (click on the links for some fun YouTube tutorial videos from M4YV). You’ll also begin to learn the basics of music theory - mainly how to read sheet music. Learning about music theory is an ongoing discipline. There’s an incredible depth, diversity, and richness to theory, especially once you start going outside of the Western canon, so there’s a lot to learn here.
|
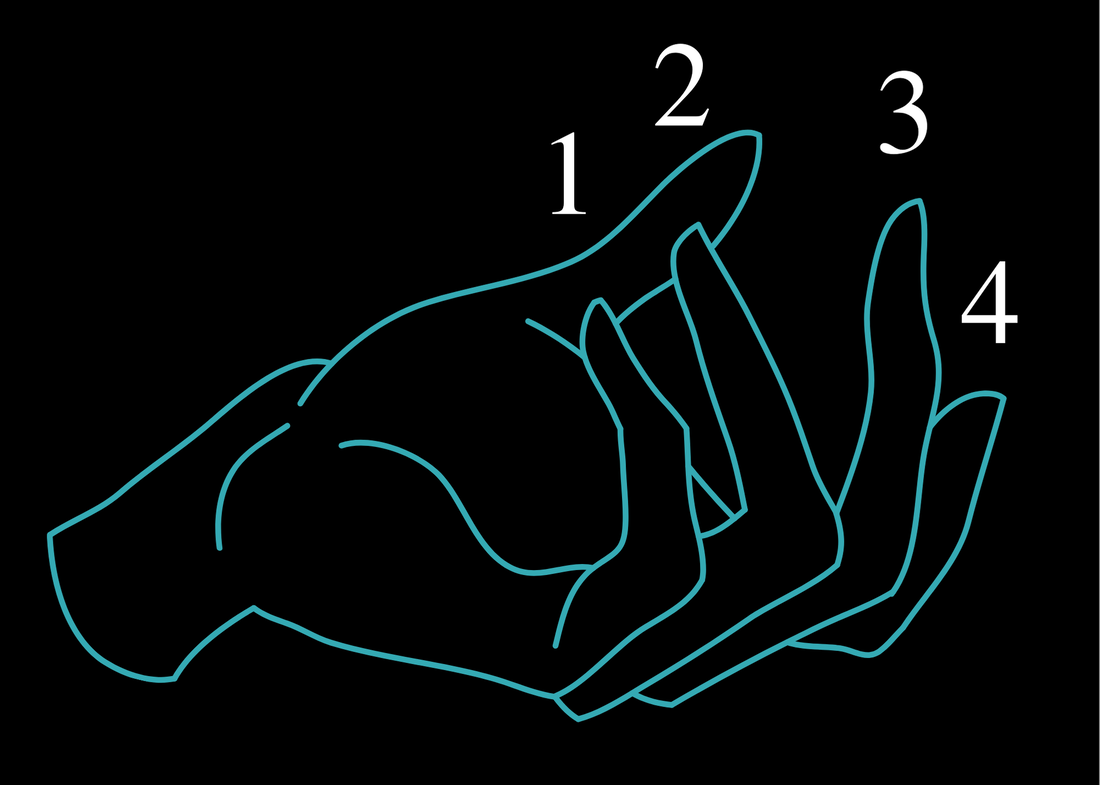 |  |
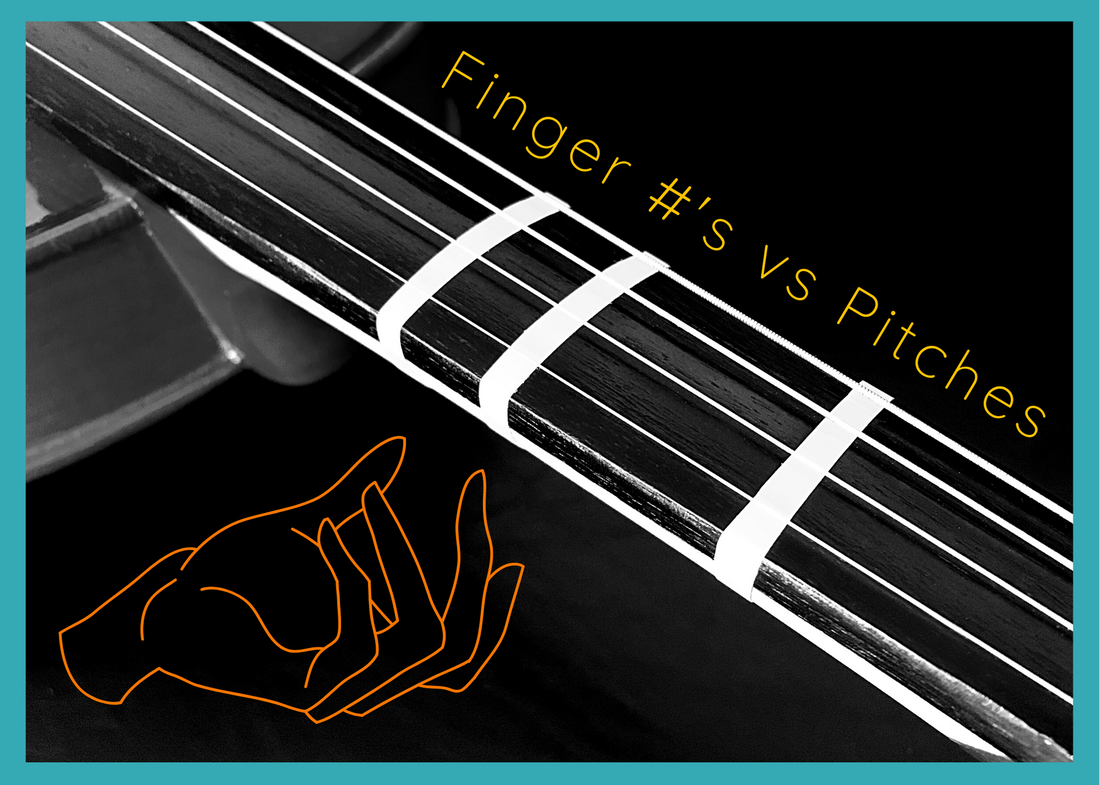
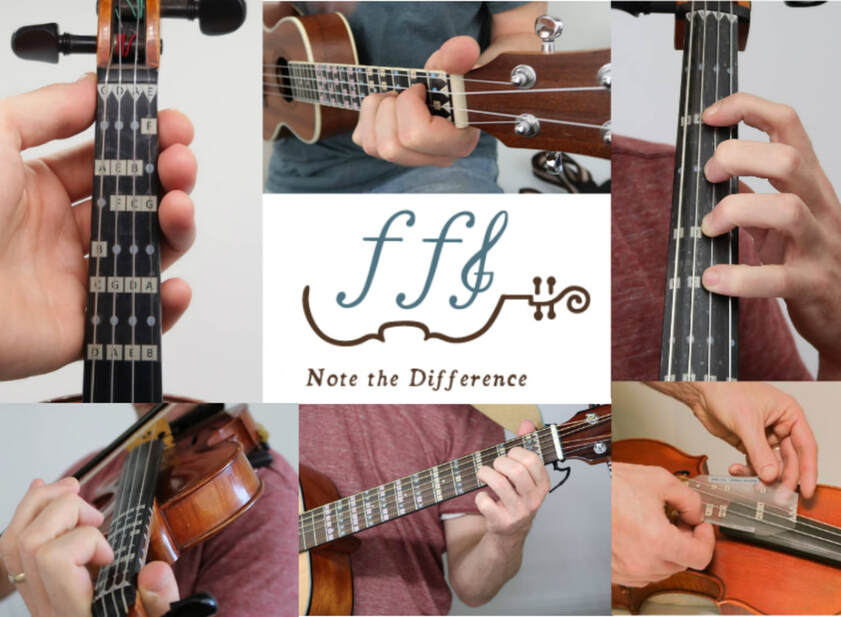
I spent most of my teaching career using finger #s and have to wonder:
I digress but bring this up since many of us had either very limited or unsuccessful music theory training. It was not until I was age 25 and did teacher training and teaching using the Music Mind Games music theory curriculum that I began to understand music theory.
I recently discovered the Fantastic Finger Guides. I think they are fantastic- they offer a quick and economical solution to accurate finger placement and immediately help to code the language of music theory into the beginning level violinist.
In 8 seconds, I applied the Fantastic Finger Guide. It went on smoothly and would be doable for students to apply independently.
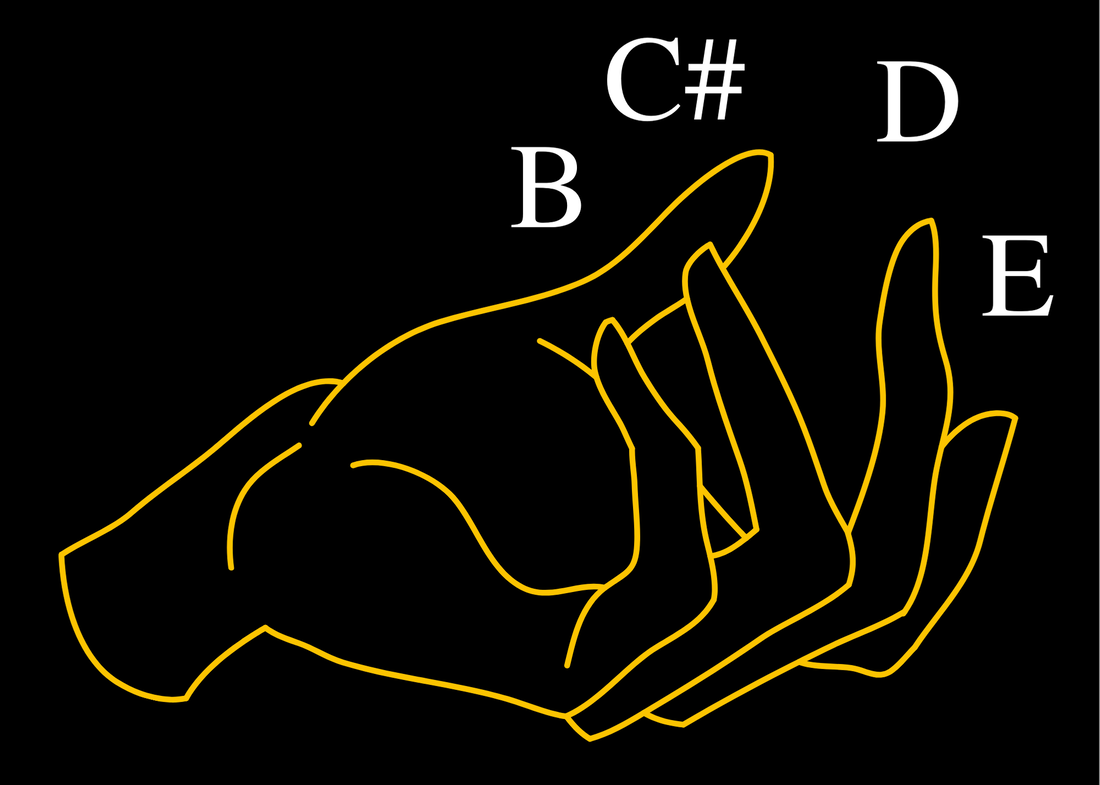
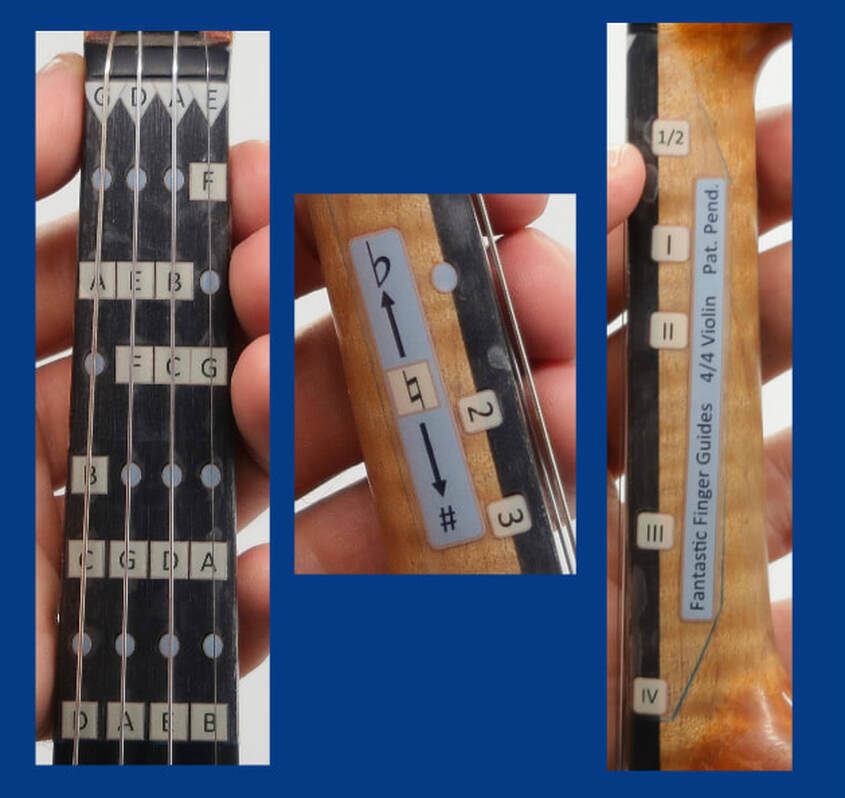
Now, a clear map of pitches appears on my fingerboard as well as easy to see finger numbers identified on the side of the neck (perfect to see from "rest position"). The product comes on a beginning version (with less information as not to overwhelm the beginning student) and an advanced version that includes more pitches and a quick visual guide for how sharps and flats work.
Click HERE to learn more and order the Fantastic Finger Guides.
Entering is easy, scroll down to learn how.
Why do we use finger tapes when first learning to play string instruments such as the violin, viola, or cello?
Is there a better way than finger tapes to get our beginners playing correctly with musical confidence?
Learn more about why using pitches instead of finger numbers is empowering to the learning process below by guest blog post author Toby Weston.
I wondered if there was a better way to teach than with finger tapes because finger tapes don't provide sufficient musical information to help the student grow musically smarter and they are a very abstract teaching tool.
I was concerned that by using finger tapes, my students were labeling the sound only by its physical location and not coding the actual musical language. At one point I used different color tapes for different locations:
1st finger was red, 2nd finger was white, and the 3rd finger was blue.
After a year of playing, most students using this system will code the location as 1st finger on the red tape on the A string, but not code the letter name nor musical language. By the time these students reached the 7th grade, many had deficiencies in understanding their fingerboard in terms of a musical alphabet.
After years of using finger tapes I had a breakthrough in the Fall of 2017:
This way the student has the information needed to move forward in the music. When a student practices on their own they build correct muscle memory for spacing and also musical alphabet memory. This leads to gaining confidence in their playing without their teacher present. The student can code the music alphabet as their primary thinking versus finger tapes that are too abstract and don't provide any musical information.
I ended up creating the Fantastic Finger Guides to solve this problem for my students. I created the D Major Beginner Guide for my first-year students and the All Notes guide for my second-year students. When students are beginning to learn the violin, less is better thus the rationale for a more simplified finger guide.
Click HERE to order the Fantastic Finger Guides.
- Comment below
- State if you are a "STUDENT" or "TEACHER"
- Write in your learning preference: NUMBERS (for finger #s) or LETTERS (for pitches).
- i..e. STUDENT & Numbers or TEACHER & Letters
I had never even heard of this thing called Zoom.
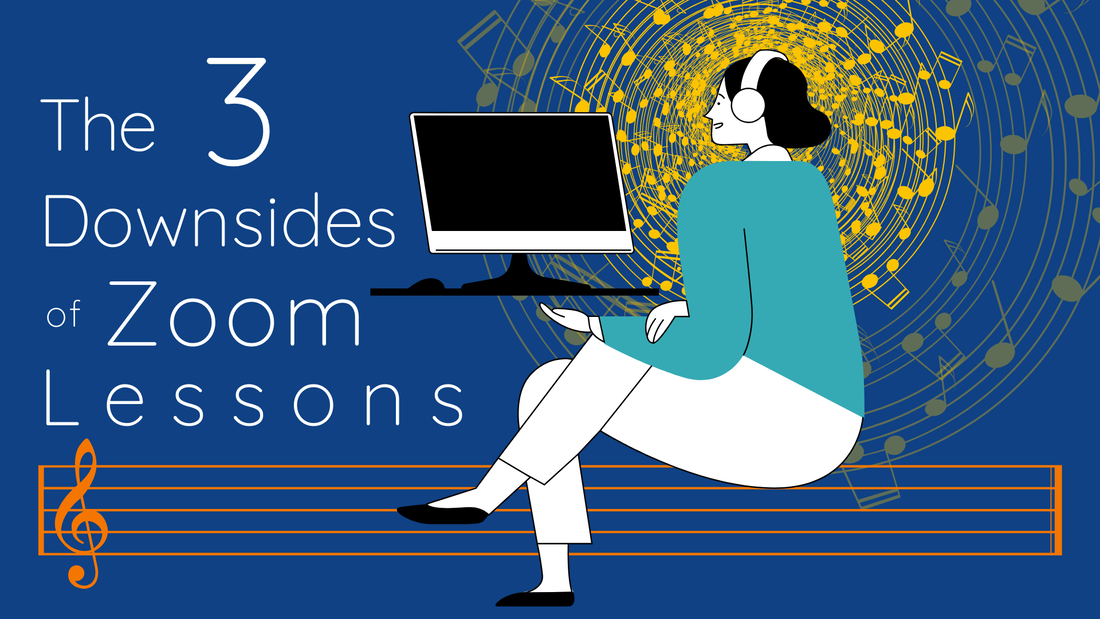
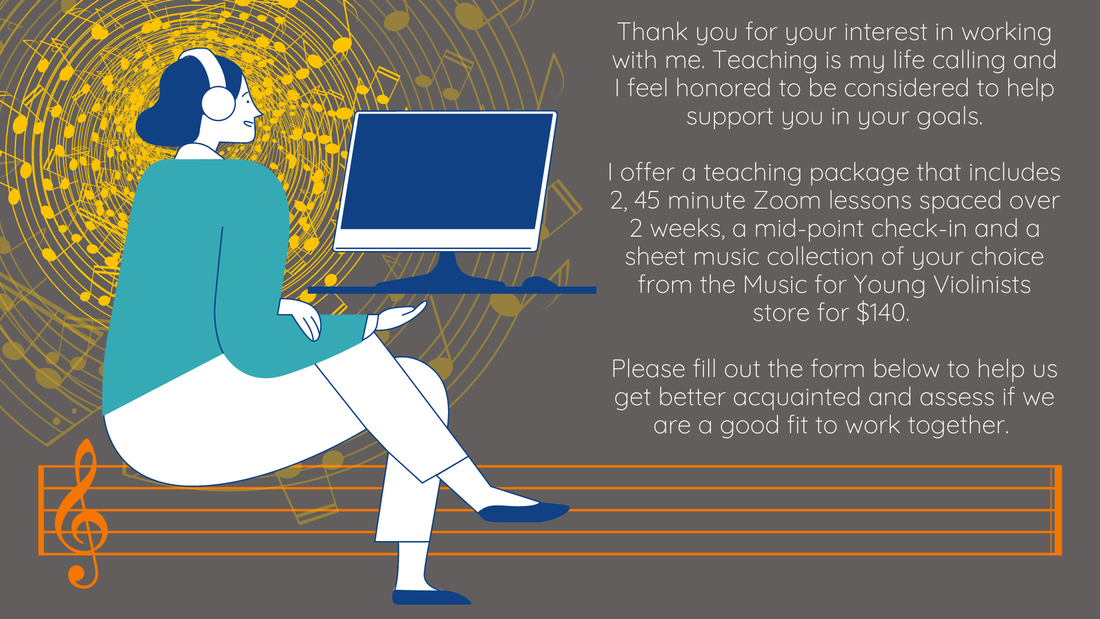
Fast-forward to June 2020 and I now use Zoom 7x a week to take classes, teach violin and capoeira, and attend meetings. Scroll down to learn the top 5 benefits & 3 downsides of Zoom violin lessons.

I know now how to set-up a recurring session, place the camera, adjust the lights, and easily adjust the audio and camera in a matter of seconds.
I learned a new skill and this will open future options for connecting and has expanded my concept for how I can teach. The options are endless and I now know that if a student or myself ever has a situation where we can not meet in person we can continue our work and fulfill our vision.
Did you see on the Zoom lesson that their music stand is not properly elevated to facilitate proper posture?
Does your student suffer from distractions?
Can you recommend a more ideal place in their home for learning based on what you observe in their environment?
Did you discover that they have a piano you never knew about and now you can integrate this into their curriculum?
The piano keyboard is the best way to solidify music theory concepts, how exciting!
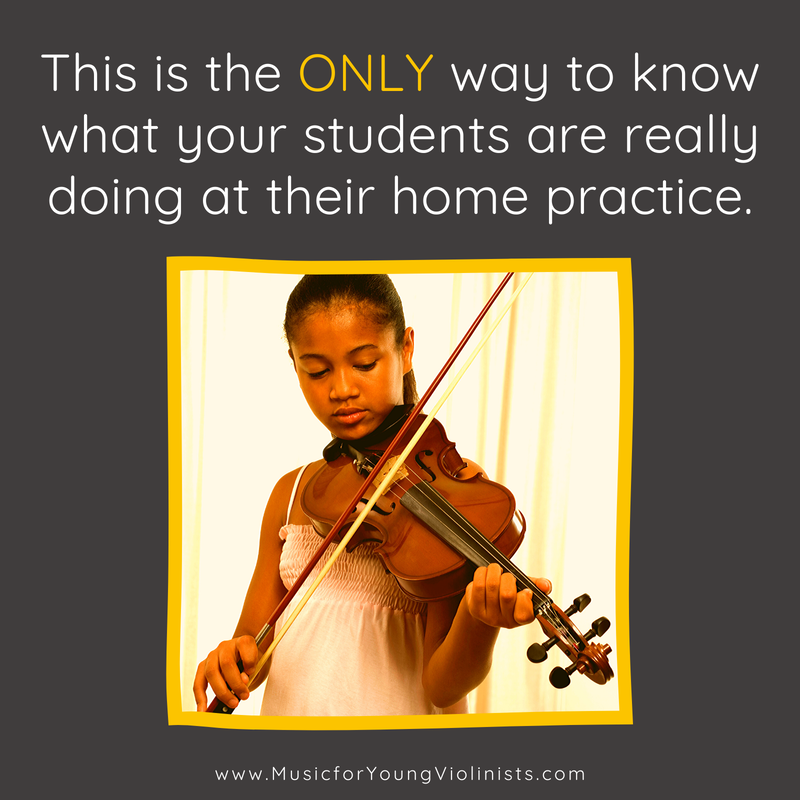
We must remember that we only see our students for 30-60 minutes every week and the rest of their learning takes place in their home. Gaining insight into the student's home learning environment can solve mysteries (such as the posture circumstance listed above) and help you make suggestions to better a student's core learning environment.
- Posture
- Bow Angles
- Bow placement
- Use of bow
- Finger placement
I have always said that the reason it is so easy for me to teach the violin is that I get to see everything so clearly. Video lessons helped to spotlight this factor and I made use of this in my curriculum. This also correlates with the 4th benefit of Zoom lessons listed next.
Viewing oneself play the violin is one of the best ways to improve. Students should be doing this regularly but as teachers, we get busy and do not always uphold this expectation. Also, this convenience relieves the student (or parent of the student) from taking notes during the lesson.
Secondly, without spending so much time driving and in activities, most of us (teachers and students) are receiving a well-needed rest. Our bodies need this extra time to repair and stay healthy.
I hope that we are all cognizant that health is one of our highest values and this experience will forge in us a commitment to take better care of ourselves in the years to come. Connecting with this value is a blessing that will serve us thruout the rest of our lives and something to be grateful for.
The limitations of the microphones and speakers in the computers we use to do Zoom lessons remove this life-infused quality of beautiful violin tone and frankly put, it's painful to listen to at times. On a basic computer, everything above a certain range or volume entirely cuts out and all violin sounds are compressed. Having a microphone or specialized headphones can help but nothing will ever compare to the beauty of live violin tone.
- No screen time whatsoever for children under 2
- One hour a day for children 2 to 12
- Two hours a day for teens and adults
We love the violin because it's slow and it connects us to a time period where things were slow. The instant gratification offered by my screens dulls our dopamine receptors and may affect the way mitochondria operate within cells. Educate yourself further about the negative impacts of too much screen time here.
Please share in the comments below. Thank you!
In this video (posted below) and correlating blog post I explain how I organized a week of watching my students practice and why this was such a powerful use of time.
On the following week, I brought my computer to my teaching studio and reorganized the space so I could sit at my desk. After explaining that I would be observing them practice, I was silent and typed up a personalized report for each student while they showed me how they practiced. We reviewed the report together at the next week of lessons and went over suggested modifications to their practice routine.
It was a heartfelt but shocking and humbling week.
1- What was actually expected of them.
2- How to execute the specific teaching points by themselves even after covering in repetition at their lesson.
((((((Deep Exhale from Me))))
It DOES NOT MATTER how great of a teacher you are and it DOES NOT MATTER how talented your student is.
IT MATTERS how they interpret the lesson information and practice in their own space and time.
The only way to check in on this is to actually watch them practice.
Win a Set of WonderThumbs!!!
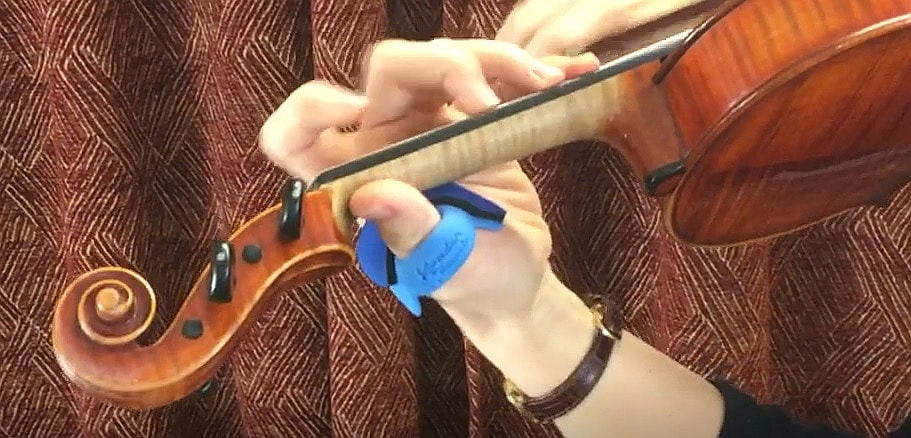
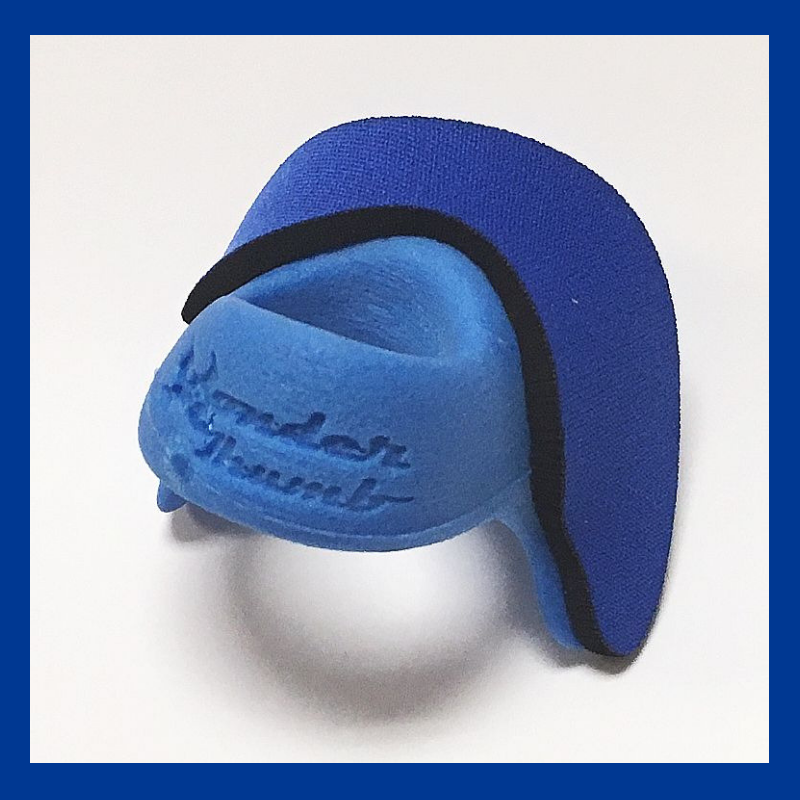
Lucky for us the creator was kind enough to donate a set to one of our lucky members. If you don't happen to be the lucky duck who wins, you can order these from the WonderThumb website or from Shar Music. They cost $24, and if you are thrifty like me, you may be on the fence for making this investment so I invite you to consider this price in comparison of 4 years of remedial violin lessons ($4,000+) if this is a product that could benefit you, your student or your child. Remedial lessons are costly and honestly, can be treachery for all parties involved. Just some food for thought as you consider this product.
I played around with several different sizes and as a 5"8 female with slightly larger sized hands am probably an L in the WonderThumb sizing. That being said, I tried all the sizes, and I like the XL for using backward which is a non-traditional use of the product, but it worked for supporting the neck of the violin. I also liked the smallest size for taking up as little space as possible. Just some ideas to consider when looking into these.

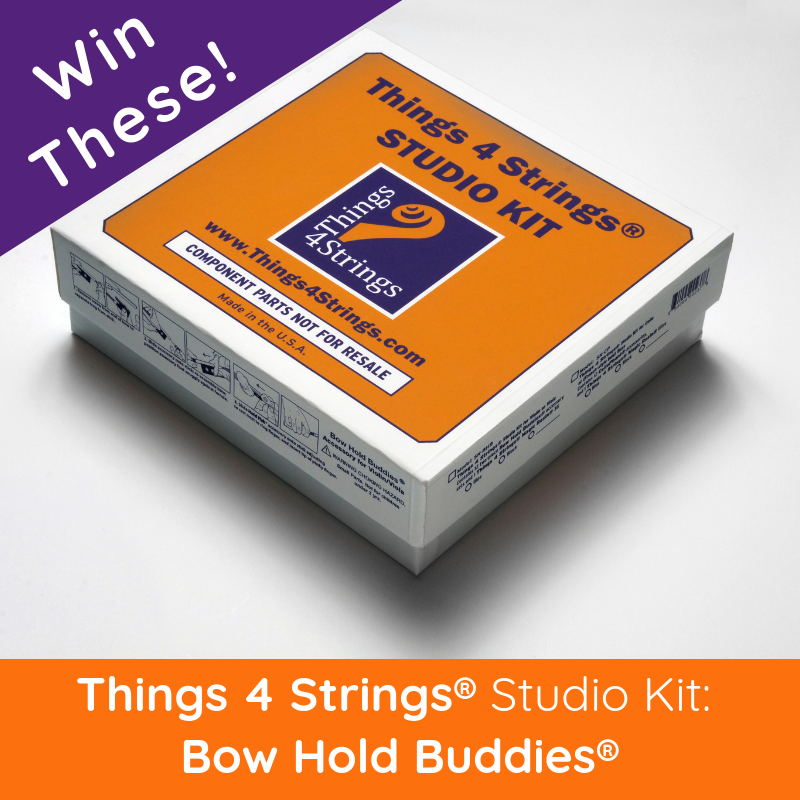
Things 4 Strings® Studio Kit:
Bow Hold Buddies®
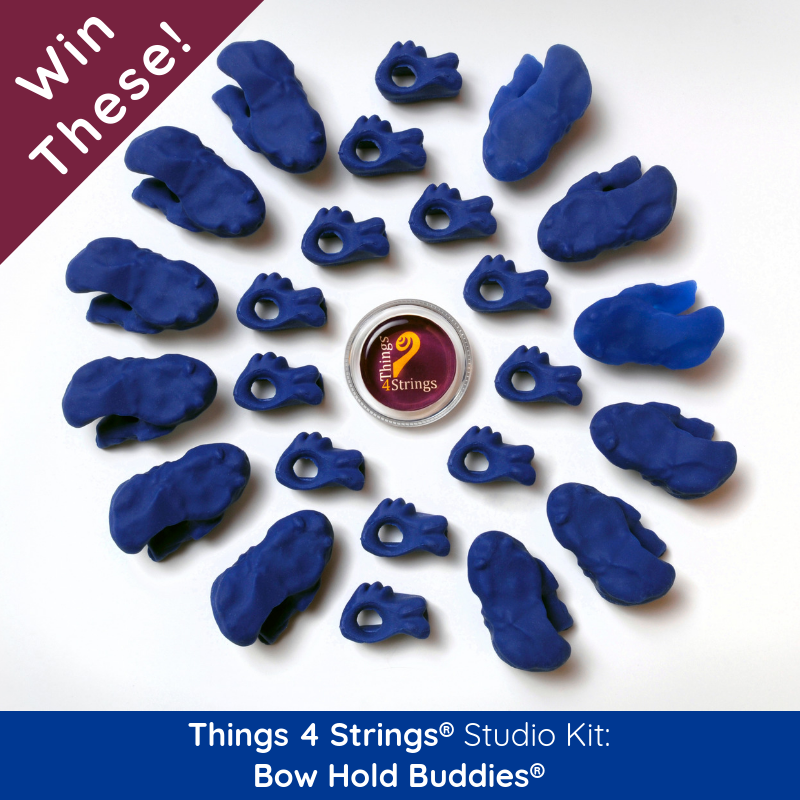
What if there were a way to have constant guidance supporting correct bow hand technique?
I have good news because this already exists with the Things 4 Strings® product solutions for learning and teaching the violin.
Things 4 Strings® accessories allow beginning string players the benefits of a relaxed and effective bow hold right from their very first lesson. Eliminating the need for constant bow hold corrections, these learning aids speed players to better tone and bow control. Made in the USA, these accessories are molded of the finest medical-grade silicone rubber, are durable enough for years of use by many students, and are suitable for all bow and hand sizes.
Launched in 2009, Things 4 Strings® patented accessories have rapidly achieved popularity with studio and classroom teachers worldwide. "Your products are really wonderful. I think the fish is for every beginning student a must!" - Nadya Canahuati, MM in Performance & String Pedagogy with Mimi Zweig
Accessory inventor and studio teacher Ruth Brons has been honored for her work advancing strings education by the American String Teachers Association (ASTA) with the prestigious Kudos Award. “A Things 4 Strings accessory dramatically reduce the time it takes students to master a proper bow hold. Students' energy can be redirected towards other challenges. Better skills, greater joy!” said Brons.
Winner will be chosen at random at the end of November.
Music for Young Violinists is honored to help spread the good news about the work of Things 4 Strings LLC. Learn more about these innovative solutions to support your music making here on their website HERE.
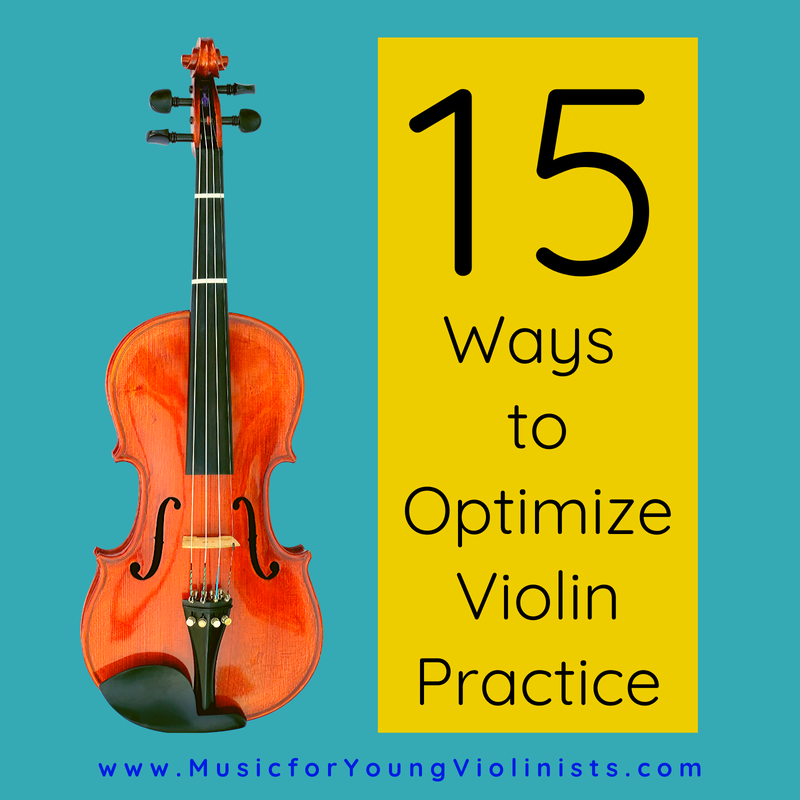
The 15 Ways to Optimize Violin Practice list and correlating video was created as a response to watching my students practice. Too often students were working hard but not progressing as far as they should because they were not practicing the right way. This list and video will help any violinist make better use of their practice time and reach their goals more efficiently.
Teachers - Use this to better support teaching technique, as a reference to share with your students and for professional development to expand your skills.
Students - Use this to help you practice more efficiently. Practicing smarter will help you progress faster. My passion is taking my 20+ years of teaching experience and helping you know the fastest path to success through the trials and errors I had working with students these past 2 decades.
Parents of Young Musicians - I know that one of the hardest jobs for you is keeping momentum in your home practice routine. Peruse the ideas on 15 Ways to Optimize Violin Practice and use the appropriate ones for your child to help keep practice creative, fresh and engaging with some new ideas.
Print out the list below and keep in your violin folder as a reference.
* Please note, some things on the list may not be clear to you until they are demonstrated in the accompanying video.
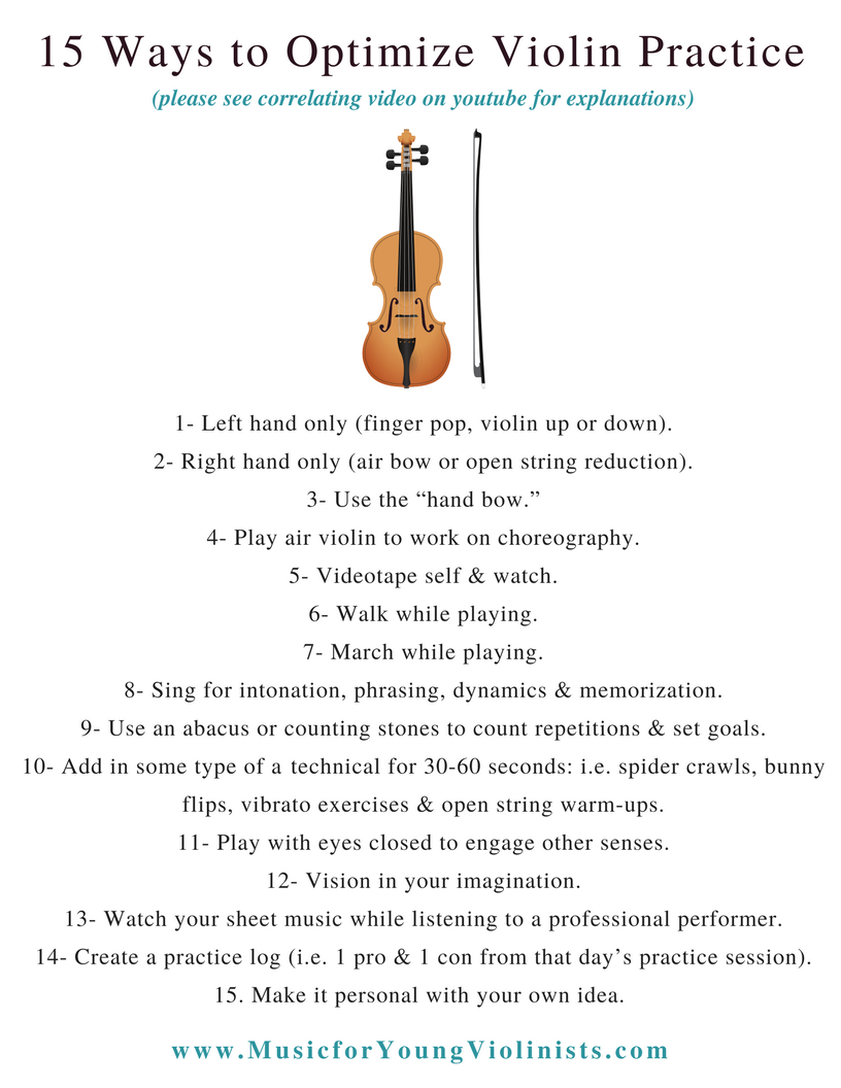
2- Right hand only (bow in the air, or make an open string reduction of the passage being worked on and play the open strings).
3- Use the “hand bow” by playing a passage with the bow hand's pinky side to feel and analyze string crossings (this is best explained by watching the video).
4- Play "air violin" (meaning no instrument) to work on the choreography and coordination involved in playing the violin.
5- Videotape self & watch. Many students are reluctant to view themselves since they focus on the parts of their playing they are dissatisfied with, but with a healthy mindset and specific goal to work on, this is one of the best ways to use your practice time.
6- Walk while playing. This will usually be awkward in the beginning but helps the player know if their playing is easy or not. If you can walk and play, this signifies that ample practicing has been achieved. Also, this helps keep the body relaxed overall to avoid tension and overuse injuries.
7- March while playing. Metronomes are fantastic, but the beat is interpreted thru the ear to the brain and then into the violin playing. A more sophisticated way to work on rhythm is to play while marching. It can feel complicated when first integrating this into violin playing but ultimately leads to better musicianship.
8- Sing for intonation, phrasing, dynamics & memorization.
9- Use an abacus or counting stones to count repetitions & set goals. Not only does this help achieve the intended repetitions, but it also serves as a release for the arms, so that discomfort due to muscle tension does not accumulate.
10- Add in some technical exercise for 30-60 seconds (i.e., the spider crawls, bunny flips, vibrato exercises & open string warm-ups). Click here for some ideas on what these can be. Continue adding in these at various intervals in a practice session.
11- Play with eyes closed to engage other senses.
12- Vision in your imagination. One way to do this is to lay down, which will also relax some of your back muscles that tend to get tight when playing the violin.
13- Watch your sheet music while listening to a professional performer.
14- Create a practice log to set goals for the practice session and reflect on what went well and what needs more attention next time.
15. Make it personal with your idea. Adding your unique idea to a practice session empowers you and engages you in the process. If you have a unique tip for optimizing violin practice, please add it in the comments below. We would love to hear from you!
Please share with us in the comments below, thank you!

 Download samples from this collection on the FREEBIES page for a limited time. 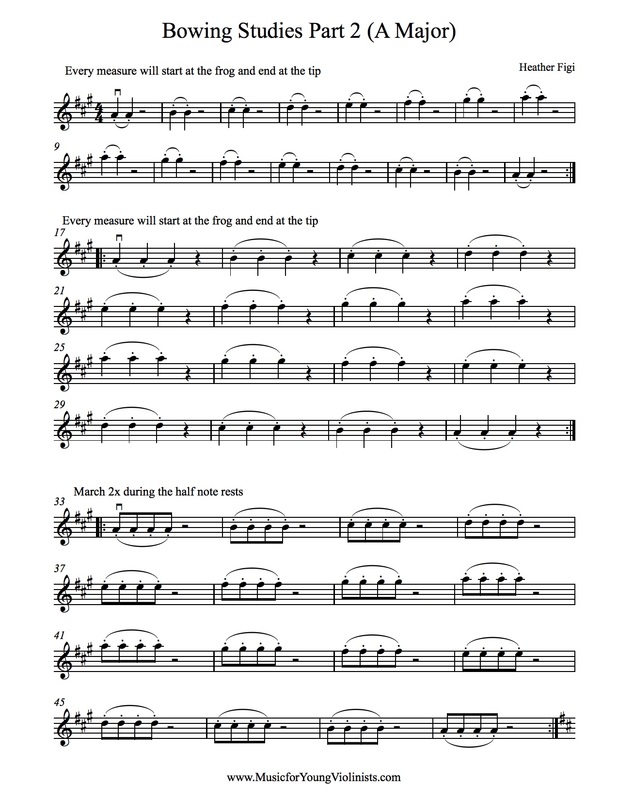 Download this sample from 7 Bowing Studies in the Keys of A, D & G Major from the FREEBIES page for a limited time. | 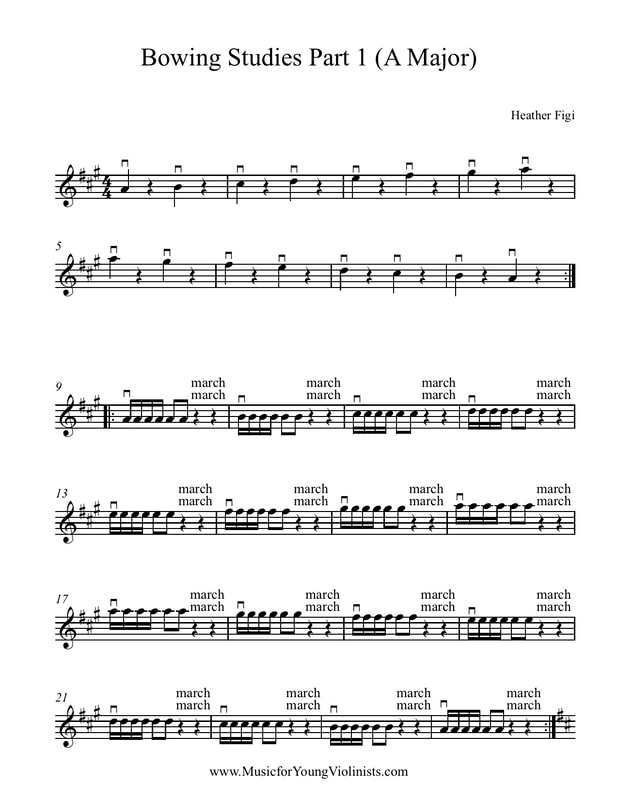 Download this sample from 7 Bowing Studies in the Keys of A, D & G Major from the FREEBIES page for a limited time. 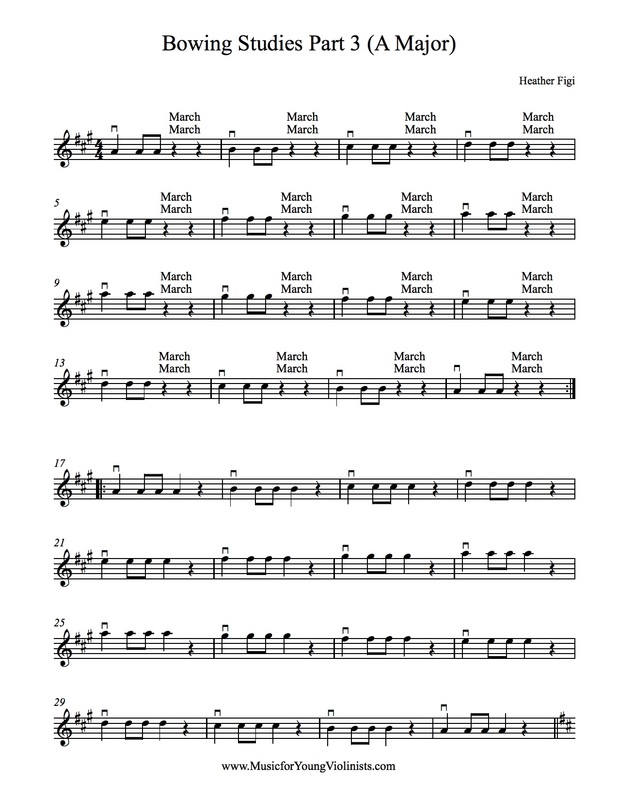 Download this sample from 7 Bowing Studies in the Keys of A, D & G Major from the FREEBIES page for a limited time. |
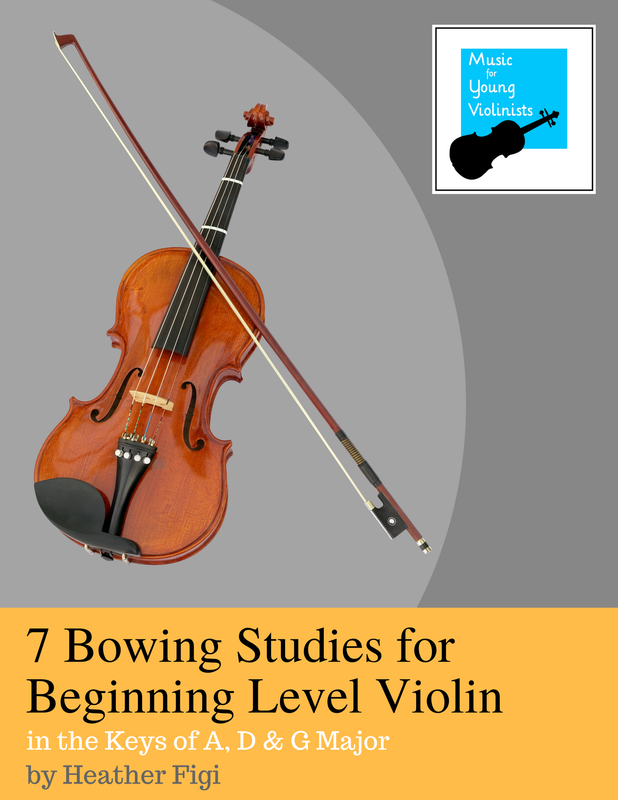
In an attempt to help her master down and up bows, I created the 7 Bowing Studies for Beginning Level Violin in the Keys of A,D & G Major. Since the focus of these studies is bowing they are kept to one octave and done 3 times in keys with parallel finger patterns (A, D & G Major) for ample repetition of the bow strokes and to keep the left hand as simple as possible.
These exercises can be used in two ways:
1- Individually to help with a specific technique needed in repertoire.
2- As a series for students who need more support organizing their down and up bows.
Features of this resource include:
- Each measure in all of the 7 bowing studies begins with a down bow for consistent training of this motion.
- The pages are designed to flow with the first exercise supporting the second on the page and so forth.
- Technical elements that are covered include string crossings, slurs, rhythms, marching with feet, circle bows (lifts) and stopped bows.
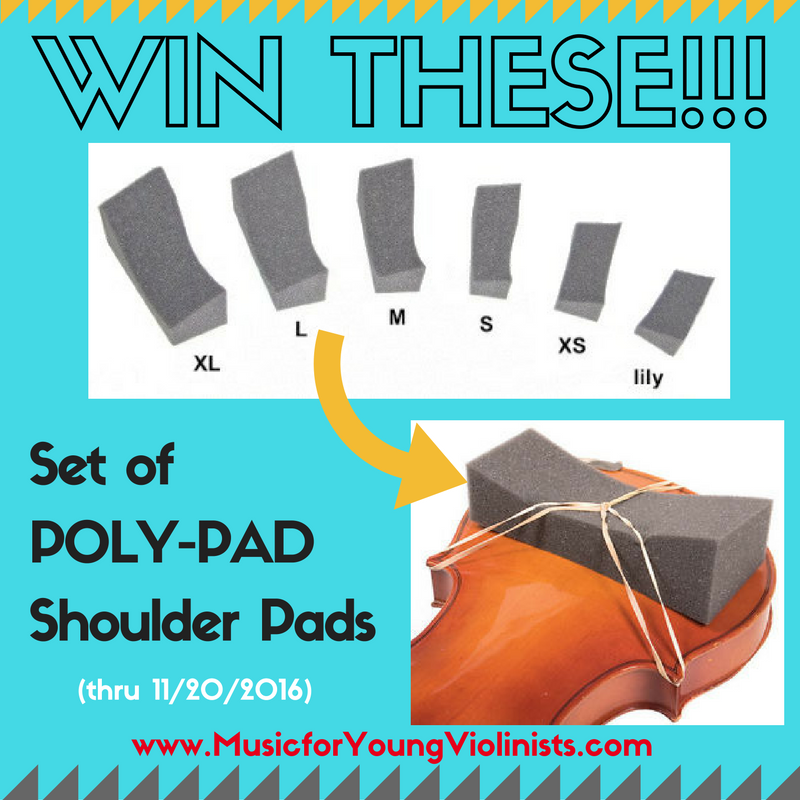
To WIN simply write in the blog comments below what your favorite shoulder pad(s) are and why. Winner will be chosen at random November 20. Thanks!
To Visit the Poly-Pad website click HERE.
Wow - that's pretty awesome right!
I will only offer these music packets as free seasonal downloads for 3 more seasons so don't delay in spreading the good news. All good things in life must come to an end and when I begin nursing school I will have to end this neat global music sharing project. Thanks! Heather
 Scott Lake, Oregon
 The school year year flew by. One week my students were walking in my studio door recharged from summer break and creating goals for the new school year and the next week we had our end of year awards ceremony and party.
One reason that I look forward to a lighter summer teaching schedule is that I am able to have the space to reflect on everything from the previous year. I try to evaluate what was successful and what I would have done different. I also think about the needs for my studio for the upcoming year and how I can create a program and curriculum structure to best support my students.
In reflecting, I also like to make a list of what made my year distinct. The time goes by so quickly that this helps me organize my memory and feel proud of my teaching. This also literally makes me slow down to create structure for the reflection process. Below is a list of events related to my music teaching that shaped my past school year.
- Hosting a masterclass with a special colleague new to town as a guest teacher.
- Not accepting any new students due to a reduction in studio size.
- Creating a new collection called Holiday Joy! Traditional Holiday & Christmas Music for Violin (eBook) and performing our December outreach concert at a new and larger location where we reached more people.
- Adding a Fiddle and Folk music component to every group class.
- Writing special solos for my younger students for our group performance of Boil Them Cabbage Down.
- Performing Copeland's Hoedown with my most advanced students and adding in choreographed marching to emphasize the rhythm.
- Performing the Cup Song as a surprise encore at the end of a recital.
- Printing S. Suzuki quotes and sharing a collection of these with each student in a hand addressed card of encouragement (available on the FREEBIES page).
- Continuing the Honors Program for the second year.
- Having students write feedback for each other in the solo portion of our group classes.
- Having my older students pair up with my younger students in some group classes for mentorship.
- Doing Bow Hold Boot Camp at the last 2 group classes of the year.
- Healthiest year I can remember with almost no absences due to illness (what a blessing).
- Hosting a mock audition with colleagues to help prepare my students for the local youth orchestra auditions.
- Teaching many students in my studio vibrato.
- Ending the year with a composer workshop for a student interested in writing music.
- Creating special summer events with my local colleagues: Advanced Review Party + Ice Cream Bar and Festival in the Park.
I recommend every teacher create an annual list like this to reflect and feel proud of your work.
What are some of the highlights from your school year? Please share in the comments below.Thank you!

(7%-38%-55% Rule)
From the 1-Minute Pedagogy Series
Please feel invited to continue the dialogue with your own ideas in the comments on the blog or youtube channel below. I apologize for the silly grin in some of these videos. I could not help but have a gigantic smile on my face when I filmed these because I was remembering so many special people that deeply you touched my life.
To view all 6 videos in this series click HERE.
One of the preeminent researchers and authors of nonverbal communication, Albert Mehrabian, asserts that in some cases only 7% of communication is contained in the vocabulary words, 38% in the body language and the remaining 55% expressed in the "liking" or attitude of the sender. The 7%-38%-55% Rule is contextual and DOES NOT apply to every communication scenario but is useful to bring up because it helps us think about communication as being a composite of vocabulary, body/facial motions and our inner attitudes and beliefs imprinted on the message.
In the video above I share some of the ways that I communicate non-verbally with my students. I would love to hear about what special non-verbal ways you have developed to communicate and connect with your students. Please share in the comments below.
One of the ways this works is because a backward alphabet is an unknown pattern to the mind. This also means it will become ineffective if used too frequently. If that is the case, then start spelling other words in your mind backward like: Violin Concerto and Johann Sebastian Bach:


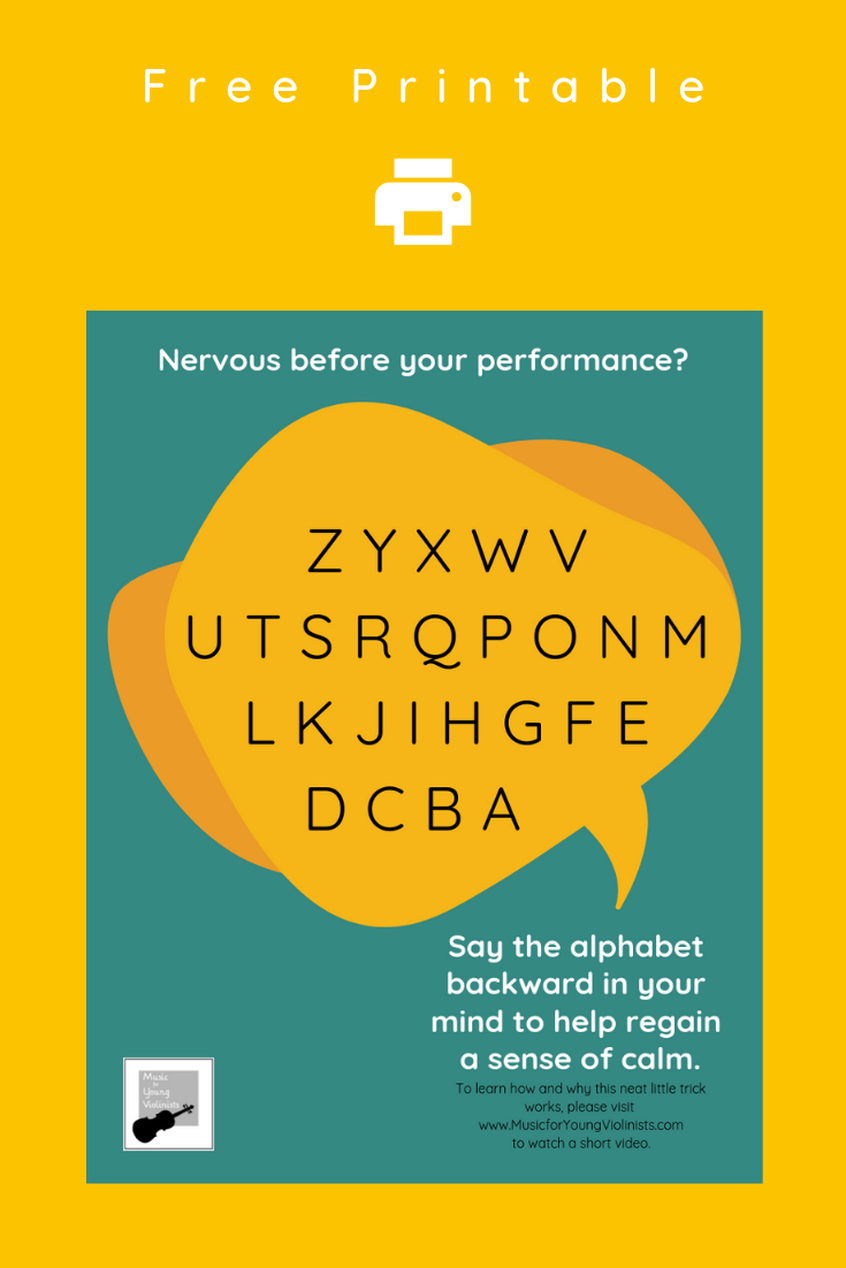 Try this trick before your next performance to help alleviate performance anxiety.
 From the 1-Minute Pedagogy Series
Please feel invited to continue the dialogue with your own ideas in the comments on the blog or youtube channel below. I apologize for the silly grin in some of these videos. I could not help but have a gigantic smile on my face when I filmed these because I was remembering so many special people that deeply you touched my life.
To view all 6 videos in this series click HERE.
Words go through our ears and into our brain where they can be interpreted in a multitude of ways which may not even match the intent of the instructor. Touching a body part relevant to the technique being studied, modeling with our own playing and reserving enough space in the lesson time to accomplish enough repetitions so the student can synthesize the information and correctly repeat in their home practice are integral to a successful learning experience. Certainly language is helpful in the process but if we talk too much we are not as effective as if we balance our teaching with training the muscle memory and inflecting meaning into the music. Additionally, we can use the tone of our voice, the spacing between words and facial gestures to communicate a sense of awe and wonder for this incredible process of learning music and stress the priorities of our teaching points.
SILENT TEACHING CHALLENGE: If you really want to have some fun with this, take out a timer and have a playful challenge with your student or class to see how long you can go without speaking. You will be amazed at how this captivates your students while preserving your energy and best of all this is very effective for getting focused work accomplished.
How do you communicate with your students in your teaching? What are some ideas you have for non-verbal teaching techniques? Please share in the comments below.

It is my week off for Spring Break and has been an absolute constant rainstorm here in Oregon. This means I have time off & time inside to have too much fun with my MacBook photobooth feature and I have gone nuts restocking the FREEBIES page.
Head on over to the FREEBIES page & enjoy some awesome new downloads to help you bring out the best in your teaching. I rotate my FREEBIES on a regular basis so many of these resources will not be up for long.
Happy music making!
Heather
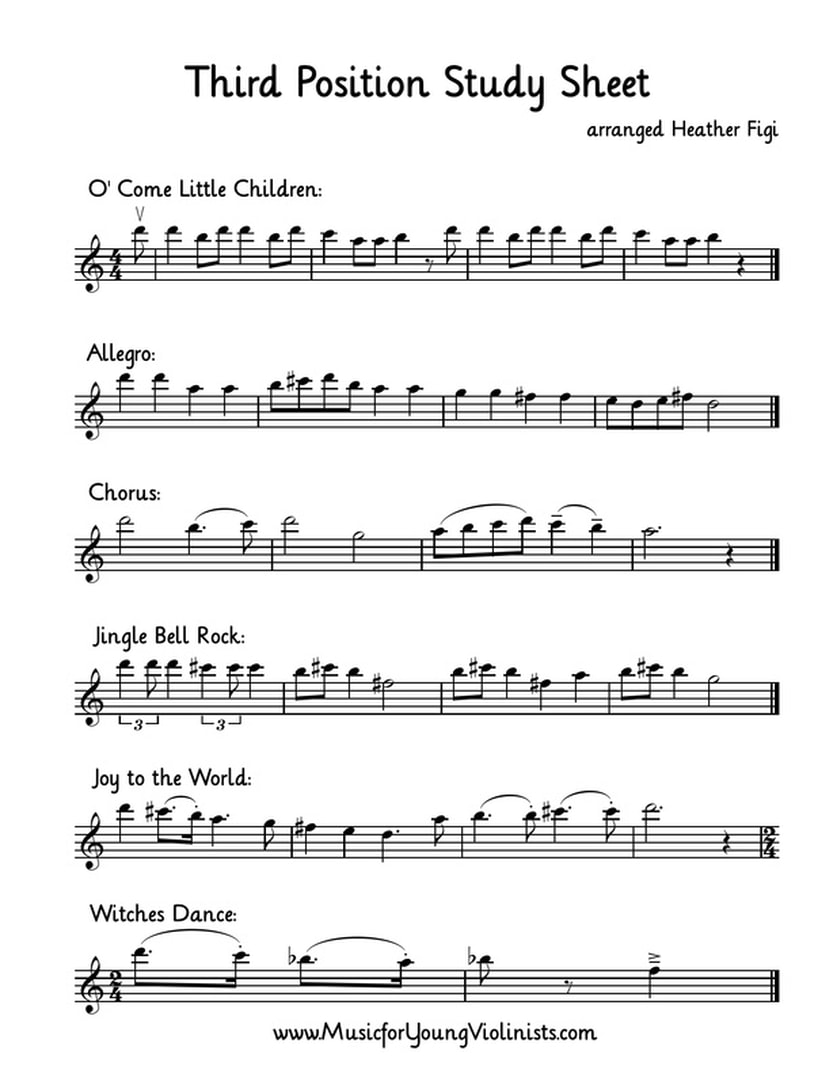
EARS - Using review pieces to learn third position serves as guard rails to keep a student on track. They already know what the tune should sound like so there is clarity from the start.
EYES - I remember when I first started reading on the G string and high on the E string how difficult it was to discern with all the additional staff lines. If a student and teacher prefer, this worksheet allows for writing in fingerings and half/whole step markings. Eventually the consistency of playing in the same range will help your young musician develop fluency for playing in this new higher range.
HANDS - I kept all of the studies in the same range on the E string to give students enough repetition of the new skill set to truly grow confident in this new skill. If a student only practices third position in a single piece they will likely struggle for a while due to not receiving enough support to master this new and fun skill.
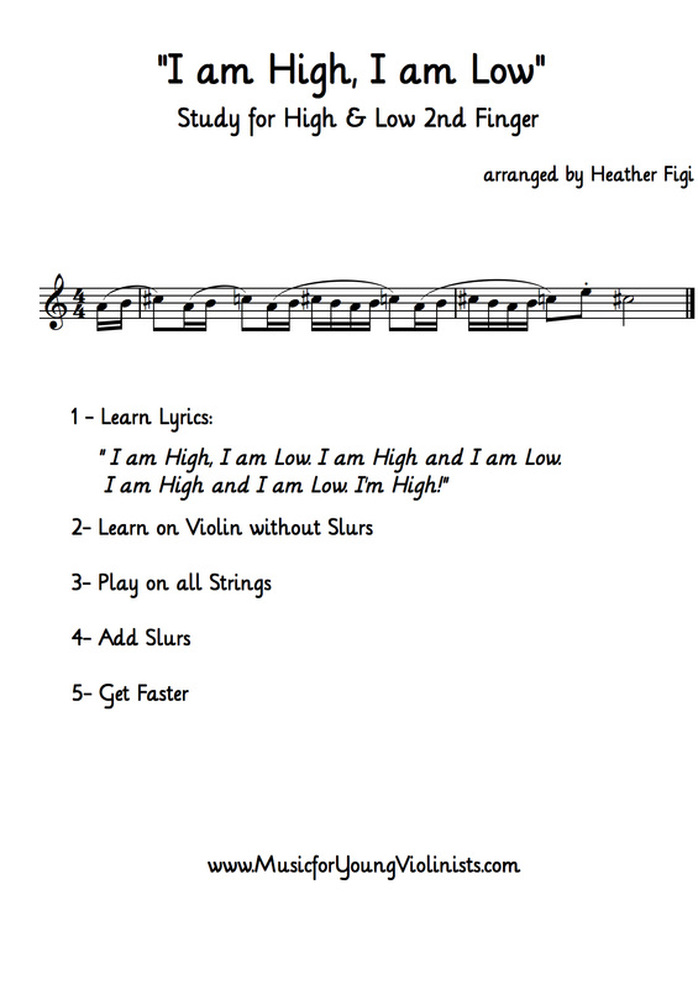
I used to hear it being practiced next door decades ago when I was in music school but I never knew the composer. I only know it is *fantastically fun for teaching young violinists how to master their low and high 2nd fingers. Nothing replaces good old fashioned 2 octave G Major scales but in my experience most students need a little more support in their curriculum.
The worksheet pictured below is a part of the Winer 2016 Music packet which is one of the many free perks of being on the Music for Young Violinists newsletter list. I give away an entire packet of music to my list every season. I love hearing from you and even if you can not tell me who composed this piano piece please let me know your feedback about the Winter 2016 Music Packet:
- What is your favorite and why?
- What do your students like the most?
- What would you like to see in future music packets?
*If you are like me you may have wondered if this is a real word. I thought I was just making this up but learned something new today and according the Merriam-Webster this word actually exists. The definition of fantastically is 1 : in a fantastic manner. 2 : to a fantastic degree : extremely Ha! That was exactly the word I was looking for to describe this small etude I use to help students with their 2nd fingers.
Sub-Division - Concerto No. 2 in G Major, 3rd Movement (F. Seitz) m. 68-83 By the time a musician is at this level sub-division should already be an acquired skill and having it printed out for explanation is not necessary. However, I find that having an assignment blocked out on a separate worksheet creates clarity of goals between teacher and student as well as preventing a student from plunging into the score without having the proper foundation to interpret the music accurately.
Ring, Ring, Ring - This is a simple etude that is easy to learn and designed to help younger musicians work on their sympathetic vibration ring tones. It can also be done starting on the D string.
“I Am High, I Am Low” - When a young musician begins differentiating between what we refer to as low and high 2nd fingers, they need a great deal of support. I borrow this musical phrase from a favorite piano piece and have students learn it in the five-part sequence listed on the worksheet. They enjoy it and have fun getting some speed in it.
Do-Re-Mi Song - Solfège is not something that most American musicians learn when they are young, but I would like to see this change. This simple and fun piece focuses on the intervals of the scale while teaching the seven syllables of solfège used in English. I first introduce this by singing and using hand symbols and fun body movements to match the lyrics. After it is learned vocally, a violin student can easily transfer this onto the violin.
Third Position Study Sheet - I love teaching the III position by ear but found that some students need a correlating visual to help it make more sense and not get discouraged in their home practice. This worksheet takes several familiar pieces and transposes them to be played in the III position on the E string to help concentrate on a specific range. It is a fun assignment and students enjoy experiencing their growth by mastering these phrases in the III position.
Did you know that my book Twinkle: Duets, Trios & Quartets was written to help students gain fluency and confidence with their III position? I created this collection of chamber music pieces before the Suzuki books were revised to fill the gap that used to exist with the use of the III position. You can view samples from this collection on the website and download a free Twinkle Duet when you sign-up for the newsletter.
Categories
All
Arpeggios
Art & War
Beginning Violin Music
Blue Jello Cards
Boil Them Cabbage Down
Bow Hold
Bowing
Bucket Board
By Ear Tune
Cello
Check Off Chart
Check-Off Chart
Chinrest
Christmas Music
Coloring Sheets
Contest
Double Stops
Dream Trees
Easy Violin Music
Fiddle
Fiddle Music
Finger Patterns
Finger Placement
Flash Sale
Folk Music
FREEBIES
Free Gift With Purchase
Free Holiday Music
Free Sheet Music
Free Violin Music
Fun
Games
Giveaway
Goals
Gratitude
Group Class
Hand Washing
Holiday Music
How To Attract Students
How To Build Studio
How To Buy Violin
Human Potential
Humor
Injury Prevention
Inspiring String Players
Intervals
Itzhak Perlman
Jingle Bells
Jingle Bells For 2 Violins
Jingle Bells For Beginning Violin
John Kendall
Joy
Key Chain
Kindness
La Folia
LARGE Print Music
Left Hand Technique
Make Practice Fun
Marketing Strategies
Mary Had A Little Lamb
Memorizing Music
Misnomer
Mixed Level
Mozart
Music
Music Education
Music Heals
Music History
Music Mind Games
Music Theory
Music-theory
Nursing
Ode To Joy
Parenting
Pedagogy
Performance Anxiety
Performing
Pinterest
Practice
Practice-chart
Practice-charts
Practice-videos
Practice-videos
Practicing
Praeludium & Allegro
Prize
Purchasing-a-violin
Quartet
Questions
Recital-preparation
Rhythm
Sale
Sarajevo-string-quartet
Scales
Searmi-park
Sheet Music For Violin
Shinichi-suzuki
Shoulder
Shoulder-pads
Shoulder-pads
Sight Reading
Spider Crawls
S-suzuki
Sticker
String Crossing
Students
Studio-building
Studio-building
Studio-policies
Subdivision
Summer-institutes
Suzuki-violin
Suzuki-violin
Teaching
Technique
Third-position
Time Tracker
Toys
Twinkle
Twinkle Little Star
Twinkle-little-star
Updates
Vibrato
Video-tutorial
Viola
Violin
Violin Cases
Violin Hack
Violin-hack
Violinist
Violinists Health
Violin Notes
Violin Pedagogy
Violin-pedagogy
Violin Practice
Violin-practice
Violin Practicing
Violin Sheet Music
Violin Teaching
Violin-teaching
Violin Teaching Tip
Violin-teaching-tip
Virtual Lessons
Vivaldi
Young Violinists
 RSS Feed
Archives
February 2024
January 2024
December 2023
November 2023
September 2023
August 2023
May 2023
April 2023
October 2022
September 2022
July 2022
June 2022
December 2021
November 2021
October 2021
September 2021
August 2021
July 2021
June 2021
May 2021
February 2021
January 2021
December 2020
November 2020
October 2020
September 2020
August 2020
July 2020
June 2020
May 2020
April 2020
March 2020
February 2020
January 2020
December 2019
September 2019
June 2019
May 2019
April 2019
January 2019
December 2018
November 2018
October 2018
September 2018
August 2018
July 2018
February 2018
December 2017
October 2017
September 2017
August 2017
February 2017
January 2017
December 2016
November 2016
October 2016
September 2016
August 2016
July 2016
June 2016
April 2016
March 2016
February 2016
January 2016
December 2015
November 2015
October 2015
September 2015
July 2015
June 2015
April 2015
March 2015
February 2015
January 2015
December 2014
November 2014
October 2014
September 2014
Author
Hi! It's me, Heather. I absolutely love working on the Music for Young Violinists project and all the many facets: blogging, website, music, teaching materials, freebies, videos, newsletter and giveaway contests. The best part is connecting with you so feel free to drop me a line. You can learn more about me on the "ABOUT" page. Thanks!
