|
After spending decades teaching and hours every day watching how the body's posture impacts the instrument's sound, I can not stress enough that the body is the first instrument. One of the most common problems is too much activation in the shoulders. Learn 3 innovative ways to train and teach the release of muscles in the shoulders in this blog post below. When we play the violin, both shoulders tend to tighten up and cause negative issues in our playing. Here are 3 tips to help violinists gain awareness in their shoulders and keep their violin playing healthy. 1- PRACTICE LAYING DOWN This is silly and awkward BUT highly effective. The laws of gravity will help a violinist feel a naturally aligned state in their body when they play laying down. Laying down while playing the violin is an incredible tool for the following three techniques: 1-Teaching the neck to release tension. 2- Supporting the shoulders in finding the base of their sockets. 3- Getting the knees to soften up. Young children love this because it feels like a novelty, however, this practice technique is appropriate for players of all ages and levels. Laying down while playing the violin will create a very unnatural feeling in the bow arm and compromise the sound, but the long-term results of alignment and awareness are more than worth the short-term compromises. 2- TIGHTEN UP: Go to the extreme to build awareness. Tighten up the shoulders as much as possible for 5 seconds and release. I use this verbal cue: "put your shoulders in your ears." After this intense use of muscles, the shoulders will respond with fatigue and rest by staying down in the bottom of their sockets. They may not always stay down for the rest of the lesson or practice session, but this exercise helps develop the necessary awareness to address tight shoulders and fix this problem in violin playing. In addition to creating muscle fatigue and natural inclination to release, this tip will also help a violinist realize the extreme of their range of motion so that they have more control in choosing where their shoulders go when playing. 3- EVALUATE THE CHIN REST AND SHOULDER PAD SET-UP: When was the last time you changed your *chin rest or shoulder pad? Young students with growing bodies have different proportions in their neck-shoulder-arms approximately every six months and, their playing needs are also growing. Chin rests and shoulder pads need to be re-evaluated for younger players on a regular basis because of this continual physical and musical growth. Most of us do not live in a major metropolitan area with a large string supply store to experiment with a variety of gear for our violins. Instead of this, stay up to date and informed of the variety of chin rests and shoulder pads by subscribing to string catalogs (links below). Also, consider the Poly-Pad which I have featured on the “Things I Love” page. This economical shoulder sponge has extra curves than competitors pads and is one of my favorites. When I moved to Oregon 15 years ago I purchased a Poly-Pad in each size and it really helped me individually fit all of my students. Interested in more tips for playing the violin? Below are 3 M4YV tutorial videos on vibrato, pizzicato and bow hold "bunny flips" that share ideas to help you bring out the best in your music making!
How do you help your student keep their shoulders relaxed when they play the violin?
0 Comments
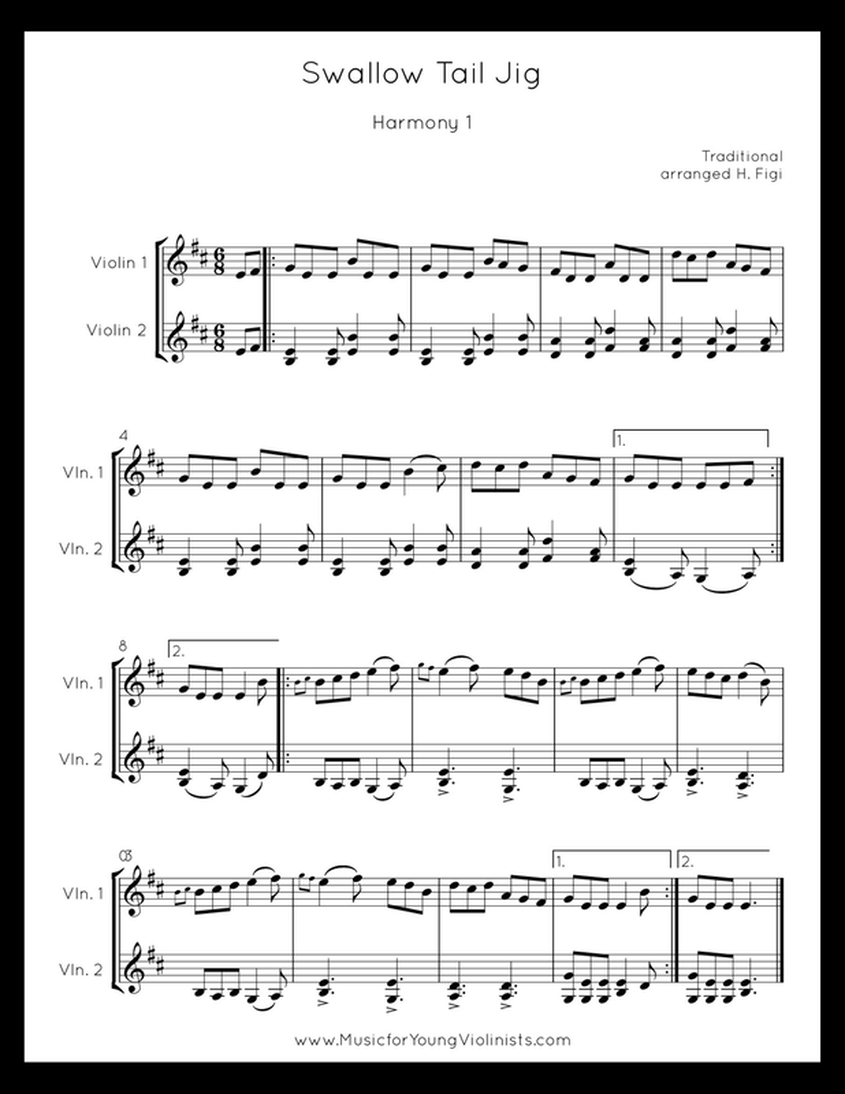
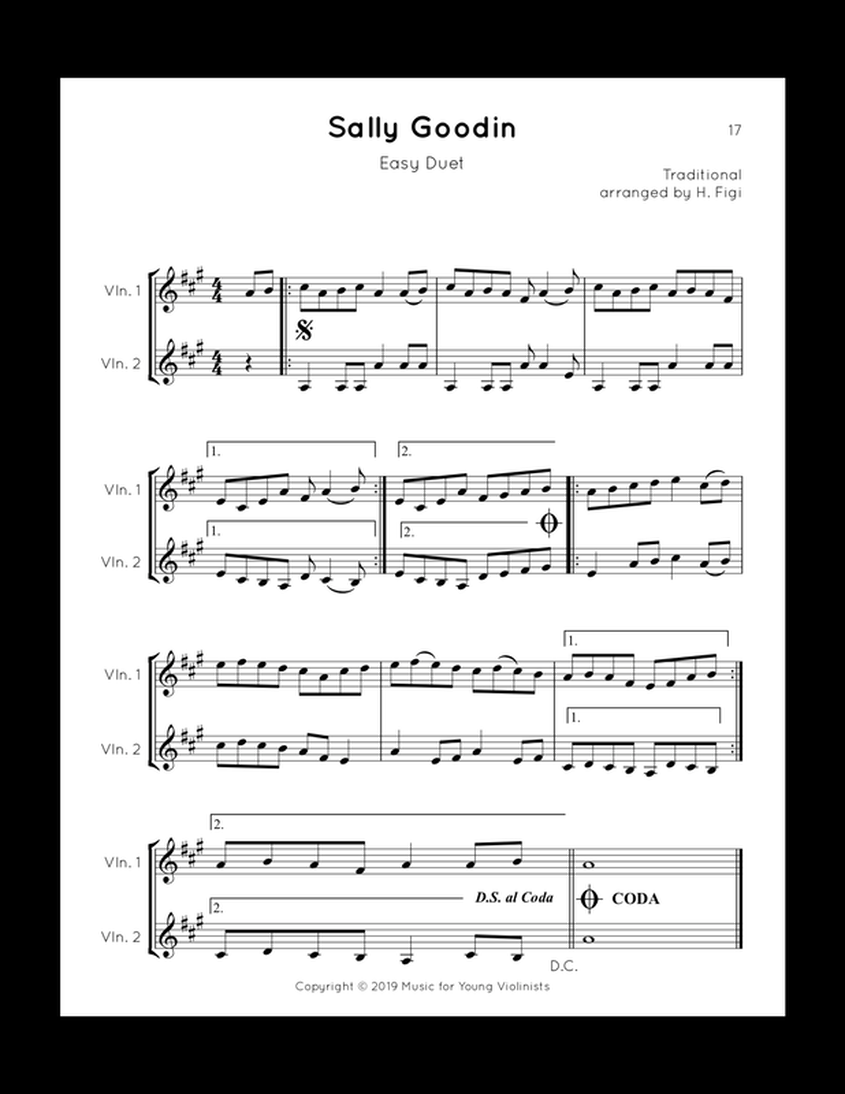
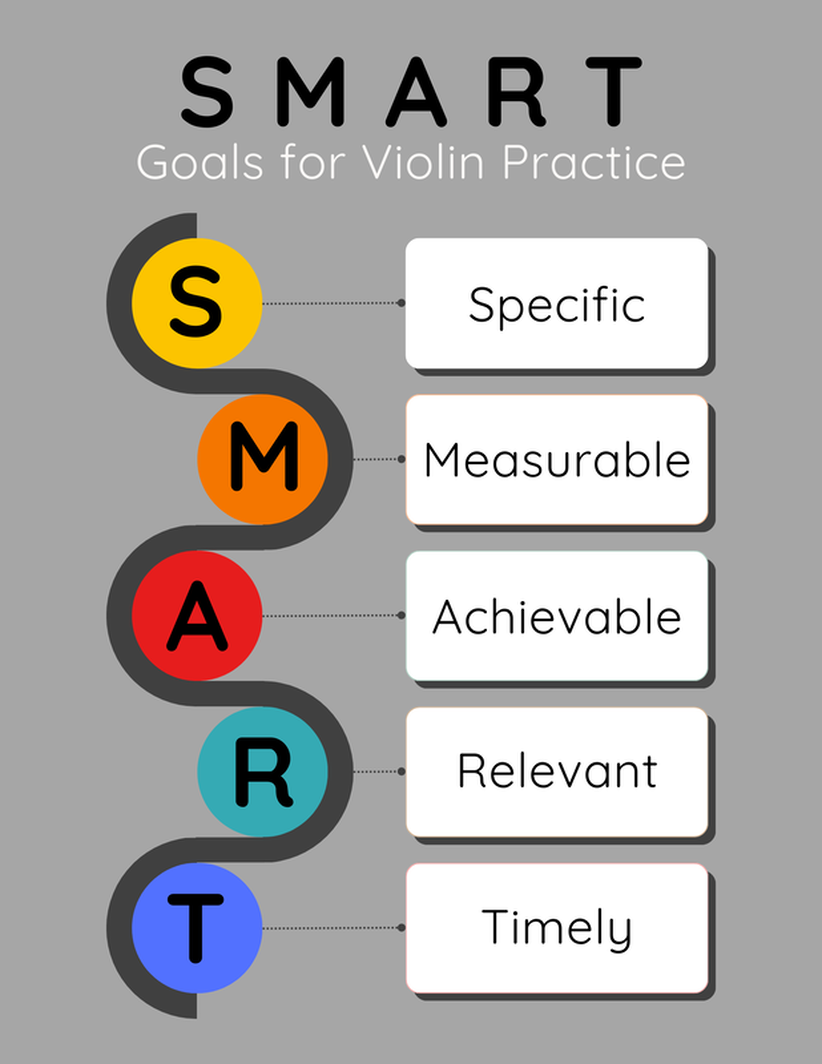
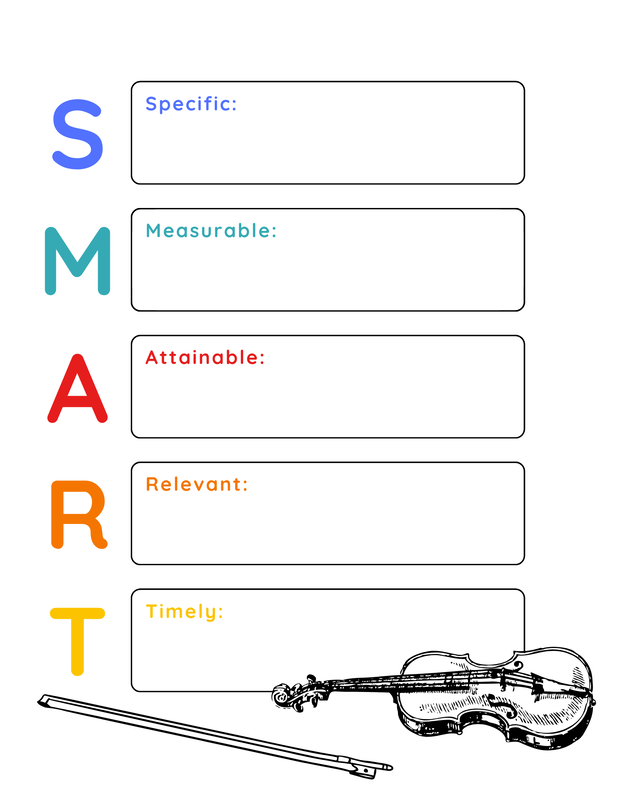
This will only be up for 24 hours and is from the Fiddle Duets sheet music collection. Friendly reminder that the 50% Fiddle Music and Fun Stuff Sale is almost done and will be going on through February. Happy music-making! Heather This tune will be taken down in 24 hours. Please scroll down to access the PDF file Enjoy a flash FREEBIE of this great fiddle tune arranged for 2 violins & beginning level. This duet is one of the selections in the Fiddle Duets collection available from M4YV. Click HERE to view the entire collection and see the advanced arrangement of this tune. The capitalized term SMART Goals is an acronym and refers to an evidenced-based formula for achieving a goal. The term "evidence-based" means using the best available research to inform decision-making, interventions, or strategies based on scientific research, and I propose we bring evidence-based practices into our work as musicians. A "smart goal" for any violinist would be "I want to practice my vibrato more." And who can argue with that? It is not a bad start, but it is akin to saying come to my house for dinner & leaves us with several voids: Where do I live? How do you get there? What date works best? When should you arrive? Are there any cats? Are you allergic to cats? Do you have any food preferences? Etcetera, etcera. Saying, "Come to my house for dinner," is not specific enough to create the best outcome, and the same problem happens when we settle with using vague goals for our violin playing. Using the "SMART goal" paradigm, the goal to practice vibrato more would turn into: "At the start of every practice session, Monday-Friday, for the next 3 months, I will set my timer for 8 minutes and work on technical exercises X, Y & Z, being conscious of the excess tension I am holding in my *tongue and eyes and then I will spend 6 minutes playing 1-octave G, D & A major scales in whole notes while I transfer my vibrato technicals into my violin playing." *I know that probably sounds weird, but believe it or not, this body part is usually too activated and tense. Phew! Can we agree that's quite a different goal? Which violinists will make better use of their time and progress faster? What exactly is a SMART goal? The capitalized term SMART Goals is an acronym and refers to an evidenced-based formula for achieving a goal. The term "evidence-based" means using the best available research to inform decision-making, interventions, or strategies based on scientific research and proven outcomes and is the standard approach in the medical field. It can also be seen in education, sports, and policymaking. I propose we bring evidence-based practices into our work as musicians. The SMART acronym stands for:
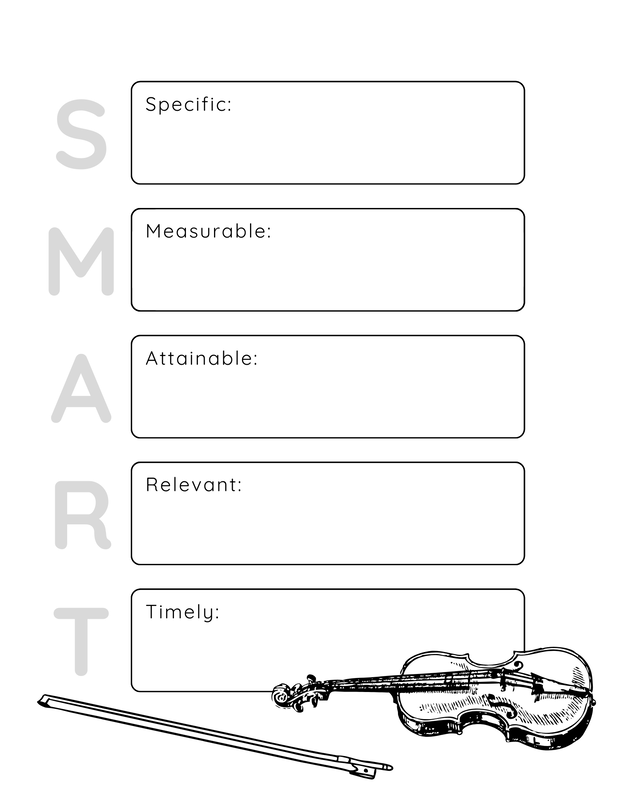
The gist of the entire SMART goal concept is getting specific. Let's look at each SMART goal template component to understand better how this can benefit a violinist. Specific: Define goals clearly and precisely. Taking our example of "to practice vibrato more," we can add a particular quality to this goal; perhaps we seek to make our vibrato more natural and less tense. Or, perhaps a particular finger, part of the hand, or arm needs to be adjusted in its angle to get a better-sounding vibrato. If you are still trying to figure out what better means for your musical goal, think about techniques because these are the ingredients for making something better. Measurable: Establish criteria for tracking progress. The example provided used time as a measurement: 8 minutes of technicals followed by 6 minutes of applying these into one-octave scales. Additional measurements for musicians include the quantity of repetitions, the number of bars to memorize, or a metronome tempo. Achievable: Set realistic and attainable goals. Yes, it's very exciting to set the goal to learn all of the unaccompanied solo Bach Partitas and Sonatas, but is this achievable for a 17-year-old high school senior to accomplish in 3 months while concurrently auditioning for different colleges? Realistic: Ensure goals align with broader objectives. This ties in with the achievable aspect of SMART goals. Our sample high-school-aged violinist above may be prodigious in their capacity, but this also occurs while completing their high school coursework and in the middle of their basketball season. You get the idea, which is why each part needs to be individualized to the musician and the context of their broader life. Time-bound: Set deadlines for goal completion. For this 17-year-old talented student in the middle of their extra-curricular sports, auditions, and coursework, perhaps they can learn the entire repertoire of unaccompanied Bach. It is just that the timeline needs to be appropriate, and they can focus on one Sonata or Partita every 6 months for the next 3 years. Timelines, when used appropriately, create the structure to soar. Drawbacks of the SMART goals system: It is exciting to use formats like the SMART goals to help us achieve our human potential and use evidence-based research to support us in living our dreams, but they are without limitations. 1- The first drawback is that it may be too cumbersome and time-consuming to apply a SMART goal to every portion of a musician's practice curriculum (scales, rhythm, etudes, repertoire, ensemble pieces & solo preparation). It could easily take an hour to collaborate on creating a SMART goal for each portion of a violin student's curriculum, which is not likely a good use of time. m 2- Next, SMART goals do not permit the exploration element because it is so specific. Playing music should involve playing in the true sense of the word "play." Resources for goal setting: I am no stranger to writing about the importance of setting goals, and I aimed to model & create structures for this for my students when I was actively teaching. I started thinking of goals as being like GPS coordinates for your dreams when I first wrote about this subject in 2018. This led to the creation of goal-setting resources (like the Rainbow Goal Sheets for sale in the store and free samples on the FREEBIES page). My passion for this topic continues because I find it relevant as I progress through different developmental stages as an adult. I also chose the example of vibrato in this post because some students and teachers need help with this element of music-making. If you have yet to see my video on vibrato, check it out here and learn an easier and ergonomic way to do vibrato on the violin. Lastly, please help yourself and download the SMART goal worksheets below to use with your students to help make this concept more tangible and accountable in a lesson structure.
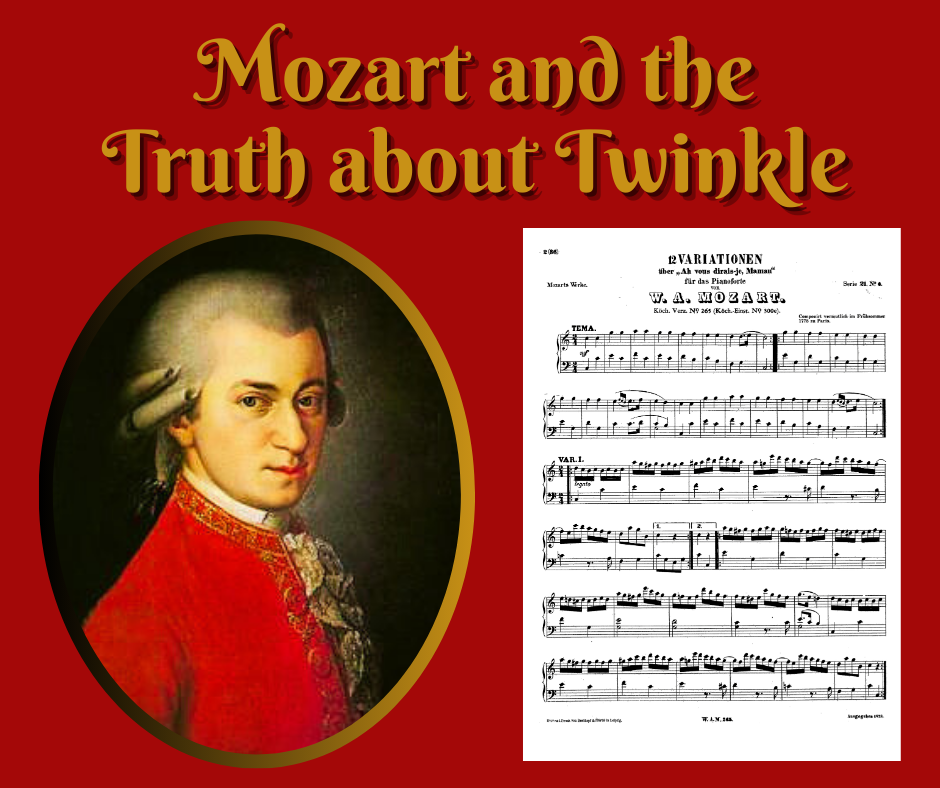
What do you think of SMART goals? Can you see yourself using this? Do you have any criticisms? Please join in the conversation and post some feedback below. Wolfgang Amadeus Mozart was born on January 27, 1756, and is a legend in the music world! He started composing at age 5 and touring at 8. When he turned 13, he received sensational press reviews stating he was a "miracle in music, one of those freaks that nature causes to be born." In his 35 years, this virtuoso violinist and keyboardist composed 800 pieces (though this number varies by different sources). I was exposed to the Der Spiegel (The Mirror) Duet as a teenager. This sheet music is designed to be played on a tabletop and demonstrates his unrivaled conception of the musical staff by being able to conceive of it simultaneously right-side up and upside-down. You can access a free PDF here. Later, as a teenager, I visited Europe with my mother and indulged in "Mozartkugel" or Mozart balls - a chocolate candy melodically combining pistachio marzipan and hazelnut nougat with a picture of Mozart on the wrapper. In college, I became dismissive of W A. Mozart's music - I thought it sounded too fluffy and predictable. It was not until I read his biography about his upbringing that I understood how difficult his life was and that music was a way to transcend his challenges. When I started teaching, a colleague turned me onto the violin duets his father, Leopold Mozart, composed, and they have been some of my favorites ever since. They are available on Amazon in case you are interested. Modern AI can even help us see what he looked like. A channel on YouTube recently did a facial reconstruction of what Mozart looked like in his day and what he would likely appear as in modern times, along with a concise biography of his life: Mozart: The Funny, Rebellious Prodigy. History Documentary, Including Facial Re-creations. So let's talk about Twinkle, Twinkle Little Star. This simple tune has permeated my musical experience, and I have taught it to students for decades and have a fondness for arranging it (here are all my collections). But I got it wrong - it was not likely composed by W.A. Mozart.
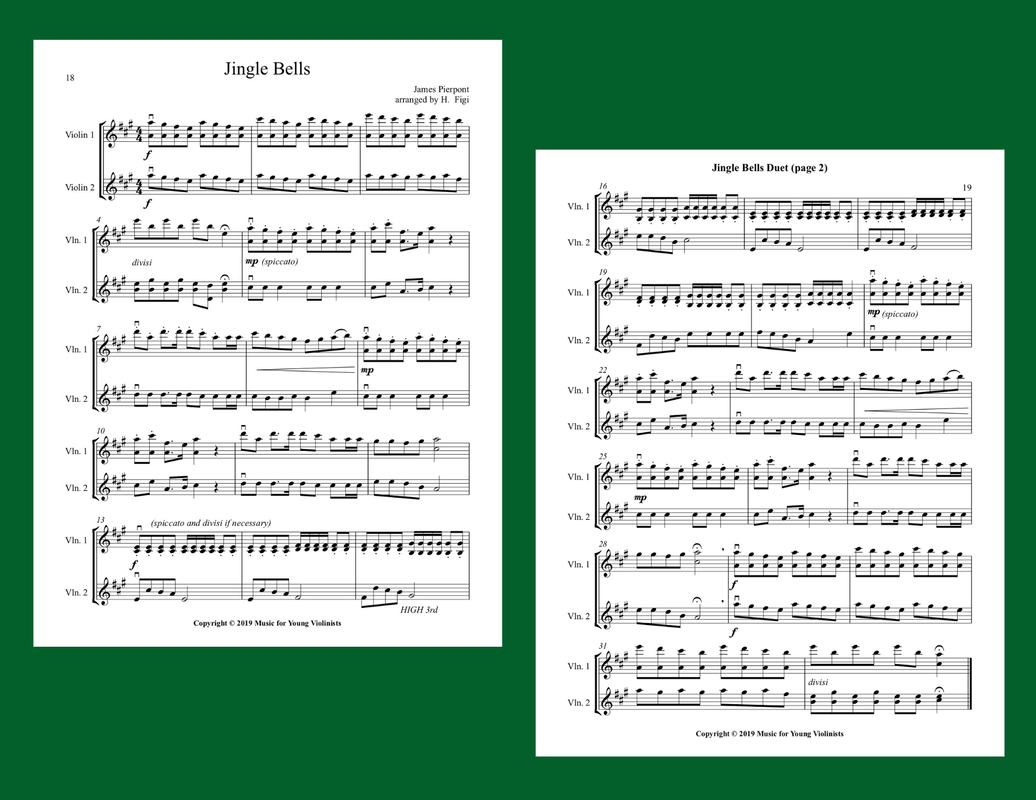
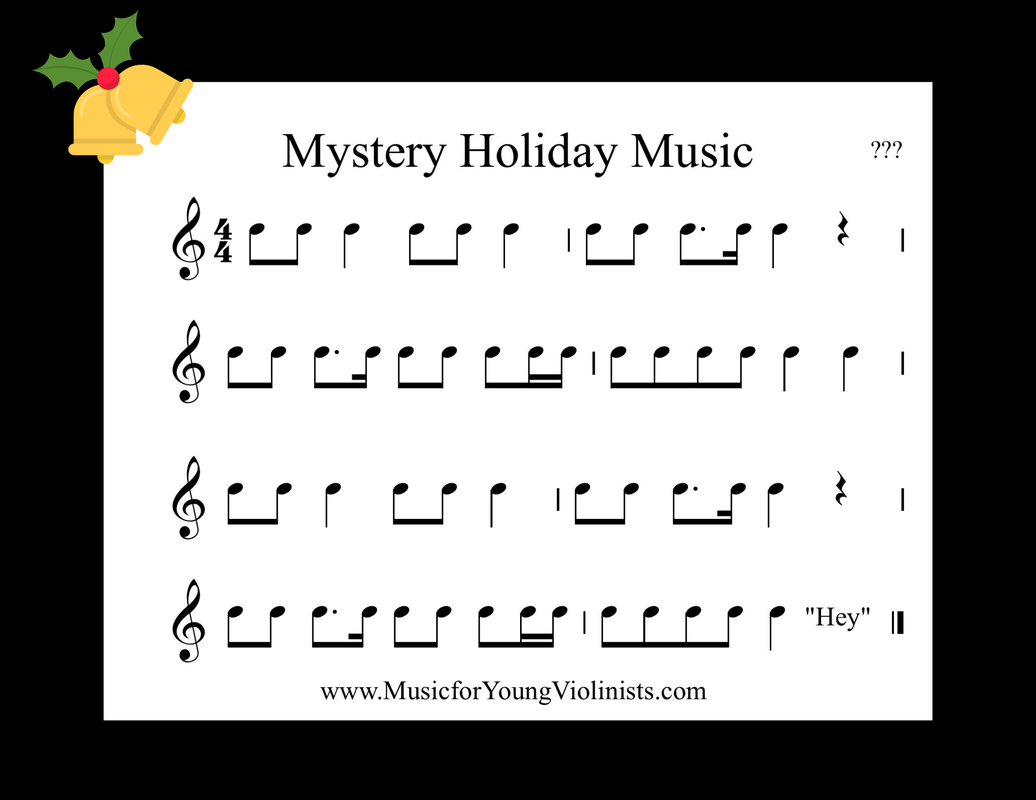
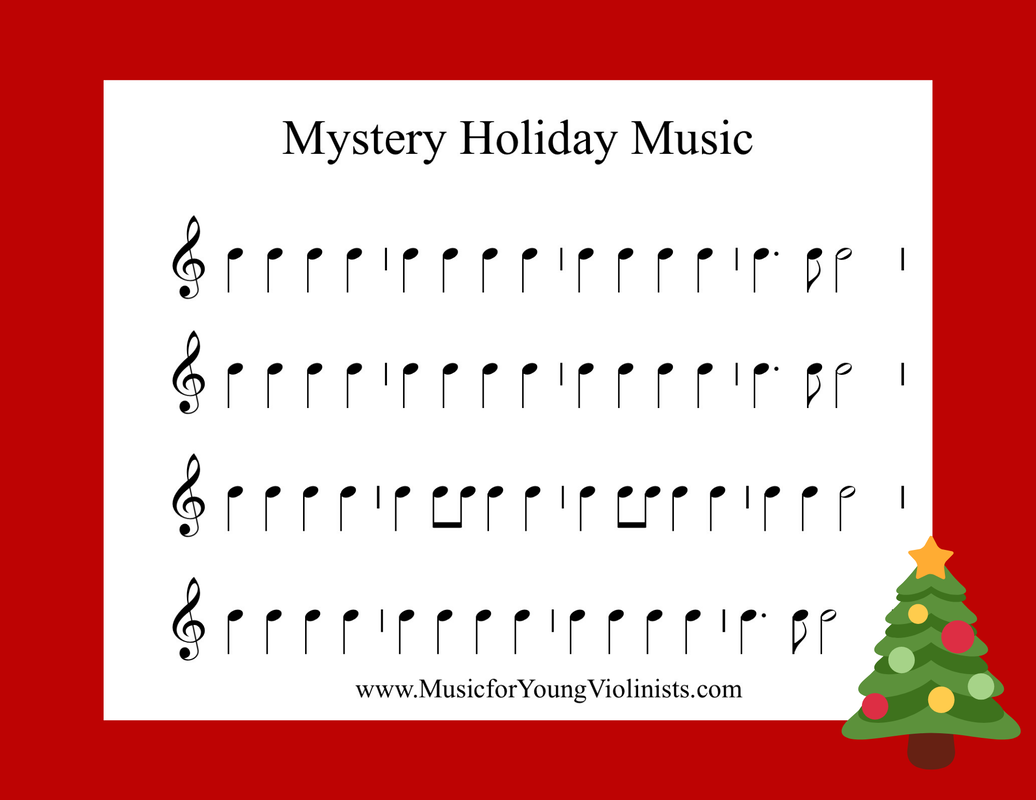
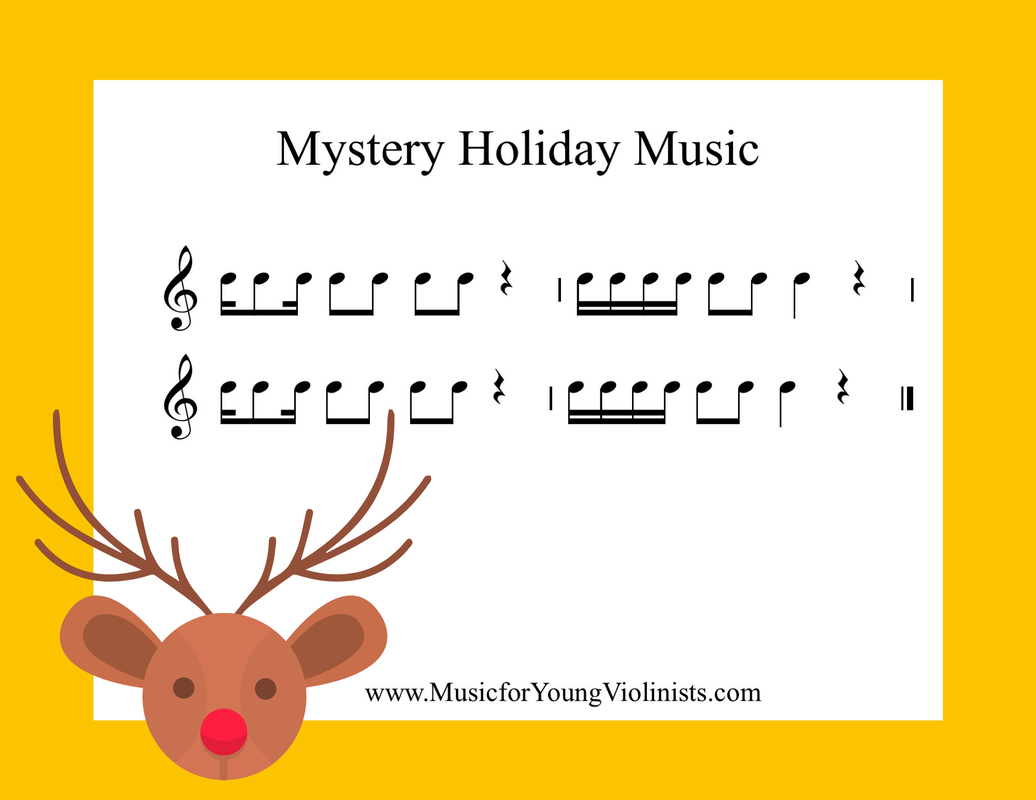
One of my favorite M4YV blog posts ever was by guest author Murray Charters (B. Mus., M.A.) Cellist and Teacher from Kitchener, Ontario, who educated me on the origins of Twinkle, Twinkle Little Star. I had gone decades of my musical life assuming this tune from W.A. Mozart until I read this. Click on the button above to learn more. Who wrote Twinkle?For decades, I thought this clever tune was composed by W. A. Mozart until a colleague enlightened me. Enjoy this delightful re-post by guest author Murray Charters from 2015. By Murray Charters (B. Mus., M.A.) Cellist and Teacher, Kitchener, Ontario Wolfgang Amadeus Mozart (1756-91) holds great appeal to teachers and students of the Suzuki method. There are pictures of the young boy playing the harpsichord with his older sister, Nannerl, and we know much about the strong guiding hand of his father, Leopold, in his music education. They were already a Suzuki family! Wouldn’t it be nice to connect clever young Mozart with the most famous tune in Suzuki literature? Wolfgang Amadeus Mozart (1756-91) holds great appeal to teachers and students of the Suzuki method. There are pictures of the young boy playing the harpsichord with his older sister, Nannerl, and we know much about the strong guiding hand of his father, Leopold, in his music education. They were already a Suzuki family! Wouldn’t it be nice to connect clever young Mozart with the most famous tune in Suzuki literature? Nannerl recorded that her brother started composing simple keyboard pieces around age 5, and his first symphony at age 8. By that time he had already travelled to many of the important cities of Europe and actually wrote that first symphony to pass the time while his father recovered from a cold when they were in England. On the way to England they had stopped in Paris where a collection of folk songs had been published just a few years earlier, in 1761. That collection included a very attractive little song, without lyrics, said to have been created in the then popular pastoral style some 20 years earlier by author or authors unknown. This tune proved so appealing that it was published again in Paris in 1774, this time with lyrics of a rather sophisticated nature added. "Ah! vous dirai-je, Maman" is the first line of an anonymous love poem of the time. Of course it’s about love; it’s French isn’t it? “Oh! Shall I tell you, Mother / What is tormenting me?” the poem begins, and goes on to exclaim: “Can anyone live without love?” These lyrics speak of teenage angst rather than nursery rhyme cuteness, but that was soon to change. In 1806 a young English poet, Jane Taylor, published a six-stanza poem called The Star in a book of Rhymes for the Nursery. Whether intended or not, Taylor’s poem fit very nicely onto this French folk song. In fact, others must have thought so too and her words were eventually printed together with that music in an 1838 song book. And thus it was that what we now know as “Twinkle, twinkle, little star” finally made its first appearance on the world’s stage in that form in the second year of the reign of Queen Victoria. So how did we come to associate this well-known English nursery rhyme and French folk song with Mozart, especially in Suzuki circles? Because both he and Dr. Suzuki knew a good melody when they heard it. Mozart wrote a splendid set of keyboard variations on this tune around 1781 or 82. But he called it “Ah! Vous dirai-je, maman” which shows he knew the melody only after its French publication of 1774. He certainly wasn’t the only composer attracted to all the possibilities for variation offered by this simple but elegant tune. Johann Christoph Friedrich Bach, 9th son of J.S., did the same thing around the same time, and there have been other sets written since, but none by composers with names of the musical appeal of Mozart. (I particularly recommend the Variations on a Nursery Tune for piano and orchestra by Ernst von Dohnanyi, perhaps because of its subtitle: For the enjoyment of humorous people and for the annoyance of others.) I’m sure these musicians saw the same things in this melody that we all point out to our eager music students. Its immediately innocent nature using just six notes of the scale, a very simple rhythm pattern, and much repetition belies a more sophisticated emotional tone set by the refusal of the middle section to return to the tonic. Of course this charming melody is also absolutely ideal for creating good posture for little left hands on bowed stringed instruments, and we should all praise Dr. Suzuki for using it so cleverly at the beginning of his method. Just don’t say it was written by Mozart. A very special thanks to Murray's Music for contributing this article to the Music for Young Violinists Project! Happy Holidays Everyone! Enjoy some awesome holiday-themed FREEBIES below (look for the red-colored "A" file icon, click on it to get your free sheet music PDF, and make a joyful noise). Jingle Bells Duet (for 2 Violins) - This is featured in the Holiday Joy! sheet music collection and was always a huge hit in my violin studio. The older students like having some double-stops, and the young students are always excited to play this simple tune. Holiday Mystery Music - This would be so fun to download and email to your violin students so they can solve the mystery of figuring out what holiday tunes these rhythms are from. It engages music theory and curiosity wrapped up with the holiday spirit. Maybe you even give a prize to any student who can figure out all 3 tunes. Visit the M4YV FREEBIES Page for even more holiday-themed sheet music downloads (scroll down a bit to access): The First Noel for 3 Violins Ding, Dong Merrily on High
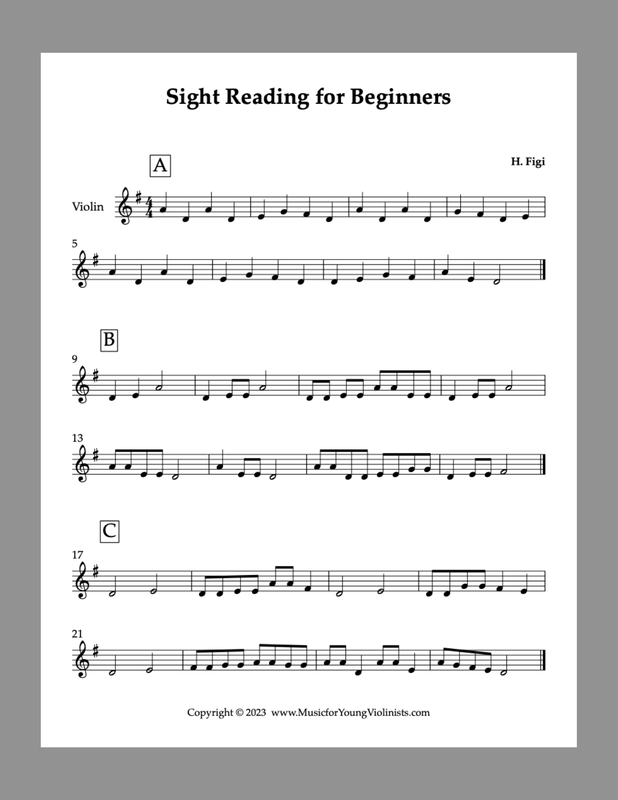
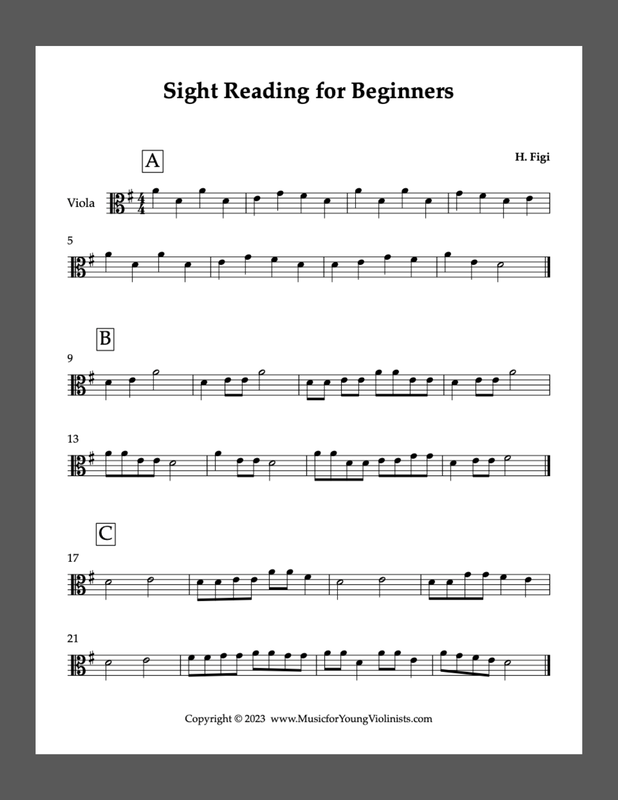
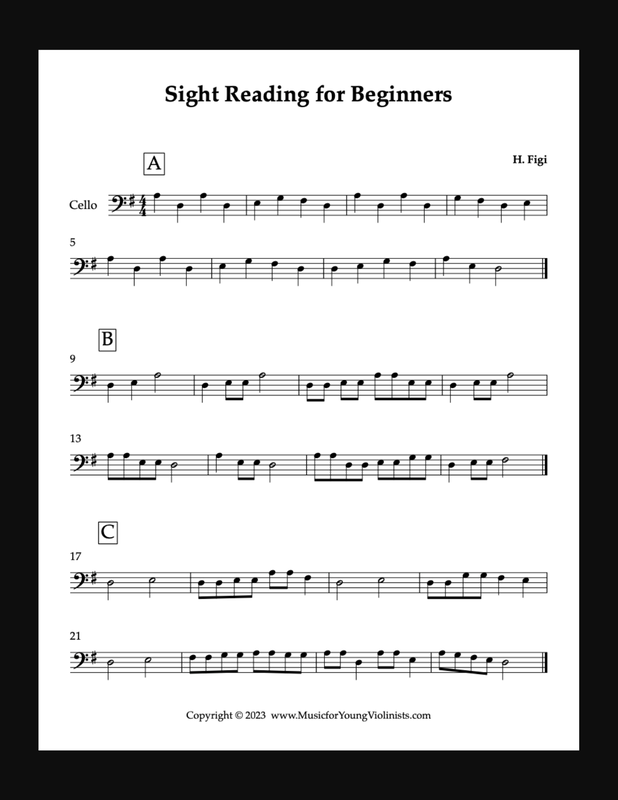
This was a suggestion from one of the musicians in the newsletter group here, who sent me an email a while ago requesting sight-reading material that violin players could play along with viola and cello players. This is a fun follow-up from another musician named Heather, who just did a guest post for us and shared some sheet music samples that are also perfect for sight reading material - click HERE to learn more.
Have an idea I can help with?
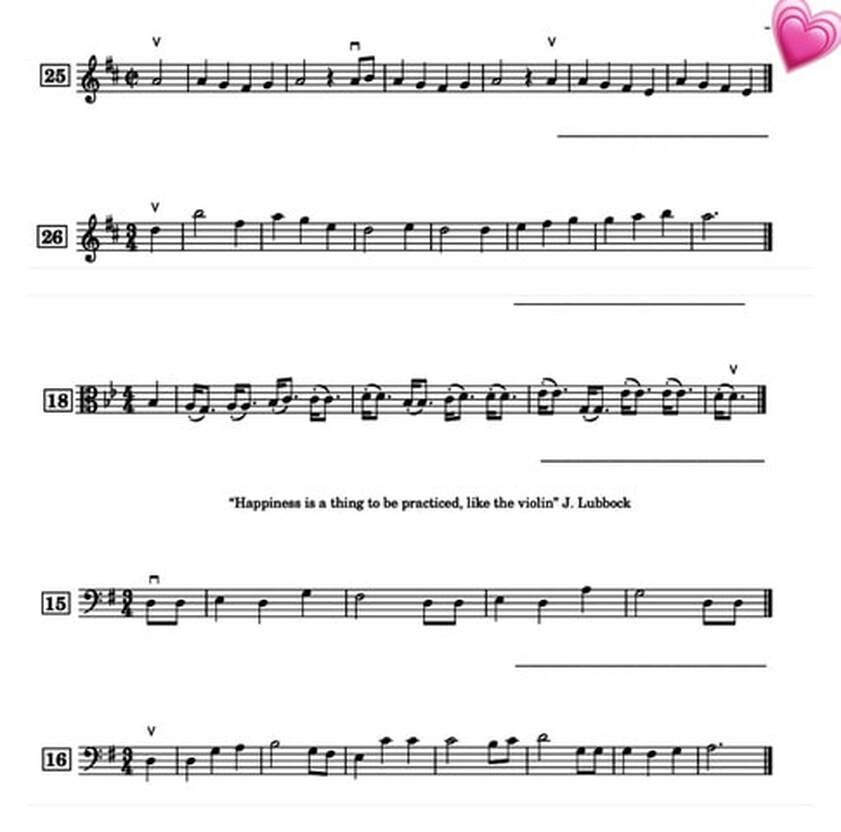
Please post in the comments below, and I will see what I can do. From guest musician & teacher Heather Braden: Would you like to add some extra fun and joy to your teaching? Do you believe that learning to read music should be enjoyable? If so, we are on the same page, and I am thrilled to share that my books of Mystery Songs have been released to the world. I found my students unenthusiastic about reading random notes and open string rhythms every week, so I spiced it up and helped them see the "why" of the random note drills. Students can apply their basic note-reading skills to identify well-known songs. Mystery Songs invite play and intrigue into learning to read music. They bring joy to all involved in this journey as parents and friends are invited to join in the guessing. Students can see that the song remains a mystery if they ignore the rhythm or disregard the key signature! Beginning with simple tunes like "Old MacDonald" and "Twinkle," the lines progress in difficulty in a methodical manner until they figure out "Chopsticks" and more difficult melodies. There are several volumes, including one with the lines written backwards, one with the excerpts from the middle of songs, and another with those two elements combined. A Bonus Bundle is available, gifting you 101 BONUS lines - and providing you with 256 Mysteries to solve. Each volume comes with a teacher's introduction and an answer key. If you are interested in the Bonus Bundle and would like to reach out to me personally at: [email protected], I will honour a special rate until November 20th. *$22 CAN for the Solo Instruments *$50 CAN for the Orchestra Edition If you want to have fun, see how many you can name from the excerpts below. Note that #18 is written backwards! Wishing you so much fun!
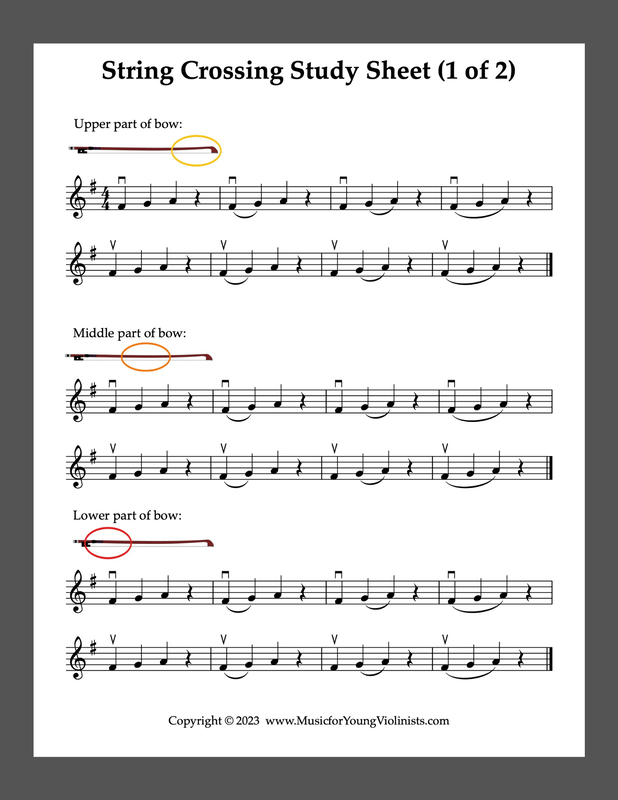
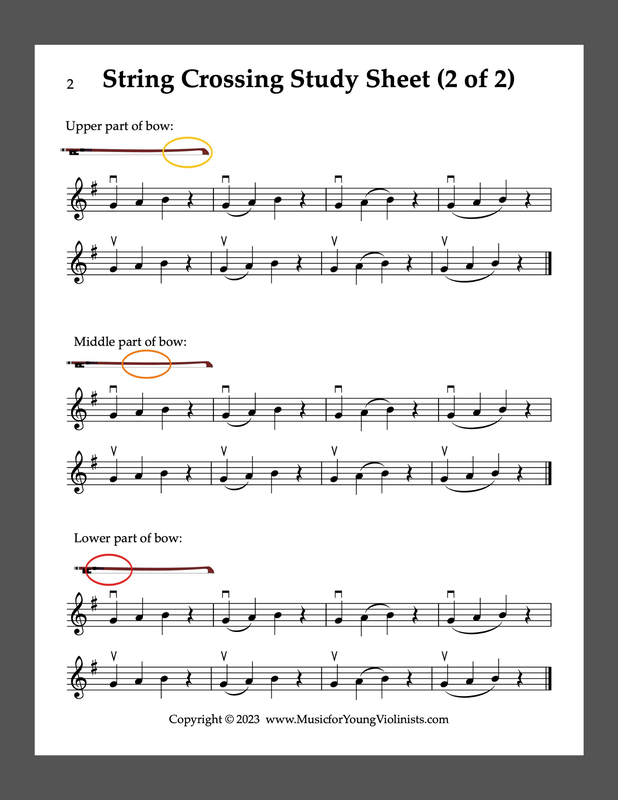
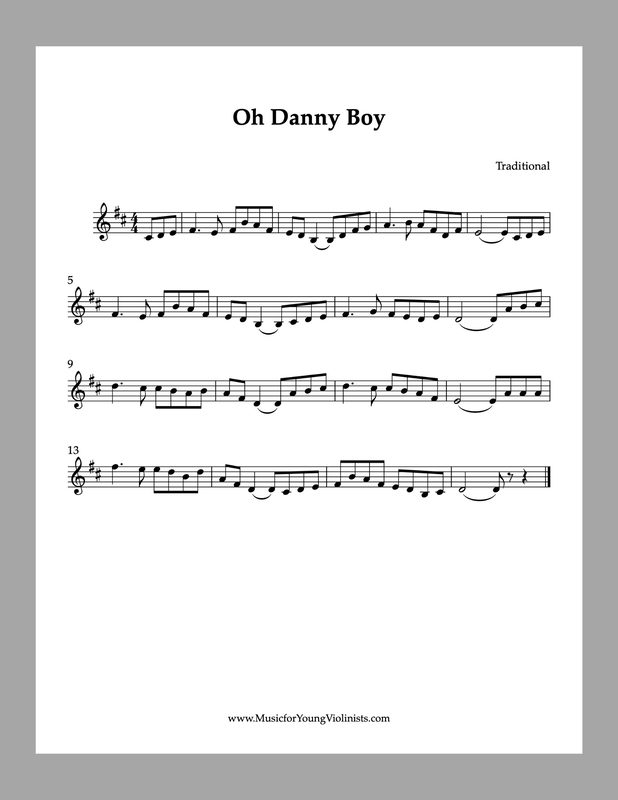
The newest M4YV FREEBIE is a 2-page PDF designed to help students practice string crossings. The recent Oh Danny Boy FREEBIE inspired this resource with its beautiful opening made treacherous by a string crossing. These worksheets help guide a curriculum to master technical elements like this and can be used independently to help with other repertoire.
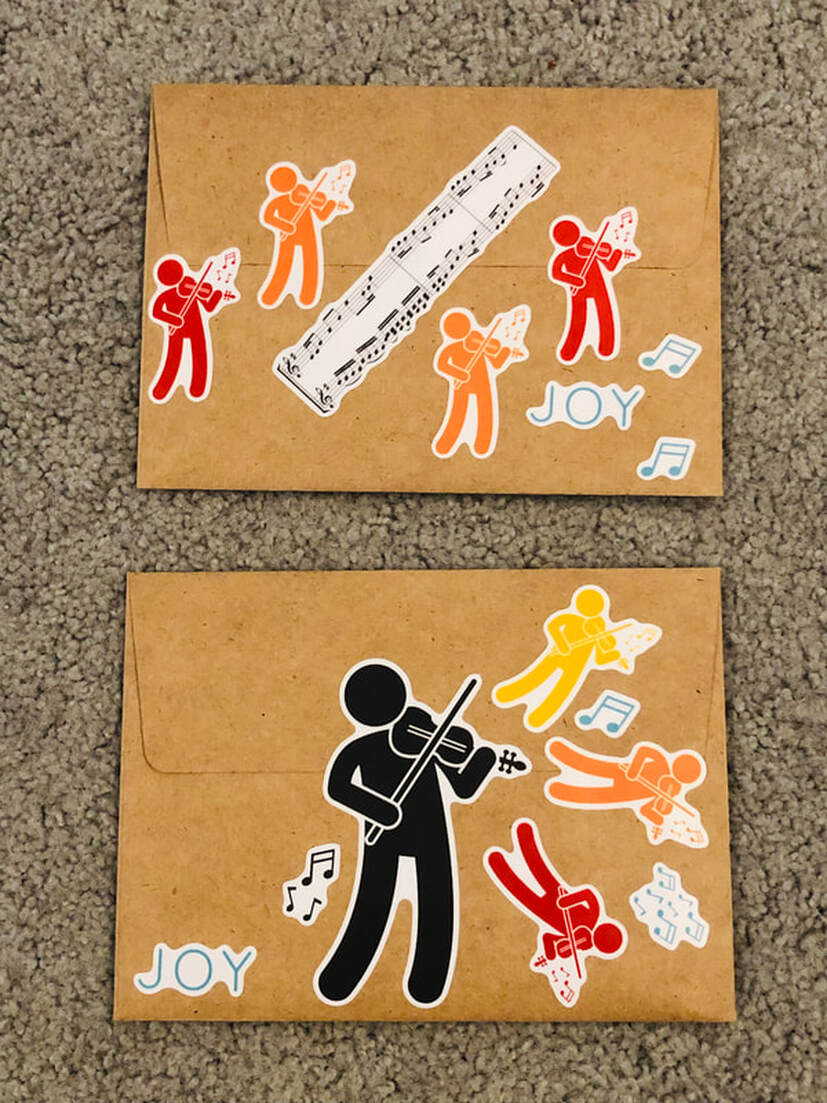
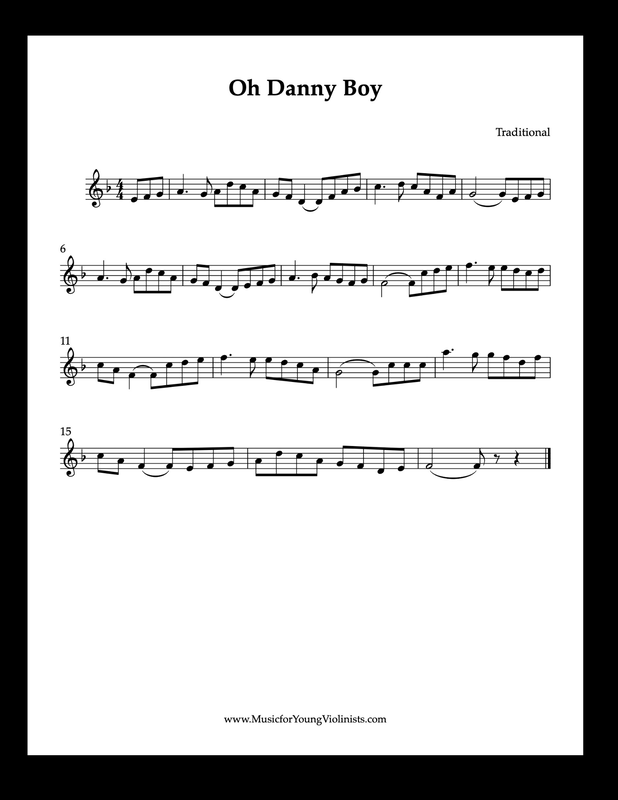
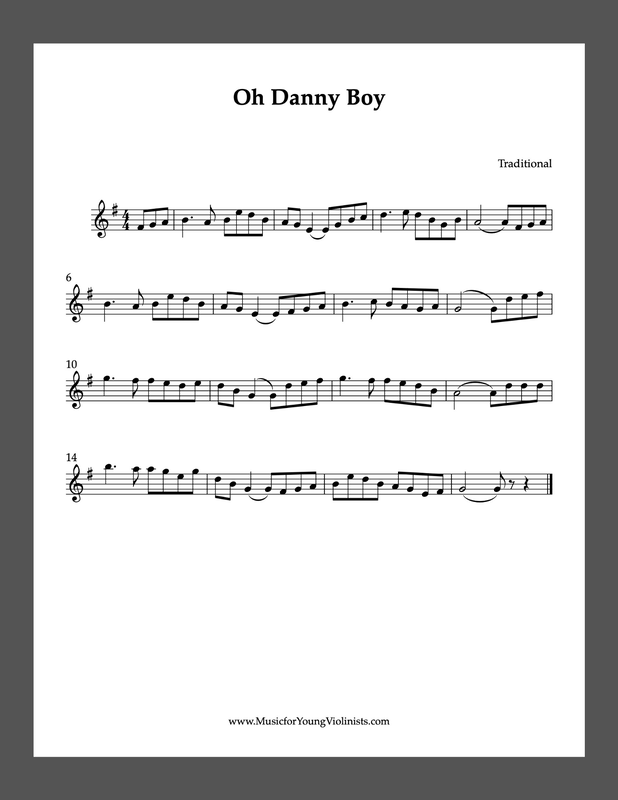
Let's talk about string crossings. To do this, we must go back into history and remember what made the violin so special. Countless stringed instruments in multiple cultures were strung on resonating chambers, such as the lute, guitar, hammered dulcimer and more (Wikipedia has a nice list if you are curious). However, with the addition of the bow to a stringed instrument with a resonating chamber, we then had a string instrument that could imitate the human voice with sustained notes that are shaped and connected. I believe this is our goal as violinists - to imitate the beauty of the human voice with our *bowing. It is a lifelong pursuit, and the art of crossing strings while maintaining a connected sound is particularly challenging. I tell my students that if someone was closing their eyes and listening to them play, it should sound like it is all being played on a single string. *Specifically for lyrical music, not for specific genres that emphasize other qualities of the violin. So, how do we cross strings with finesse and sonically hide the gaps our bows have to encounter? Working with a skilled teacher will guide a student toward this skill; like many things in our work, it does not compact nicely into a blog post. However, concepts include: 1- Raising & lowering the bow arm to the plain of the string. 2- Anticipating the coming string by changing the angle of the preceding note. 3- Practicing passages with as many bowing combinations as possible to synthesize a connected sound. This last point is where these worksheets are useful. They extract 3 notes in 3 locations of the bow and offer 24 different ways to practice these 3 pitches to develop elegant and singing string crossings. These worksheets were inspired by the opening of Oh Danny Boy (get PDFs of this piece here) but apply to any beginner-intermediate level student seeking support for mastering the skills of smoother string crossings. Can you just teach this concept to students without a worksheet? Absolutely; however, sometimes, a student makes the best use of their practice time with a visual guide. I am always curious to know your thoughts in the comments - how do you teach string crossings? Every purchase from the M4YV digital store gets a thank you card in the mail from yours truly and some super cute violin stickers. It's a digital world, but I love to also connect in the physical world and have so much fun writing everyone and showing up in your snail mail. I also have a lot of fun decorating the envelopes with these stickers (see below for mail going out today). 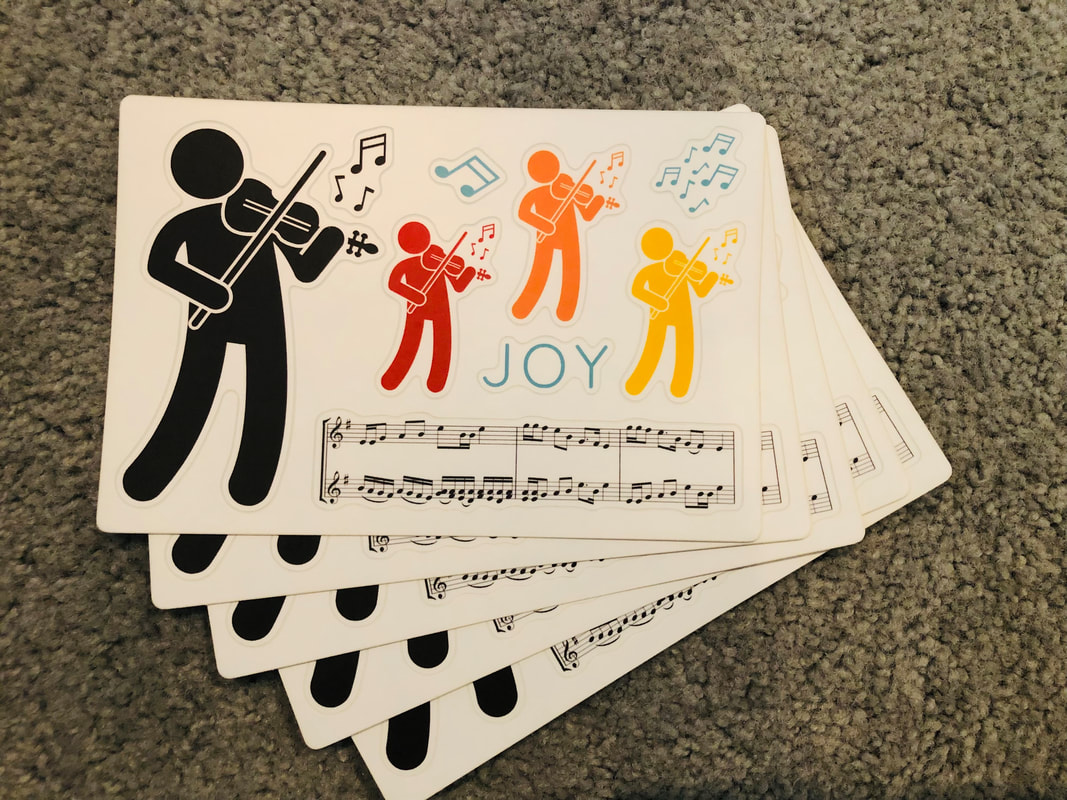 The annual back-to-school sale is still going on for 10 more days, and all sheet music collections are available at 50% off regular prices. Everything (including the Bonus Bundles) is 50% off from today through the end of September. Stock up on Holiday Music, Scales, and more!!! PS - If you want to make your own snazzy violin stickers for your students (which I am sure they would love), I get my custom stickers from Sticker Mule and can recommend their service. Enjoy some PDFs of the classic lament Oh Danny Boy in the keys of F, G & D Major. Perfect for beginning-intermediate level violinists. If you are interested in learning more about this iconic tune, there are plenty of articles on the World Wide Web to share its history, the lyrics and famous renditions. I have long believed that beauty tells its own truth, and our hearts understand messages like these and that sometimes involving the brain breaks this sacred communication pathway, so I will refrain from sharing any historical data about this piece here. I will, however, share a beautiful version of this tune below.
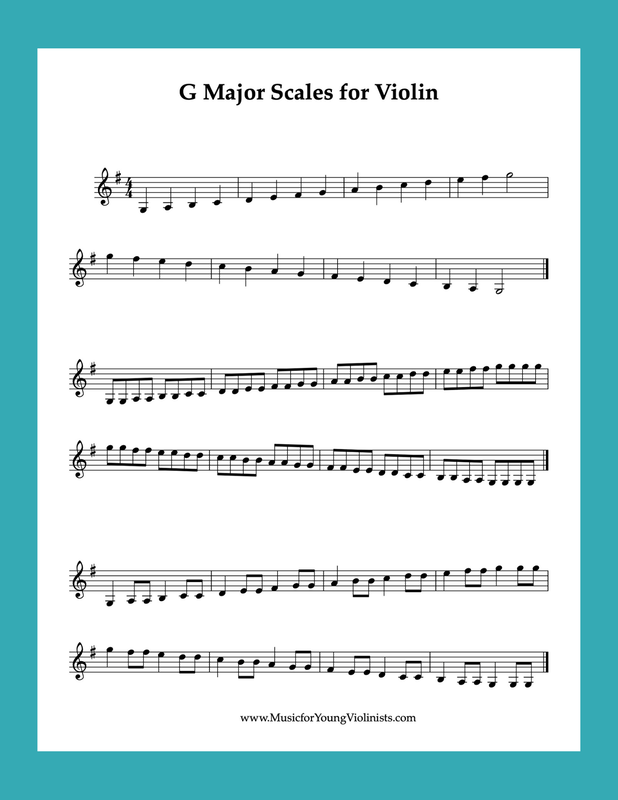
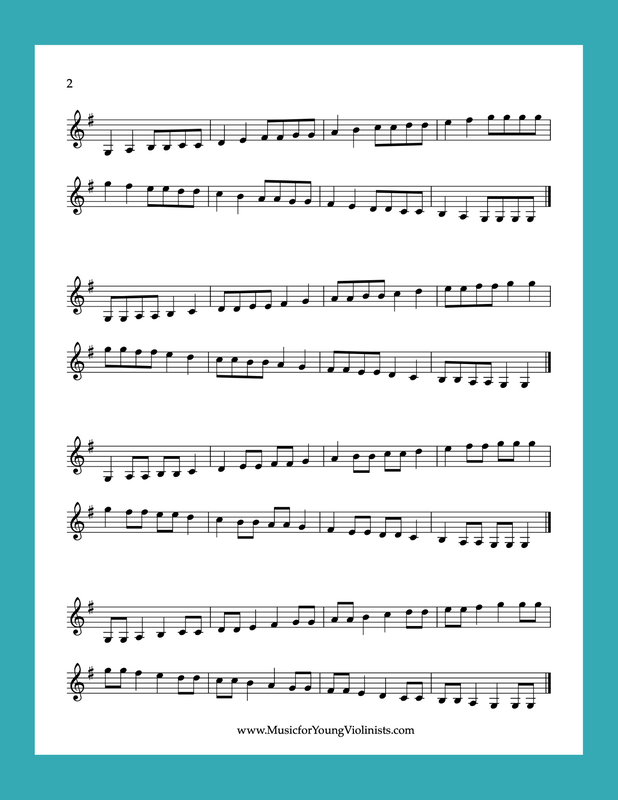
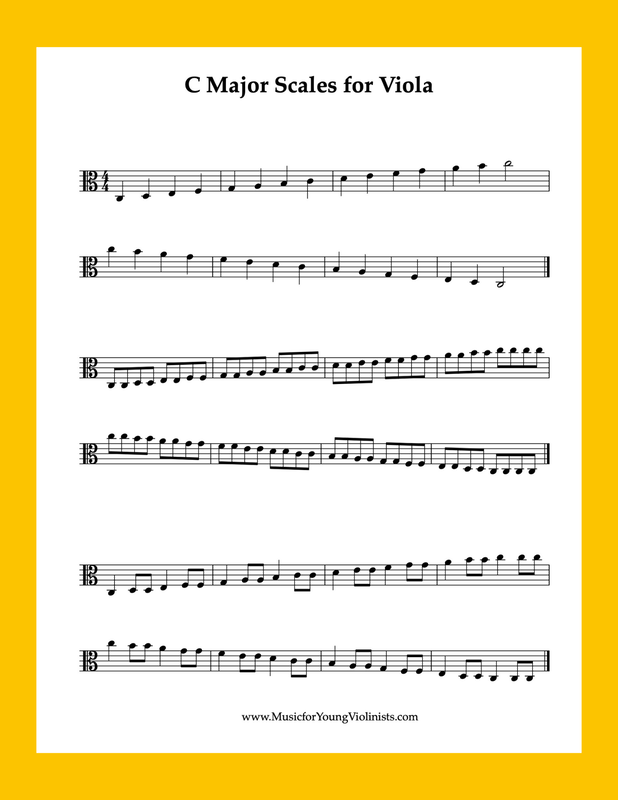
Sometimes, you don't need a full-scale book, 4 octaves of notes, multiple fingering options and all the extras like relative minor and chromatic scales (though these are all fantastic and have a vital place in pedagogy). Sometimes, you only need a simple scale sheet to teach a simple concept. These G & C major scale sheets are just that - simple. I created them to help a student work on their marching, as a visual guide and to provide basic repetitions to integrate marching while playing, but they can be used for a multitude of beginning-level violin skills. Scroll down to the end of the post to access your PDF files.
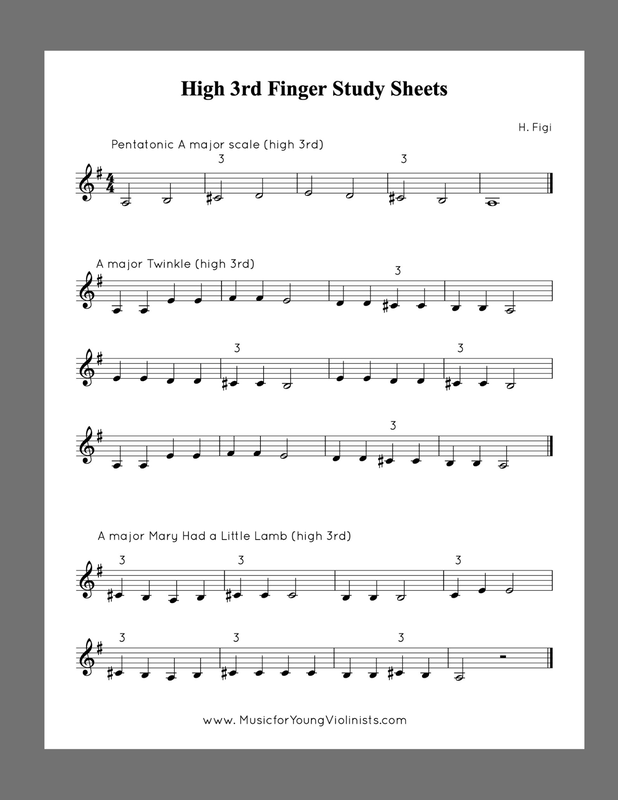
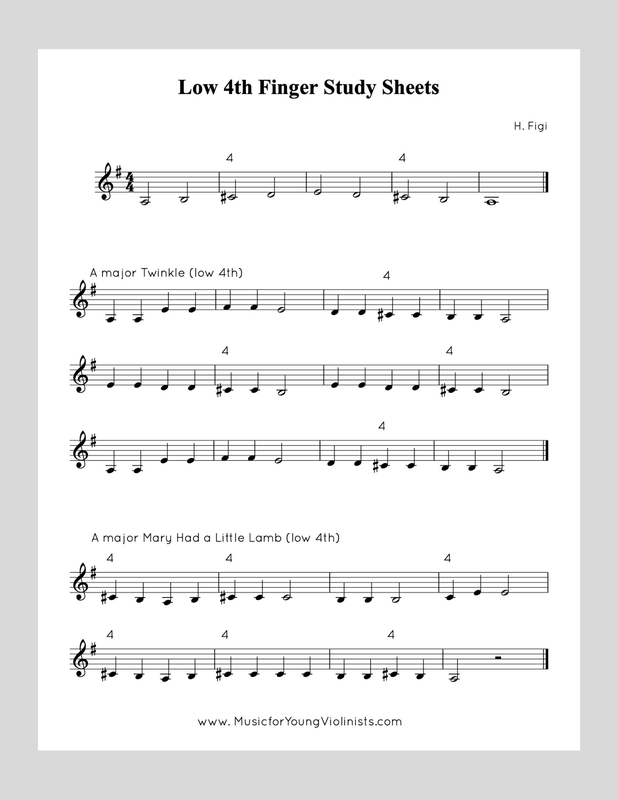
Eeek! High 3rd Fingers (or Low 4th Fingers) - New FREEBIEs The time has come, and a beginning violinist has just encountered a piece with a new geographical location for the 3rd finger - what do we do? First of all, congratulations! This is so exciting and takes a little support, but soon you will feel comfortable with this new technique and thrilled to play this new tune that has enticed you. Next, we want to take the old and add the new. What does this mean? Keep scrolling to learn.
Whether you are a student or a teacher, it is really important to implement this concept of using an existing aural template (or physical technique) and augmenting it with the new technique to make learning natural. While it will still be challenging, we can avoid defeat by working like this. My student recently shared a super neat piece she wants to learn - it's in the key of G Major (1 sharp, a very standard key for us violinists), with G#s and D#s (requiring either high 3rds or low 4ths) all over the place - WOW, this is taking it to a new level! The free PDF downloads above will help you tackle a situation like this. We will use your existing knowledge and aural template of major keys, beginning scales and easy tunes. It seems like a lot with 6 pages in total, but simplicity will emerge after you peek at it. It should all sound familiar - these are simplified 5-note major scales and easy pieces Twinkle & Mary Had a Little Lamb, but with new, fancy, sophisticated high 3rds (and then the same music but with using low 4ths). "Hey, wait a second. I need some clarification. Why is this all in the key signature of G major?" Great question; these study sheets are all with only one sharp because this is often what we encounter with our actual sheet music when we get new repertoire with accidentals. "What's an accidental? Sounds like the word accident, which is not what I am going for in my music." Accidental is a term for a note (aka pitch) that is outside the key signature. For example, if we have a piece in the key of C major (which has no inherent sharps or flats), a G# would be an accidental for this key. The world of music making, especially violin playing, is full of misnomers, and I have written about 3 common ones here (and the comments share more food for thought). How to use these study guides? Some students must use the "guitar position" (sitting with the violin on the lap) and pluck the exercises before doing as written with the bow. This is especially important for violinists like me and prone to excess tension in the left hand or violinists who struggle with proper left-hand technique due to recently sizing up to a new instrument or where they are in their development. There is inherent repetition within these sheets; some students will need to do all the exercises daily for a month, and some will be able to grasp the concept by just utilizing one portion. We are all unique, and these guides can be tailored to where a violinist is at in their development. Catch a mistake? To error is human; I always double-check my work, sleep on it and then check it again, but from time to time, I make a mistake. Gold stars to anyone who catches a mistake and sends me a friendly email to fix it. This project is a labor of love, and your help is appreciated! Also, please reach out in the comments below to share your innovative ideas for approaching this issue with your teaching and practicing.
HAPPY NATIONAL TEACHER'S DAY! Disclaimer: If you are seeing this and not a teacher, consider forwarding this to your teacher so they can continue offering their amazing gifts to the world. They work hard behind the scenes, are often underpaid and deserve all our support to thrive. Download 7 Steps to Attract More Students & Grow Your Violin Studio (What I Wish I Knew Before Starting My Studio 10 Years Ago) free for the next 48 hours. "How do I get more students?" So many teachers emailed me this question privately that it was time to share my responses with a greater community. This led to creating 7 Steps to Attract More Students & Grow Your Violin Studio (What I Wish I Knew Before Starting My Studio 10 Years Ago), a resource for teachers to get the support they deserve for building a sustainable career in an ever-changing world. The culmination of insights and actionable tasks in 7 Steps to Attract More Students & Grow Your Violin Studio (What I Wish I Knew Before Starting My Studio 10 Years Ago) results from my trials and errors in building a violin studio. It was slow to develop, and I paid the price for my lack of the knowledge I share in this handbook by having a low income and frustration for quite some time. But you can avoid making the same mistakes I did! This resource is for teachers growing their teaching studios and established teachers who want to maintain their success. Learn more HERE.
P & A is short for Praeludium & Allegro - the awesome violin showpiece by Fritz Kreisler. Today's Flash FREEBIE is the Practice Exercises for Praeludium and Allegro, by Fritz Kreisler, and is available for only 24 hours. This 5-page PDF download gives students a sequential practice curriculum for mastering the dazzling measures 66-83 in the Allegro portion of this composition.
Click HERE to access it for the next 24 hours.
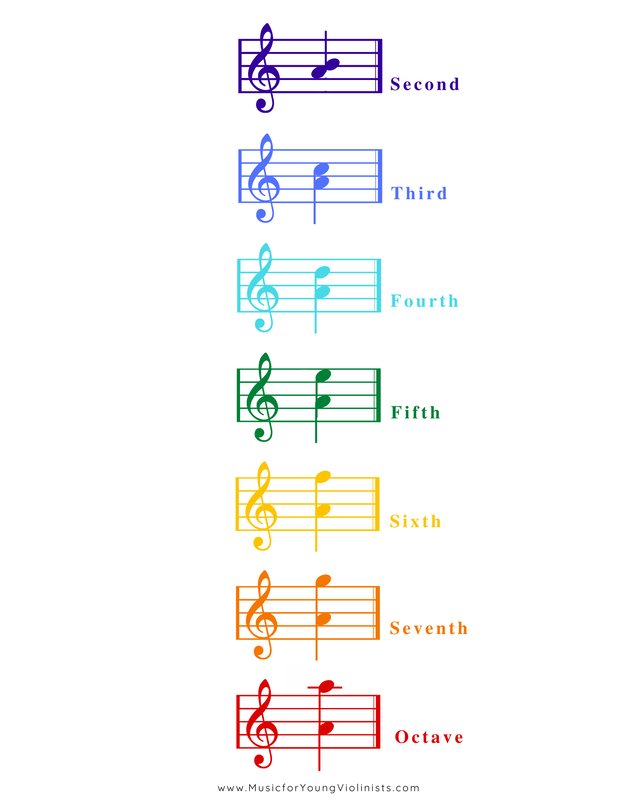
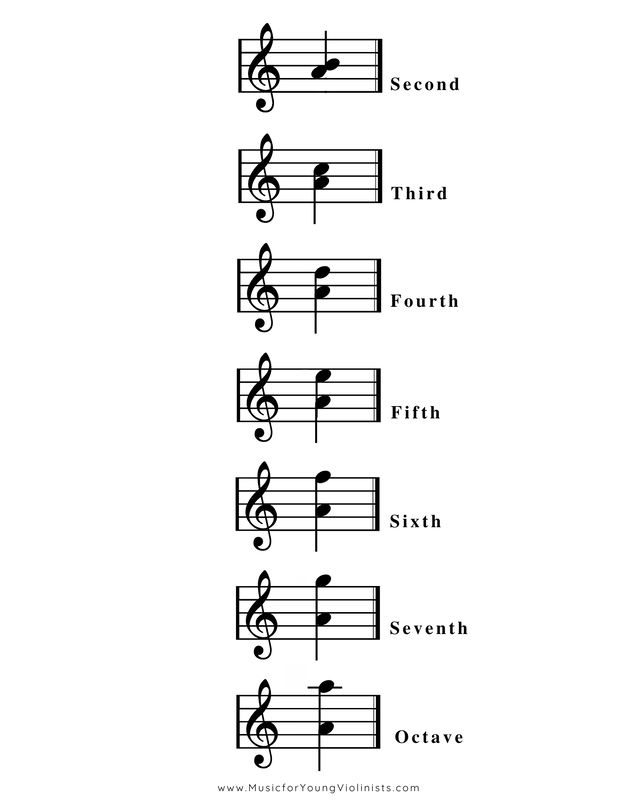
Also, feel free to comment below and let me know your favorite recording of this awesome showpiece? In this post you will learn what a double-stop for the violin is, the top 5 benefits of using double-stops and be able to download free double-stop PDF printables for beginner-advanced level violin. Double-stops on the violin are when two notes are played simultaneously and part of what makes the violin repertoire so thrilling, gorgeous, and sublime. See the image below for an example of how this would appear in a score. The term "double-stop" is a bit of a misnomer and can be confusing because nothing is actually stopping in the verb sense of the word stop (i.e., to cease or end). The term double-stop makes more sense when we think of "stop" as a noun referring to a location such as a bus stop. For violinists, the location refers to pitches on the fingerboard. When a request for more double-stop content from the M4YV project came to my inbox, I was an instant YES due to my captivation with this aspect of violin playing. I love double-stops so much that they are one of the reasons I play the violin! Double-stops are not hard, but they are different than playing on a single string. For some of the players here, it will be a new technique, which makes this the perfect time to remind us that new does not equal difficult, but without the proper mindset, new can be interpreted as feeling difficult. Keep reading to learn the 5 benefits of double-stops on the violin. 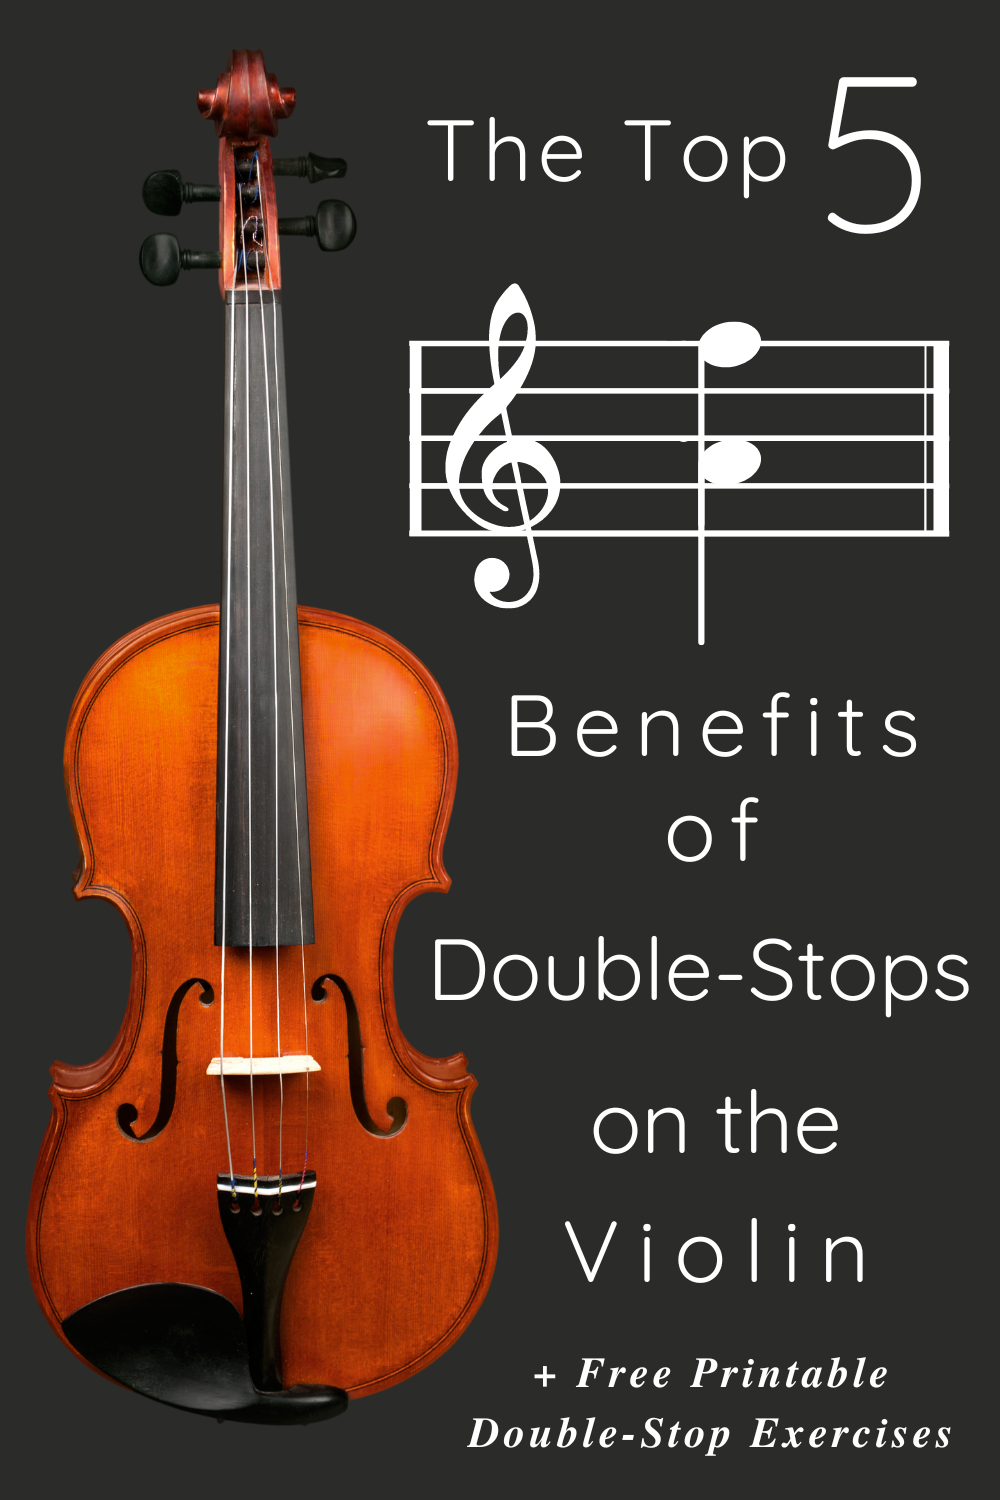 The Top 5 Benefits of Double-Stops on Violin:1- Improved intonation: Double stops help to hear pitches in relationship to each other, and this process leads to better intonation because intervals are more evident in the ear. 2- Learning block fingerings: Double-stops require using "block fingerings," where two fingers are placed on the fingerboard simultaneously. Block fingerings are more sophisticated than using a single finger at a time and help to develop skill. 3- Better understanding of whole & half steps: Double-stops fortify an understanding of whole and half steps because when using block fingerings, the fingers will feel the proportions of a whole and half step in relation to each other. 4- Advanced bow control: In the same way that double-stops require the left hand to use two fingers at a time, the right hand also needs to double it's playing requirements by refining it's control over two strings simultaneously. When we begin playing the violin, we work with focus to play just a single string at a time. When we start learning double stops, we exert focus to play two strings together with control and precision. 5- Advanced repertoire: The most magnificent repertoire composed for the violin uses double-stops, including but not limited to: J.S. Bach's 6 Sonatas & Partitas for Solo Violin, concerto cadenzas, and mesmerizing fiddle playing. Check out the videos below for some amazing examples of double-stops in violin repertoire.
Scroll down a bit on the page to find these FREEBIES to help learn and play double-stops. What are your favorite double-stop compositions?
Please share in the comments below. It has been on my agenda for a long time to fix the double stops resource because the second was not properly demonstrated when these were initially created. I'm human and hope I got this right the second time (pun intended). Scroll down to download the updated versions.
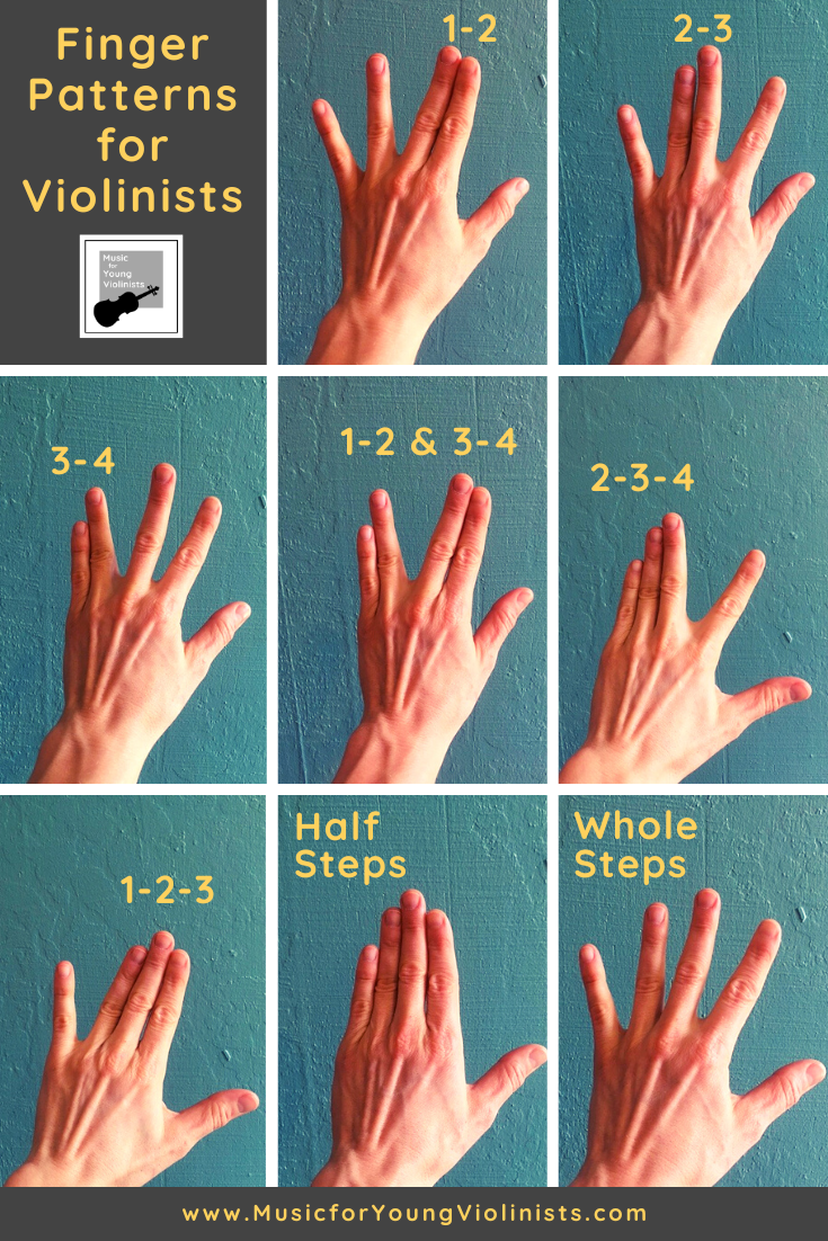
Playing music is one of the ultimate experiences because we merge all 3 parts of our being. We use our mind to control our body to express our soul. What is a technical? A "technical" is termed as such because it works on technique, extracting just the mind-body connection involved in playing music. They are fun to do in themselves, and anyone serious about pedagogy knows how important it is to break things down into their smallest component, using technicals for step-by-step mastery. I like to use the metaphor that technicals give us more colors in our palette to paint with, leading to more personalized expressions when we then apply them to our music-making. #1- FINGER PATTERNS: 1 & 2 2 & 3 3 & 4 1 & 2 + 3 & 4 1-2-3 2-3-4 How to teach?
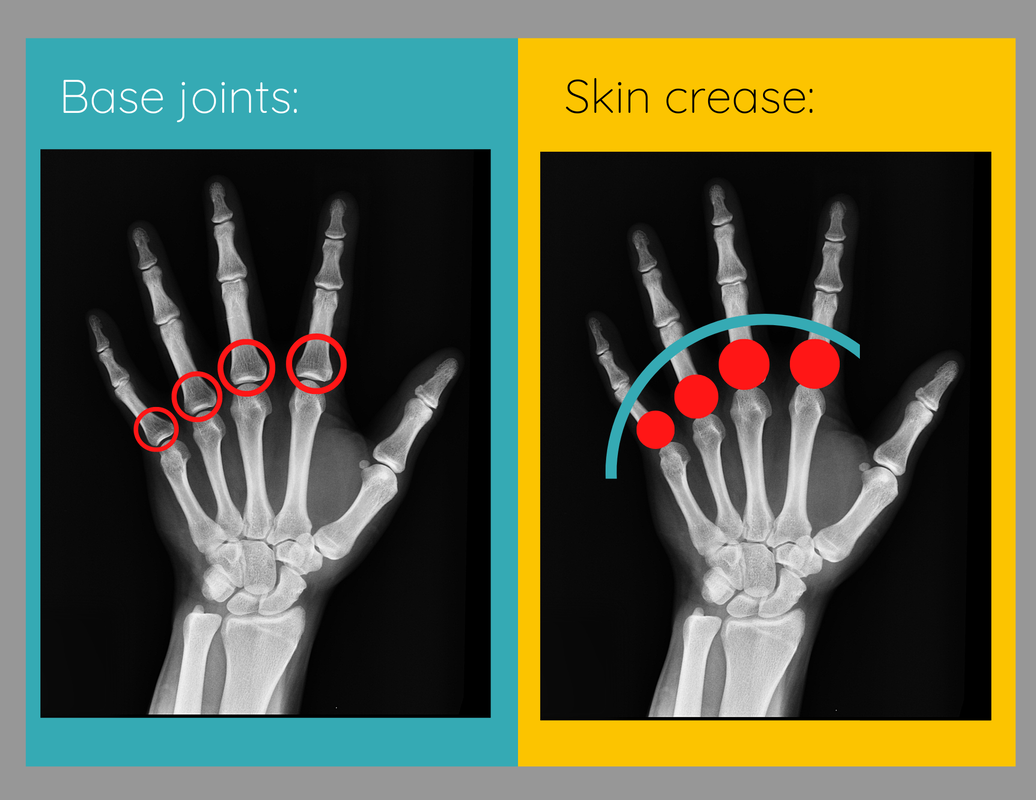
Why teach? Finger patterns help make music theory applicable to violin playing and aid in learning repertoire faster. #2- BASE JOINTS: The anatomical term for these finger bones is proximal phalanges, but we will refrain from Latin terms and call them the base joints. The base word is familiar in the word "basement," and etymologically, this refers to the foundation, which is appropriate since utilizing this portion of our body provides a solid foundation for playing the violin and, when mastered, creates highly articulate playing and fingers capable of fast playing. We will use this concept in the next technical presented here in this series, and it can also be taught independently. How to teach?
Why teach? The eye sees the hand covered in skin, does not identify the proximal phalanges bones, and then tends only to use what it sees, not taking advantage of the power the base joints offer. Using base joints to deliver the fingers on the instrument leads to clean, articulate playing. #3- HOOK BACK FINGER: How often does a violinist contort the entire hand to get the 1st finger into what we often refer to as a "low" position? (or flat), because we have not isolated the finger from procuring this motion How to teach?
Why teach? Students will be able to find notes requiring this, but in my decades of teaching experience, I find that they are not likely to use a hook back and will contort their hands. While improper hand shape is usable with beginning-intermediate level repertoire, ultimately, it will prevent from playing more advanced and fast-paced repertoire. #4- VIBRATO: Two key concepts can be implemented to start learning vibrato ergonomically and easily. By removing the asymmetry and gravity-defying elements of violin playing and replacing these with "cello position." Once we take out these 2 elements, vibrato is clear to understand and easy to learn. How to teach?
Why teach? Not only will this approach streamline learning vibrato, but it helps both the player and teacher hone in on the elements of violin playing (asymmetry and going against gravity) that tend to make learning many new techniques difficult, providing a learning template for moving forward. #5- SHIFTING: Shifting is simple: the arm abducts and adducts. This is all that shifting is: Moving the arm up closer to the body by adducting it and moving the arm farther from the body by abducting it. How to teach?
Why teach? Anyone who has ever worked on an advanced repertoire may feel this because shifting can feel difficult, but it is a very simple motion. Identifying this, feeling the arm (so the hand shape does not overcompensate). Correlating Downloads for 5 Technicals for Left Hand:
Scroll down to download the file for the next 24-hours. On September 11, 2001, I was scheduled for my 1st day of teaching at the Levine School of Music in Arlington, Virginia. Earlier that day, I was at a faculty meeting for a different school when the news of the planes flying into the Twin Towers hit. I remember a colleague brushing it off but intuitively knew something was not right. As I headed from that meeting towards what was supposed to be my 1st-day teaching, another plane hit the Pentagon in Arlington, VA, and all plans for normalcy were suspended indefinitely. I headed back to my apartment in Maryland and bought a TV to watch the news and understand what was happening. That was 20 years ago and a defining moment in our nation's history. The Flash FREEBIE being shared today is titled Annabelle and Toby. It was composed from this period in my teaching career and comes from the Music for 4 Violin, Volume 1 collection. It's a neat piece because it combines multiple playing levels, features an accessible 3rd position part (fun for the player new to this skill), flashy technique (like left-hand pizzicato), and is easy to memorize. Students absolutely LOVE THIS PIECE! Sorry, you missed this flash FREEBIE, but there are tons of other FREEBIES on this page:
Violin playing is a dynamic and complex learning process that can be cumbersome when the syntax is not built upon existing concepts. Learn 3 misnomers in violin teaching and how to upgrade your languaging for better results. Down Bows & Up Bows: Since the bow moves in lateral directions, left and right, the actual words "up" and "down" do not correlate with the motions and can confuse both young violinists and their parents during home practice. For violin players having difficulty integrating the words "down" and "up" into their playing, consider substituting the words "open" for down bows and "close" for up bows. Open refers to the arm opening up straight for what is termed the down bow, and close refers to abducting the forearm in what is termed an up bow. The Chinrest: I always told my students that if I could go back in time, I would change the term "chinrest" to "jawrest" since it's a misnomer. In reality, the chin is not involved in violin placement, and it is the jaw that contacts the face of the violin. This terminology has befuddled more than one student in my career, and they tried defeatedly to place their chin there. It is useful to point out this discrepancy so that the violin posture is not inadvertently misinterpreted during home practice. Learn about my favorite type of "chinrest" HERE. High and Low Fingers: Words like "high" & "low" are confusing to beginning violin students while still learning how to play the instrument because these words are associated literally and do not yet connect with pitch vibrations. Consider altering your instruction to be a description location like "closer to the bridge (or nose)" and "closer to the scroll" instead for more efficient results in the initial stages of learning these distinctions. Learn a neat trick for teaching "low" 1st fingers HERE. Have a languaging teaching tip?
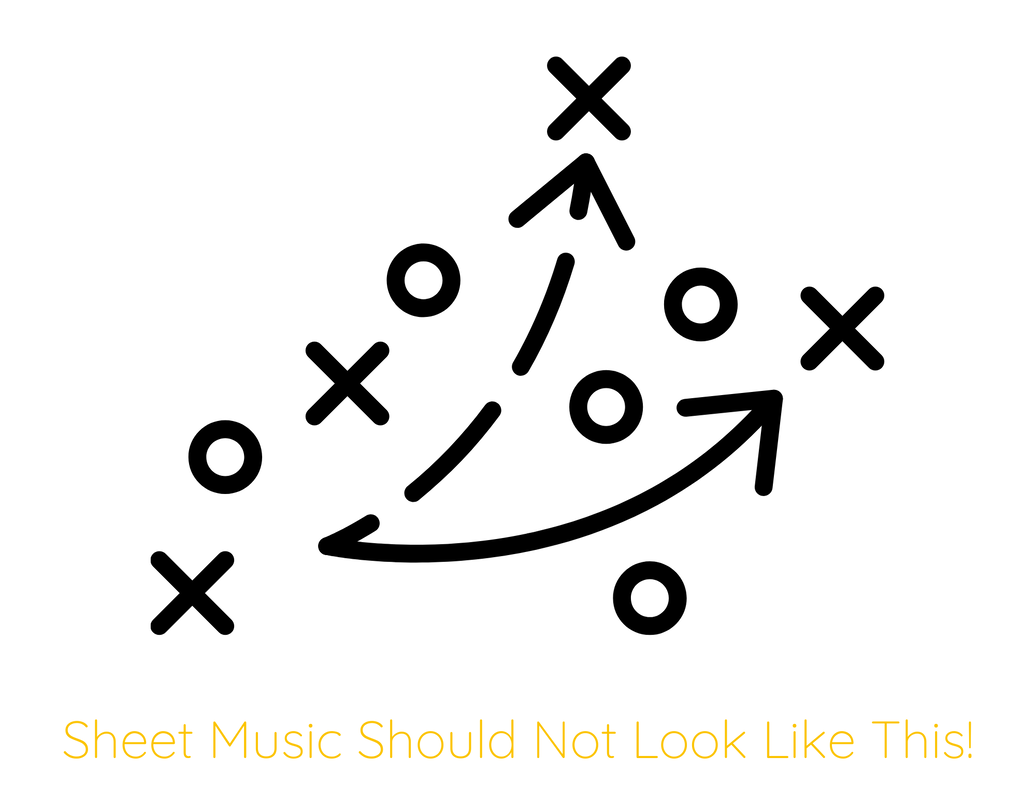
Please share in the comments below. Have you ever crossed out so much content and advanced fingerings in a scale book for your students that the sheet music looks like a football play drawing? Young students deserve better resources that are clear to read and appropriate for their level and let them be successful in their home practice.
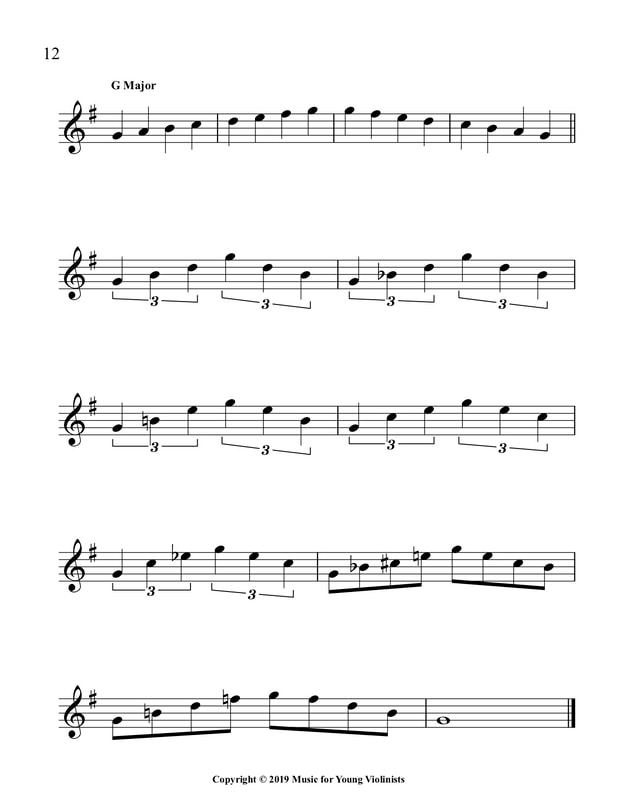
Teachers deserve resources that maximize every second of a 30-minute violin lesson. Like all of my materials, I developed the One Octave Scales and Arpeggios for Violin out of a need for my studio and to fill a void in the existing resources available for beginning-intermediate-level violinists. I was frustrated that my students did not have an easy-to-read version of foundational content and tired of having to cross out octave ranges and fingerings in the existing scale collections. Click on this link to learn about the One Octave Scales and Arpeggios for Violin. This resource is still on sale for 50% off until the end of the month. A version for viola is also available. This flash FREEBIE will only be available for 24-hours and is the G Major portion of the One Octave Scales and Arpeggios for Violin 31-page *eBook (scroll down to access). The One Octave Scales and Arpeggios for Violin has been one of my most popular resources, and the features include:
Like all of my materials, I developed the One Octave Scales and Arpeggios for Violin out of a need for my studio and to fill a void in the existing resources available for beginning-intermediate-level violinists. I was frustrated that my students did not have an easy-to-read version of foundational content and tired of having to cross out octave ranges and fingerings in the existing scale collections. Not having proper resources for the beginner-intermediate level student led to them inadvertently making errors when practicing at home. Once we started using the One Octave Scales and Arpeggios for Violin, concepts were clear, easy to read, and quickly mastered. The entire collection will be on sale at 50% off thru June 30, 2022. Here is what other violinists and teachers are saying about the One Octave Scales and Arpeggios for Violin resource: "Wonderful resource for my beginning violin classes. Thank you, Heather, for compiling such a clean, organized collection that is easy to use and easy for my students to read." - S. K. "I really love having sheet music in crystal clear large print. I think it will help my 6-year-old overcome his aversion to reading sheet music, and it is much easier on my own eyes, too." - Angela S. "This product is EXACTLY what I needed! Clear and concise, especially for us old guys. I need a good reference for scales and especially, arpeggios and it filled the bill right up front. Thanks Music for Young Violinists!! GREAT JOB!!!" -Jim "I think is a fantastic resource for beginners learning scales. The notes are large and very readable. I really love having it because when students play in competitions, they are expected to know a lot of scales to play by memory, and this is a fundamental resource." - Kate B. "Immediately delivered PDF access. Very easy to download, open, print, and save. Well documented, easy to read. Perfect for any beginner or intermediate player for learning for practicing." - Sandra C.B. Missed the flash FREEBIE?
No worries, the collection is still available at the online store and the FREEBIES page has tons of amazing downloads. We live in a world of great contrast, and the only fair thing is that everyone gets 24-hours a day. What we do with these hours makes the biggest difference in our lives, and I have created habits, which include auditing how I use my time, that help me set my life up for accomplishing my dreams and staying focused. Download the 15 Minute Time Tracker (Free Printable) below and access a previous version on the FREEBIES page.
I recently had an eventful four months: getting COVID-19, finishing my Bachelors of Science in Nursing (Summa Cum Laude), applying to *Doctoral programs, having surgery (again), and moving to a new apartment which was accompanied by some significant life changes and losses. This period of time was surrounded by grace, but it was intense and difficult to stay on course. One tool that helped me was this 15-Minute Time Tracker to help me stay focused and ensure that my use of time aligned with my goals. For those of you who are new to the M4YV project, you may not know that I have a long-term dream to combine the arts with healing and plan to bridge my decades of experience with music with medicine. I do not use this time tracker every day, but at least 2-3 days a week, it helps me stay on track. I use the "Top 3 Goals" section to list the tasks I hope to accomplish but are not my favorite but need to get done. This usually includes following up with insurance to pay medical bills, getting my computer fixed, and making a dental appointment. The other parts I use to stay organized. I will then list the scheduled parts of the day and create a draft of what my day will look like. Rarely the day sticks precisely to this draft, and occasionally, I use the same sheet for 2-3 days at a time. However, it helps create a framework to stay on task and work towards my dreams. Overall, this simple tool has been very useful for me, and somewhere I once heard a quote that stated something to the effect of "we tend to overestimate what we can accomplish in a day and underestimate what we can accomplish in a decade." This rings true for me, my days are ambitious with what I hope to fill them with (I am a lover of learning), but when I review what I have accomplished these past 10-years, it astounds me. *I am honored and excited to begin at Frontier Nursing University in the fall of 2022 to work towards my Psychiatric Mental Health Nurse Practitioner degree. Stay tuned for how this unfolds, and thank you for your support. Hey, I love sharing and want to invite you to my FREEBIES page for tons of innovative free downloads: Click HERE for more joy!
Interested in more ideas for staying organized and support to reach your goals? Check out the Goal Planning sheets. The Best of the FREEBIES is the newest offering from the Music for Young Violinists project and is a 30 page eBook collection created to celebrate the most popular M4YV FREEBIES featuring 25 pages of music and teaching materials to help you bring out the best in your music making! 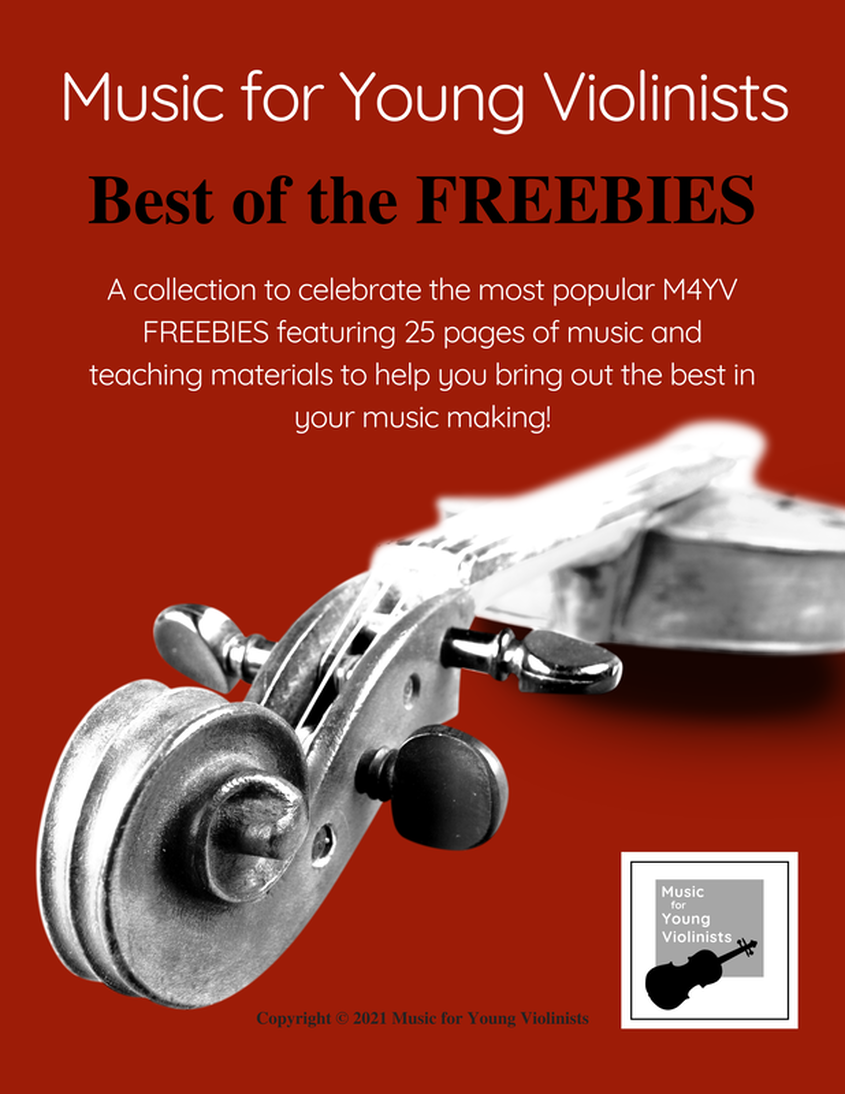 Even though we may never meet in person, it thrills me to connect here with our shared love of music and all things violin. Every day the M4YV project connects musicians from all over the globe: Australia, Argentina, Bahamas, Brazil, Canada, England, Finland, France, India, Ireland, Mexico, New Zealand, Norway, Philippines, Poland, Portugal, Puerto Rico, Serbia, South Africa, Turkey, United States & More! I feel so grateful to do this because my biggest passion is to help bring more music into this world. I currently work full-time as a registered nurse, and I created the M4YV project to celebrate and archive this special part of my life. I hope that sharing my 25 years of teaching experience with you will help you advance your violin skills, support your young musician(s), and deepen your knowledge of violin pedagogy. When writing this (December 23, 2021), this project hosts:
If you are ordering this collection on the M4YV store, you will be signed up for the newsletter, will be the first to know when a new FREEBIE is posted, and on a special email list that gets announcements about flash sales. You will also be notified of innovative teaching and practice tips available on both my blog and video series to help keep your music-making inspired so you can reach your goals! Happy Music Making in 2022!!!
|
Categories
All
Archives
February 2024
AuthorHi! It's me, Heather. I absolutely love working on the Music for Young Violinists project and all the many facets: blogging, website, music, teaching materials, freebies, videos, newsletter and giveaway contests. The best part is connecting with you so feel free to drop me a line. You can learn more about me on the "ABOUT" page. Thanks! |
|||||||||||||||||||||||||||||||||||||||||||||||||||||||||||||||||||||||||||||||||||||||||||||||||||||||||||||||||||||||


 RSS Feed
